Relay Host
Normally, Hermes SEG delivers email directly to remote SMTP hosts over the Internet. Sometimes, this configuration may not work for certain scenarios. For example, your ISP may not allow outbound SMTP over port TCP/25.
In those scenarios it is necessary to configure a Relay Host e.g., an external SMTP host that will receive emails from your Hermes SEG and relay them to their final destination.
Enable Relay Host
- Select the Relay Host Enabled option (Figure 1).
Figure 1

- Selecting the Relay Host Enabled option from Step 1, will enable the options Relay Host Authentication Required and Relay Host Authentication NOT Required options below (Figure 2)
Figure 2

Relay Host Requires Authentication
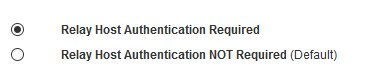
- Select the Relay Host Authentication Required option (Figure 3).
Figure 3
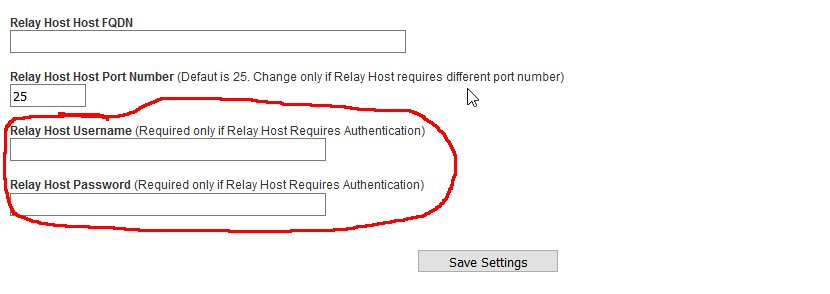
- Selecting Relay Host Authentication Required from Step 1, will enable the Relay Host Username and the Relay Host Password fields below (Figure 4).
Figure 4
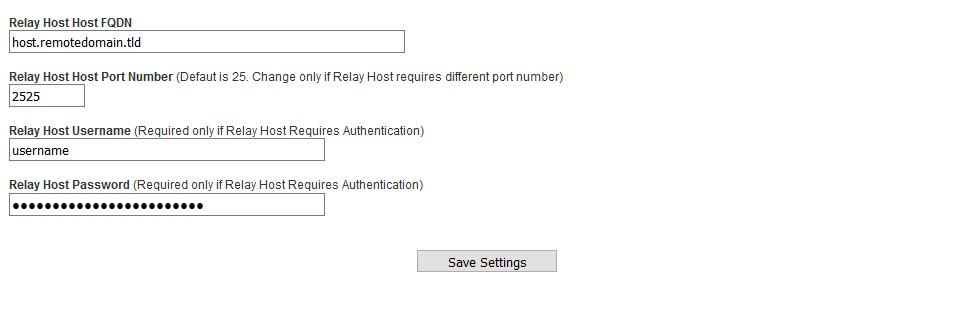
- Enter the relay host FQDN hostname or IP address in the Relay Host Host FQDN field.
- If the relay host requires a port other than 25, enter it in the Relay Host Port Number. Otherwise, leave it at default 25.
- Enter the relay host username in the Relay Host Username field and enter the password for that username in the Relay Host Password field and click on the Save Settings button (Figure 5).
Figure 5
- Click on the Apply Settings button on the bottom of the page for your changes to take effect (Figure 6)
Figure 6

Relay Host does NOT Require Authentication
- Select the Relay Host Authentication NOT Required option (Figure 7).
Figure 7

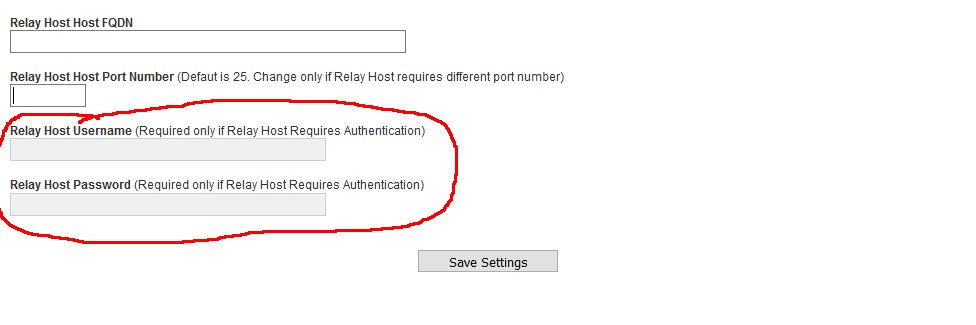
- Selecting Relay Host Authentication NOT Required from Step 1, will disable the Relay Host Username and the Relay Host Password fields below (Figure 8).
Figure 8
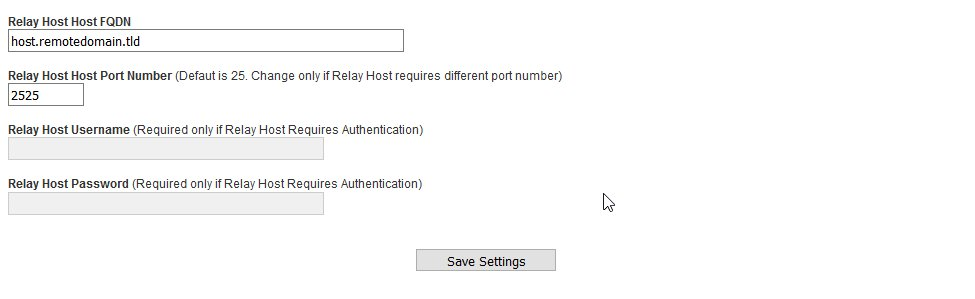
- Enter the relay host FQDN hostname or IP address in the Relay Host Host FQDN field.
- If the relay host requires a port other than 25, enter it in the Relay Host Port Number. Otherwise, leave it at default 25.
- Click on the Save Settings button (Figure 9).
Figure 9
- Click on the Apply Settings button on the bottom of the page for your changes to take effect (Figure 10).
Figure 10
