Custom Antispam Filter Tests
This page allows you to customize Spam filter tests scores to fit your needs. If you have problems with certain email getting tagged as Spam or Non-Spam because of a particular test not scoring properly and training the Bayes Database does not yield the results you need, customizing the Spam filter tests scores may be the best option. The tests the Spam filter performs can be found in the headers of incoming emails. For example, take a look at the following headers of an obvious Spam email:
X-Spam-Status: Yes, score=14.528 tag=-999 tag2=3.6 kill=12
tests=[BAYES_60=1.5, DCC_CHECK=1.1, DIGEST_MULTIPLE=0.293,
HTML_MESSAGE=0.001, RAZOR2_CF_RANGE_51_100=0.5,
RAZOR2_CF_RANGE_E8_51_100=1.886, RAZOR2_CHECK=0.922,
RCVD_IN_SBL_CSS=3.335, RDNS_NONE=0.793, SPF_HELO_PASS=-0.001,
SPF_PASS=-0.001, URIBL_BLACK=1.7, URIBL_DBL_SPAM=2.5]
autolearn=disabled
As you can see the following tests with their corresponding scores were performed:
- BAYES_60=1.5
- DCC_CHECK=1.1
- DIGEST_MULTIPLE=0.293
- HTML_MESSAGE=0.001
- RAZOR2_CF_RANGE_51_100=0.5
- RAZOR2_CF_RANGE_E8_51_100=1.886
- RAZOR2_CHECK=0.922
- RCVD_IN_SBL_CSS=3.335
- RDNS_NONE=0.793
- SPF_HELO_PASS=-0.001
- SPF_PASS=-0.001
- URIBL_BLACK=1.7
- URIBL_DBL_SPAM=2.5
You can take any of those tests and configure the system to either completely disable the test (by setting the value to 0) or adjust the score to your needs.
Note: Customizing Spam Filter Tests can have very bad consequences for your Spam detection, thus it should ONLY be performed by qualified individuals that have a clear understanding of those consequences.
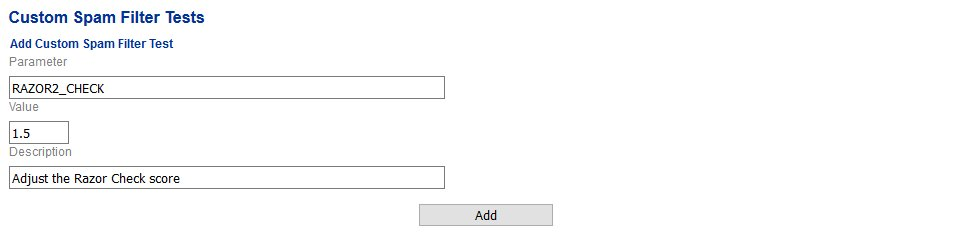
Add Custom Spam Filter Test
- Under the Add Custom Spam Filter Test section, under the Parameter field, enter the test you wish to customize without the = or the score part.
- Under the Value field, enter the score you wish to assign to that test (Setting the value to 0 will effectively completely disable the test).
- Under the Description field, enter a short description for that test.
- Click the Add button (Figure 1).
Figure 1
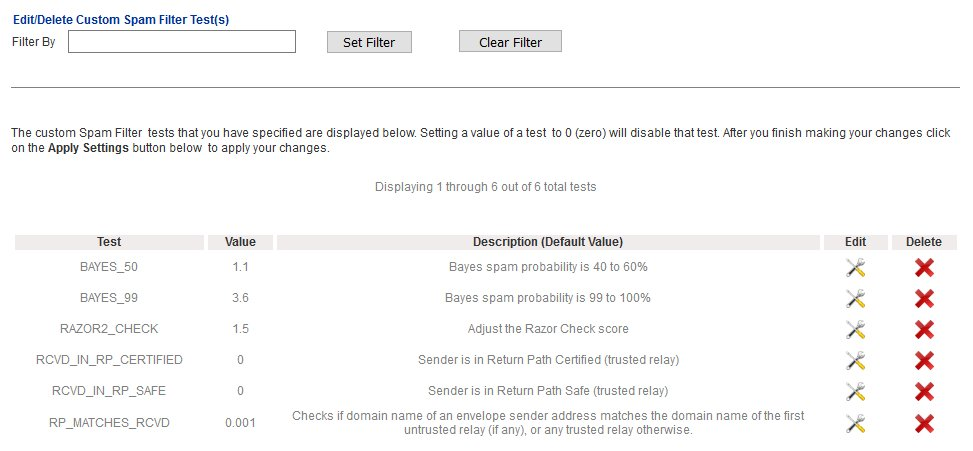
- As you add entries, they will show up under the Edit/Delete Custom Spam Filter Test(s) section (Figure 2).
Figure 2
- Continue adding entries as needed. When finished, click on the Apply Settings button on the bottom of the page for your changes to take effect (Figure 3).
Figure 3
Edit Custom Spam Filter Test
- Under the Edit/Delete Custom Spam Filter Test(s) section, click on the
 icon of the entry you wish to edit.
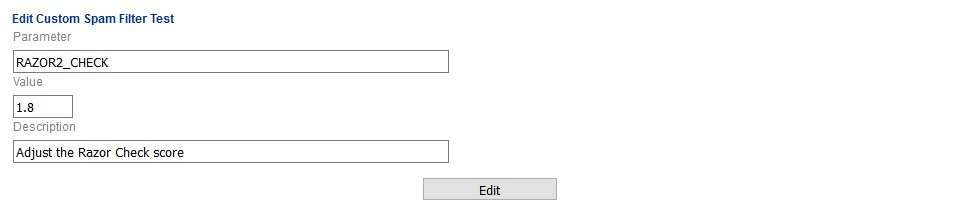
 - On the Edit Custom Spam Filter Test page, adjust the Parameter, the Value or the Description as needed and click the Edit button (Figure 4).

Figure 4
- You will be automatically returned to the Custom Spam Filter Tests page.
- Click on the Apply Settings button on the bottom of the page for your changes to take effect (Figure 5).
Figure 5

Delete Custom Spam Filter Test
- Under the Edit/Delete Custom Spam Filter Test(s) section, click on the
 icon of the entry you wish to edit.
 - On the delete confirmation page, click on the Yes button to delete the entry or press the No button to cancel (Figure 6).

Figure 6
- You will be automatically returned to the Custom Spam Filter Tests page.
- Click on the Apply Settings button on the bottom of the page for your changes to take effect (Figure 7).
Figure 7
