Internal Recipients Encryption
If Internal Recipients have not been added in your system under Gateway --> Internal Recipients, this page will not show a recipient listing.
By default, When Internal Recipients are added into Hermes SEG, they are NOT configured with the ability to send encrypted email. Each Internal Recipient must be individually configured for the type of encryption you wish for them to use.
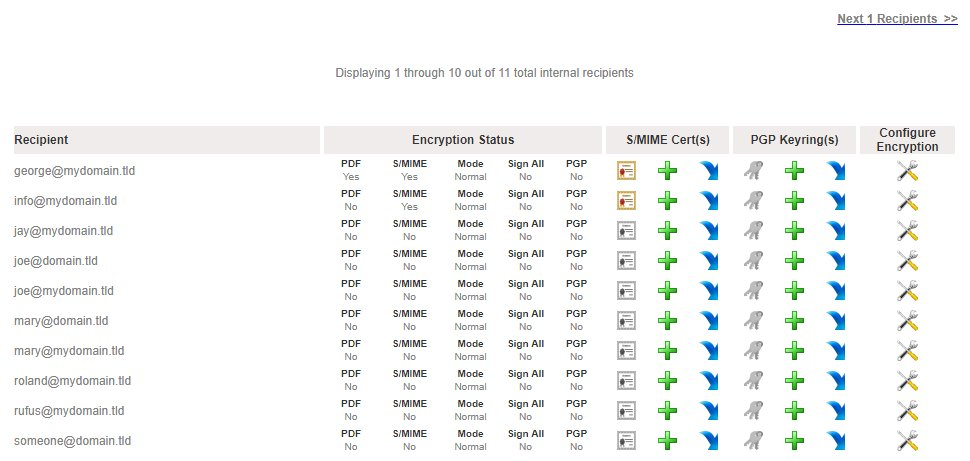
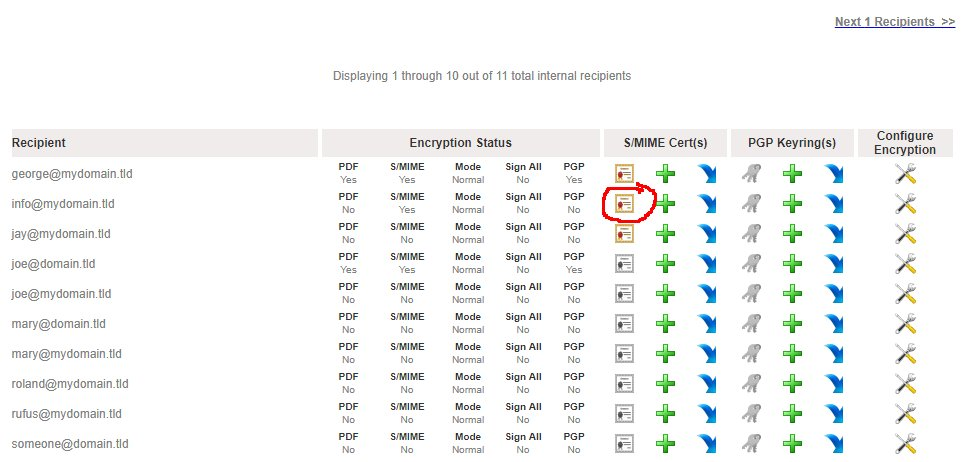
On this page, a listing of only previously added Internal Recipients will appear. Note, that under the Encryption Status section the PDF and S/MIME and PGP columns are set to No. Additionally, under the S/MIME Cert(s) section, the certificate icons are disabled indicating that no S/MIME Certificates are present, and under the PGP Keyring(s) section the keyring
 icons are disabled indicating that no PGP Keyrings are present (Figure 1).
Figure 1
Filter Internal Recipients Encryption
Setting a filter will assist you in narrowing down specific recipients by email address or domain in order to manage encryption settings easier.
- In the Filter By field, enter a complete or partial email address or domain and click the Set Filter button. If any matches are found, the Internal Recipients Encryption listing will be populated with only the entries matching the filter you set (Figure 2).
Figure 2

- You can clear a filter you set by clicking the Clear Filter button at any time.
Configure Internal Recipients Encryption
- Under the Configure Encryption column of the Internal Recipient you wish to configure, click on the
 icon.
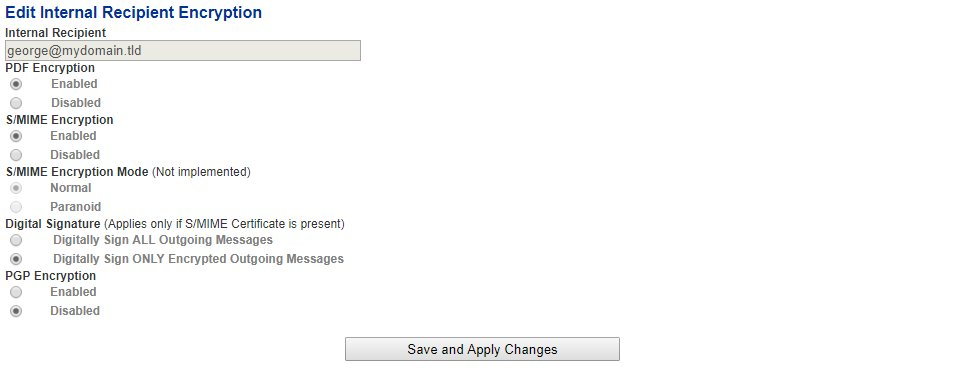
icon. - In the Edit Internal Recipient Encryption page, under the PDF Encryption field, select Enabled if you wish to enable PDF Encryption for this recipient.
- Under the S/MIME Encryption field, select Enabled if you wish to enable S/MIME Encryption for this recipient. Please note, that if you enable S/MIME Encryption, you must also create or import a S/MIME Certificate for this recipient.
- Under the Digital Signature field, select Digitally Sign ALL Outgoing Messages if you wish to have all outgoing messages from this recipient to be digitally signed by S/MIME Certificate regardless if the messsage is encrypted or not. Otherwise, leave selected the default setting of Digitally Sign ONLY Encrypted Outgoing Messages which will ONLY digitally sign outgoing messages that have been encrypted. Please note, Digital Signature requires a S/MIME certificate to be created or imported before any messages can be digitally signed.
- Under the PGP Encryption field, select Enabled if you wish to enable PGP Encryption for this recipient. Please note, that if you enable PGP Encryption, you must also create or import a PGP Keyring for this recipient.
- Click on the Save and Apply Changes button (Figure 3).

Figure 3
- The button will display a status of Saving and Apply Changes, please wait...(Figure 4).
Figure 4

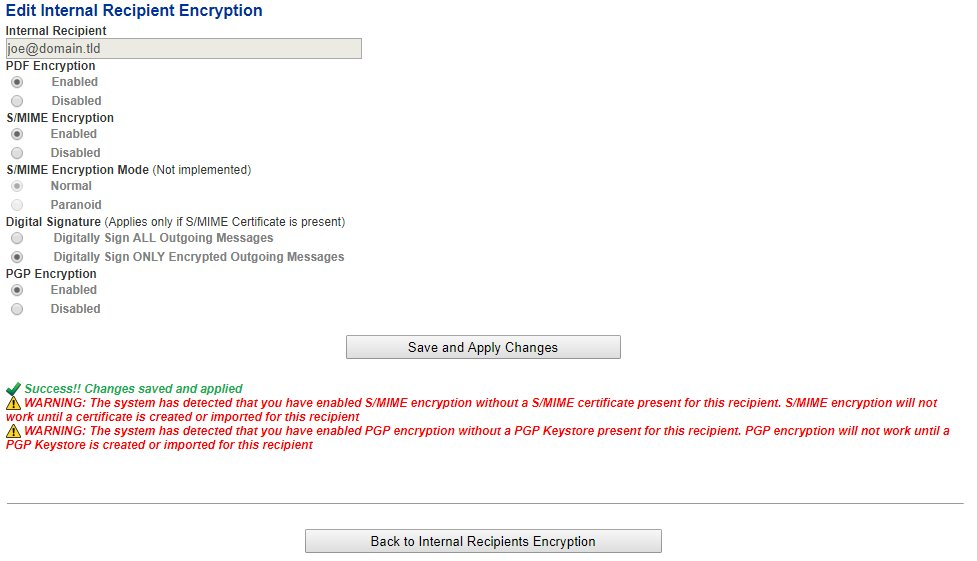
- Configuring encryption can be a time consuming process. Please wait for a Success message from the system before clicking the Back to Internal Recipients Encryption button at the bottom of the page (Figure 5).
Figure 5
Generate Internal Recipient S/MIME Certificate
Do not attempt to generate a S/MIME Certificate for an Internal Recipient unless you have already enabled S/MIME encryption on that recipient.
- Under the S/MIME Certificate(s) section of the Internal Recipient you wish to generate a certificate, click on the
 icon.
icon. - You will be re-directed to the Add Recipient S/MIME Certificate page.
- Assuming you have previously created an Internal Certificate Authority, under the Certificate Authority field, select the Internal Certificate Authority you wish to use to generate the S/MIME certificate.
- Under the S/MIME Certificate Validity Period, select the number of years you wish this S/MIME Certificate to be valid. The default setting of 5 Years is recommended.
- Under the S/MIME Certificate Encryption Length, select the length of the certificate. The default setting of 4096-bits is recommended.
- Under the S/MIME Certificate Algorithm, select the algorithm you wish to generate the certificate. The default setting of RSA-SHA-512 is recommended.
- Under the Auto-Generate S/MIME Certificate and Private Key PFX password field, select Yes to have the systtem automatically generate a password for the PFX file or select No if you wish to specify your own password. When generating a certificate, the system will also create a PFX file (Personal Information Exchange) and assign a password to it for security. A PFX file will contain both the public AND the private key of the generated certificate. The PFX file is used by the system for sending both the private and public key to the recipient that the certificate is being generated for for backup purposes or for configuring an email client. It's recommended that you allow the system to generate a PFX file password.
- If you selected No in the Auto-Generate S/MIME Certificate and Private Key PFX password, enter the password you wish to use under the S/MIME Certificate and Private Key PFX password and enter the same password under the Verify S/MIME Certificate and Private Key PFX password field.
- Click on the Create Certificate button (Figure 6). Please note that clicking the Create Certificate button will not change the button status and the system may appear unresponsive. Please wait until the certificate get created and the system re-directs you back to the Internal Recipients Encryption page.

Figure 6

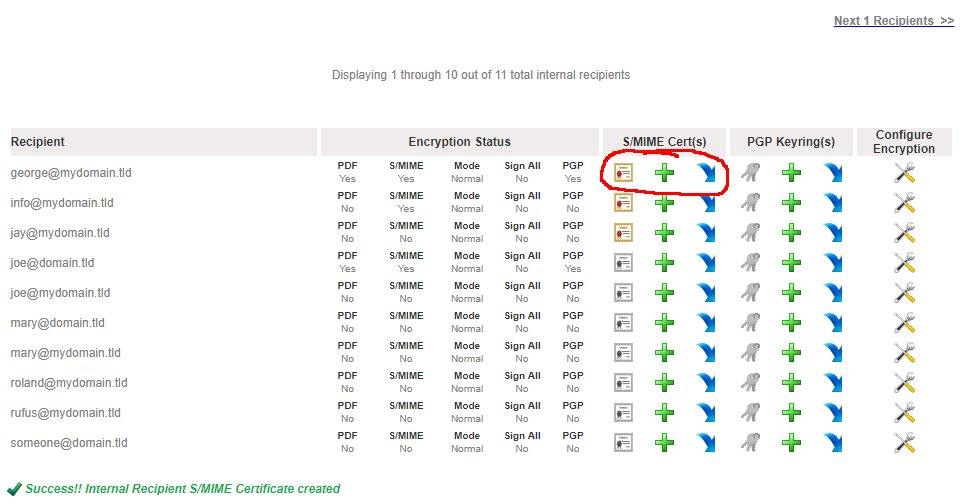
- The system will generate the certificate and automatically redirect you back to the Internal Recipients Encryption page.
- Under the Internal Repients listing on the S/MIME Cert(s) section of the recipient you just generated a certificate, you will note the
 icon which will now be enabled and clickable indicating that there are certificates present (Figure 7).

Figure 7
Import Internal Recipient S/MIME Certificate
Do not attempt to import a S/MIME Certificate for an Internal Recipient unless you have already enabled S/MIME encryption on that recipient.
Hermes SEG ONLY supports importing S/MIME certificates from PFX (Personal Information Exchange) files. Ensure that you have a PFX file which will contain both the certificate and the private key along with the password of the PFX file before proceeding.
- Under the S/MIME Cert(s) section of the Internal Recipient you wish to import a certificate, click on the
 icon.
icon. - You will be re-directed to the Import Recipient S/MIME Certificate page.
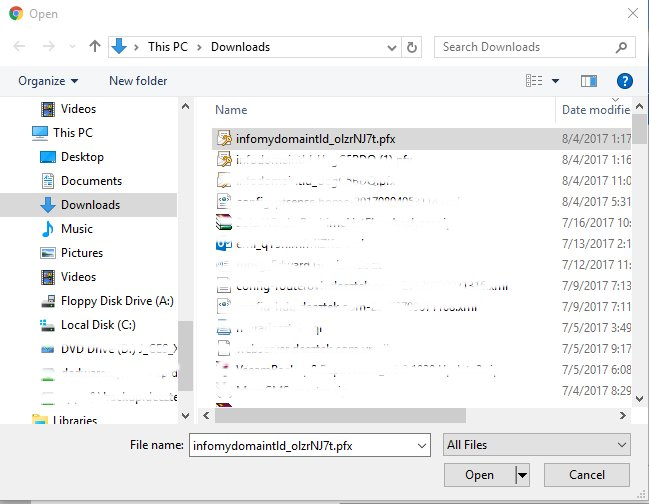
- Under the Select PFX File section, click on the Choose File button.
- Browse to the location of the PFX file, select the file and click the Open button (Figure 8).

Figure 8
- The name of the PFX file you chose will appear next to the Choose File button (Figure 9).
Figure 9

- Under the PFX file password field, enter the password to the PFX file (Figure 10).
Figure 10

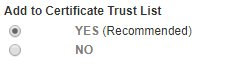
- Under the Add to Certificate Trust List field, select Yes to add the certificate to the system Certificate Trust List. Selecting Yes is always recommended unless you have a specific reason not to trust the certificate you are importing. In that case, select No (Figure 10).
Figure 10
- Click the Import Certificate button (Figure 11).
Figure 11

- After a succesful import, click on the Back to Internal Recipients Encryption button on the bottom of the page (Figure 12).
Figure 12

- Back at the Internal Recipients Encryption page, under the Internal Repients listing on the S/MIME Cert(s) section of the recipient you just imported a certificate, you will note the
 icon which will now be enabled and clickable indicating that there are certificates present (Figure 13).

Figure 13
Download or Send PFX File
Hermes SEG will allow you to download or send to the Internal Recipient the password protected PFX file containing the certificate and private key.
- At the Internal Recipients Encryption page, under the S/MIME Cert(s) section, click on the
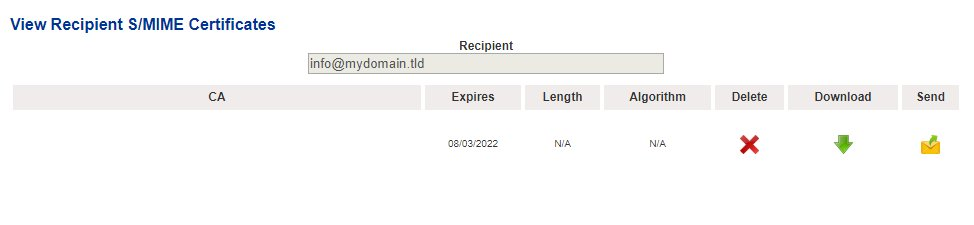
 icon of the recipient you want to download or send the PFX file. You will be re-directed to the View Recipient S/MIME Certificates page (Figure 14).

Figure 14
Download PFX File
NEVER share PFX File passwords via unsecured means such as unencrypted email, SMS text etc.
- Click on the
 icon of the certificate you wish to download. Your browser will immediately start downloading the PFX file.
 - If you wish to view the PFX password, click on the
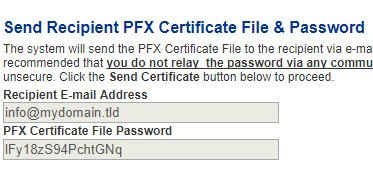
 icon. You will be re-directed to the Send Recipient PFX Certificate File & Password page, where you will be able to view the PFX file password under the PFX Certificate File Password field (Figure 15).


Figure 15
Send PFX File
NEVER share PFX File passwords via unsecured means such as unencrypted email, SMS text etc.
Hermes SEG will send the PFX file ONLY to the recipient email address that the certiciate was generated/imported for.
- Click on the
 icon of the certificate you wish to send.
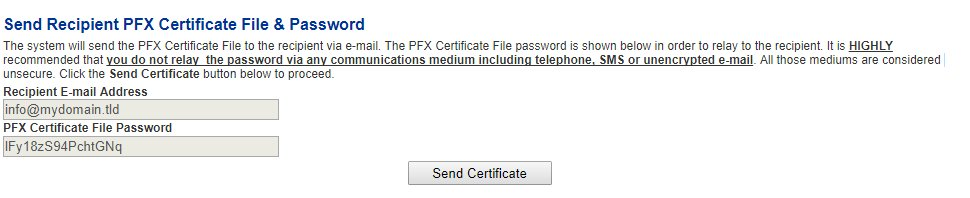
 - You will be re-directed to the Send Recipient PFX Certificate File & Password page.
- Click on the Send Certificate button (Figure 16).

Figure 16
- If necessary, provide the password to the PFX file to the recipient via secured means.
Generate Internal Recipient PGP Keyring
Do not attempt to generate a PGP Keyring for an Internal Recipient unless you have already enabled PGP encryption on that recipient.
- Under the PGP Keyring(s) section of the Internal Recipient you wish to generate a PGP Keyring, click on the
 icon.
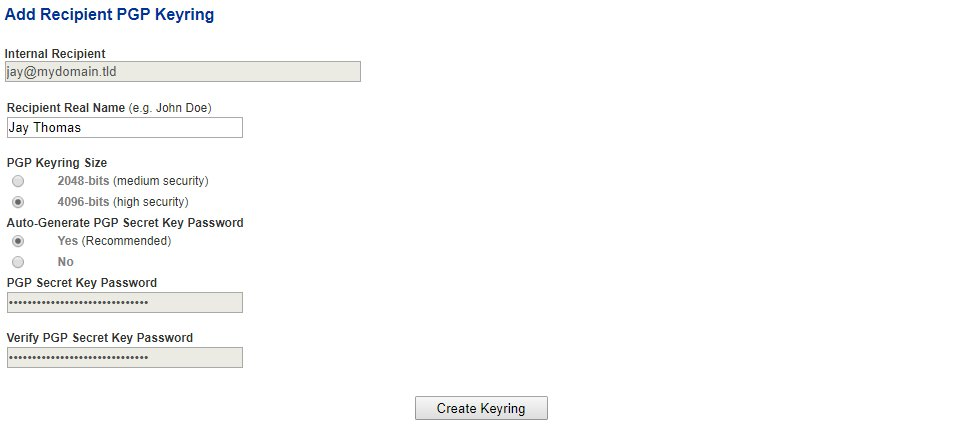
icon. - You will be re-directed to the Add Recipient PGP Keyring page.
- Under the Recipient Real Name section, enter the recipient's First and Last Name.
- Under the PGP Keyring Size, select the size of the keyring. The default setting of 4096-bits is recommended.
- Under the Auto-Generate PGP Secret Key Password field, select Yes to have the systtem automatically generate a password for the Secret Key or select No if you wish to specify your own password. It's recommended that you allow the system to generate a Secret Key password.
- If you selected No in the Auto-Generate PGP Seccret Key password, enter the password you wish to use under the PGP Secret Key Password and enter the same password under the Verify PGP Secret Key Password field below the first one.
- Click on the Create Keyring button (Figure 17). Please note that clicking the Create Keyring button will not change the button status and the system may appear unresponsive. Please wait until the keyring get created and the system re-directs you back to the Internal Recipients Encryption page.

Figure 17
- The system will generate the keyring and automatically redirect you back to the Internal Recipients Encryption page.
- Under the Internal Repients listing on the PGP Keyring(s) section of the recipient you just generated a keystore, you will note the
 icon which will now be enabled and clickable indicating that there are keyrings present (Figure 18).

Figure 18

Import Internal Recipient PGP Keyring
Do not attempt to import a PGP Keyring for an Internal Recipient unless you have already enabled PGP encryption on that recipient.
- Under the PGP Keystore(s) section of the Internal Recipient you wish to import a keystore, click on the
 icon.
icon. - You will be re-directed to the Import Recipient PGP Key page.
- Under the PGP Key Type field, select whether you will be importing a Public or a Private Key type. If you select a Private PGP Key Type, the Private PGP Key Password field below will become enabled.
- If you selected a Private PGP Key Type above, enter the private key password in the Private PGP Key Password field.
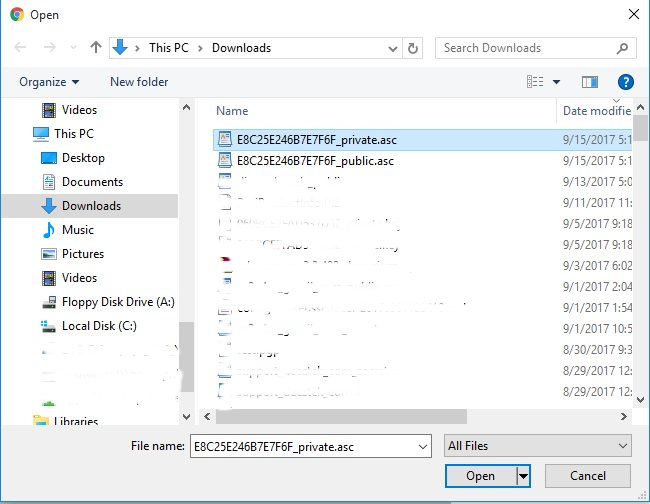
- Under the Select PGP Key File section, click on the Choose File button.
- Browse to the location of the PGP key file, select the file and click the Open button (Figure 19).

Figure 19
- The name of the PGP Key file you chose will appear next to the Choose File button (Figure 20).
Figure 20

- Click the Import Key button (Figure 21).
Figure 21

- After a succesful import, click on the Back to Internal Recipients Encryption button on the bottom of the page (Figure 12).
Figure 22

- Back at the Internal Recipients Encryption page, under the Internal Repients listing on the PGP Keyring(s) section of the recipient you just imported a certificate, you will note the
 icon which will now be enabled and clickable indicating that there are keystores present (Figure 23).

Figure 23
Delete Key, Download Public Key, Download Private Key, View Private Key Password and Publish Public Key
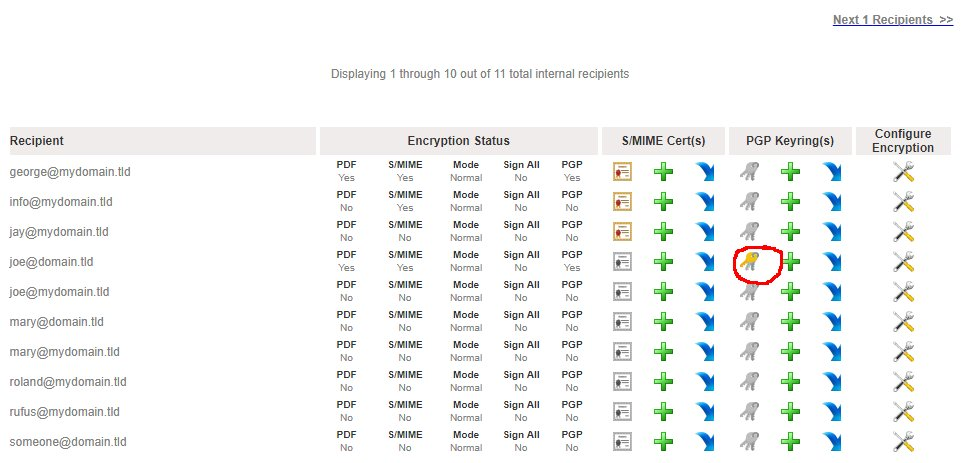
- At the Internal Recipients Encryption page, under the PGP Keystore(s) section, click on the
 icon of the recipient. You will be re-directed to the View Recipient PGP Keyrings page (Figure 24).

Figure 24

Delete Key
- Click on the
 icon of the key you wish to delete. You will be re-directed to the Delete Recipient PGP Key page (Figure 25).

Figure 25
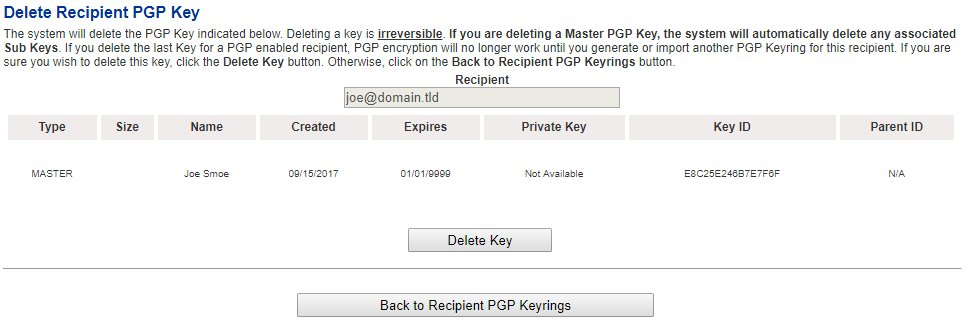
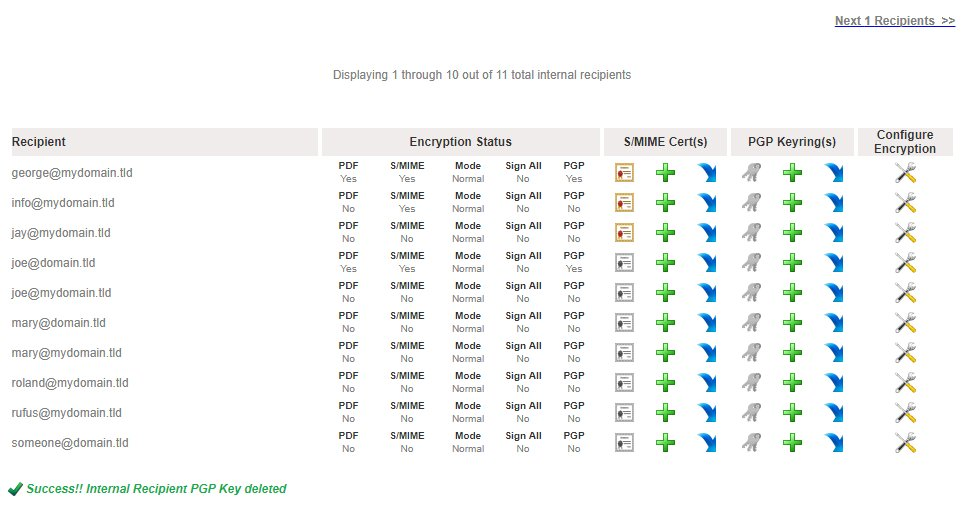
- Click the Delete Key button. Please note that if you are deleting the Master Key, the system will automatically delete both the Master and any associated Sub Keys. If you are deleting a Sub Key, the system will only delete the Sub Key you selected to delete. If you wish to cancel, click on the Back to Recipient PGP Keyrings button.
- Clicking the Delete button will delete the key and re-direct you back to the Internal Recipients Encryption page (Figure 26).
Figure 26
Download Public Key or Private Key
Downloading the Public and Private Keys is useful for importing those keys in 3rd party PGP applications such as Enigma, Kleopatra etc.
- Click on the
 icon under the Download Public or the Download Private column of the key you wish to download. Your browser will automatically begin downloading the key you clicked in ASCII armor format.

View Private Key Password
This feature is useful in determining the Private Key password that the system automatically generates when generating a PGP Keyring. NEVER share Private Key passwords via unsecured means such as unencrypted email, SMS text etc.
- Click on the
 icon under the View Password column of the key you wish to view the private key password.
 - You will be re-directed to the View Recipient PGP Private Key Password page (Figure 27).

Figure 27

Publish Public PGP Key
This feature is helpful with publishing recipient Public PGP Keys to Public PGP Key Servers. Public PGP Key Servers act as central repositories for public keys in order to assist in PGP cryptography.
Please note that if no PGP Key Servers are defined under Encryption --> PGP Key Servers the icons under the Publish Key column of every key will be disabled .
.
- Click on the
 icon under the Publish Key column of the key you wish to publish.
 - You will be re-directed to the Publish Recipient PGP Public Key page (Figure 28).

Figure 28
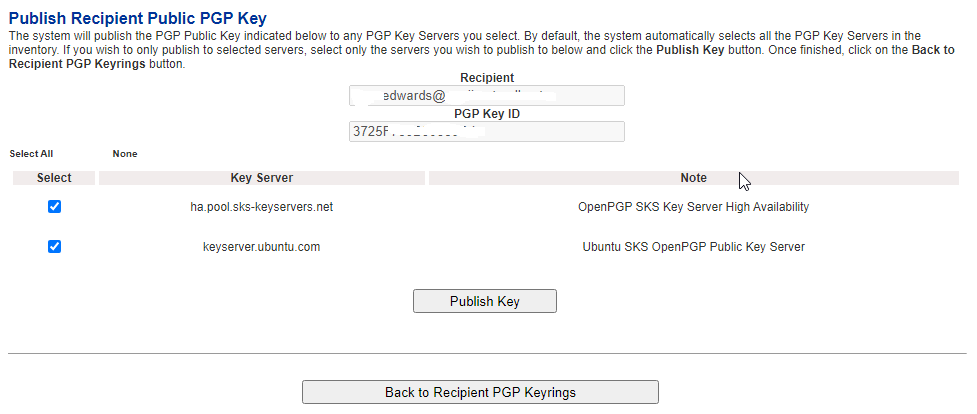
- By default all the configured Public PGP Key Servers are selected. If desired, uncheck any key servers from the list that you do not wish to publish the public key and click the Publish Key button.
- When finished, click, on the Back to Recipient PGP Keyrings button on the bottom of the page.