Relay IPs & Networks
In this section, you can add which individual IPs or networks will be allowed to send (relay) email through Hermes SEG.
Best security practice is to never allow entire networks to send email through Hermes SEG and instead only allow specific IPs.
Add Relay IP
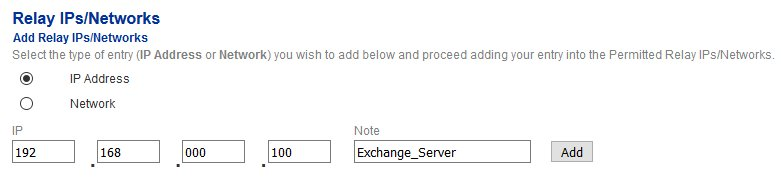
- Under the Select the type of entry... section, Select IP Address option.
- Under the IP field, enter the IP Address that you want to allow.
- Under the Note field, enter a note identifiying the IP address and click the Add button (Figure 1).
Figure 1
- Each IP address you add shows up in the Permitted Relay IPs/Network to be added section (Figure 2)
Figure 2
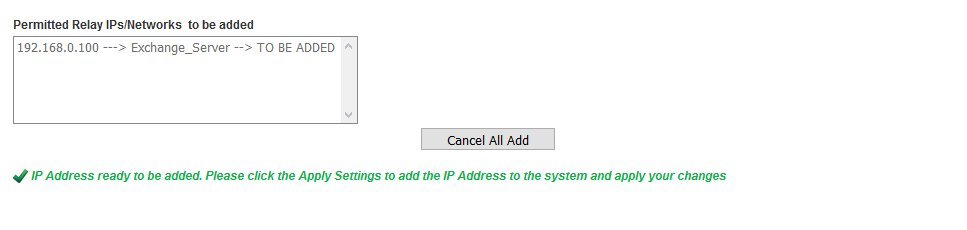
- Continue adding IP addresses as needed. When finished, click on the Apply Settings button on the bottom of the page (Figure 3).
Figure 3

Add Relay Network
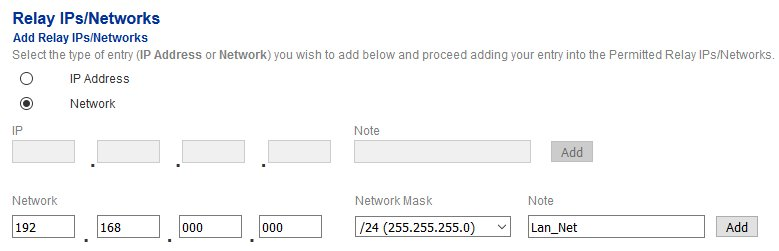
- Under the Select the type of entry... section, Select Network option.
- Under the Network field, enter the Network Address that you want to allow.
- Under the Network Mask drop-down field, select the mask (subnet mask) of the network
- Under the Note field, enter a note identifiying the network address and click the Add button (Figure 4).
Figure 4
- Each network address you add shows up in the Permitted Relay IPs/Network to be added section (Figure 5)
Figure 5
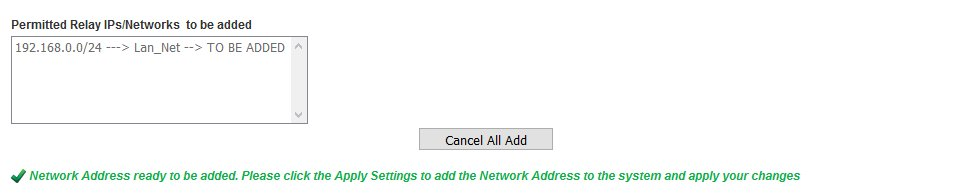
- Continue adding Network addresses as needed. When finished, click on the Apply Settings button on the bottom of the page (Figure 6).
Figure 6

Delete Relay IPs/Networks
- Under the Delete Relay IPs/Networks section, select the entry you wish to delete and click the Delete button below (Figure 6). Note that only one entry can be selected to be deleted at a time.
Figure 6

- Each entry you select to be deleted shows up in the Permitted Relay IPs/Network to be deleted section (Figure 7).
Figure 7

- Continue selecting entries to be deleted as needed. When finished, click on the Apply Settings button on the bottom of the page (Figure 8).
Figure 8
