Configure Outlook for Hosted Mail using ActiveSync
Outlook 2016 or higher from Office 365 on Windows
If you installed Outlook 2016, Outlook 2019 or Outlook for Office 365 from Office 365 (i.e. downloaded and installed from Office 365), please be advised that those versions of Outlook have an issue with autodiscover. Because of this, you must first disable the Simplified Account Creation wizard in order to setup your mailbox with our Hosted Mail.
Disable Simplified Account Creation wizard
You can disable the Simplified Account Creation wizard by following the instructions outlined at the link below:
Alternatively, you can download and import the disable_simplified_account_creation_wizard.reg to your computer.
Configure Outlook
Start Outlook
If this is the first time starting Outlook, the Auto Account Setup window will automatically launch.
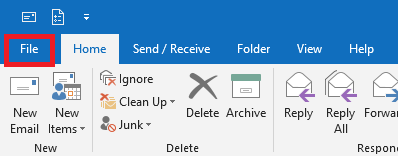
If this is NOT the fist time starting Outlook, click on File on the upper left-hand corner (Figure 1).
Figure 1
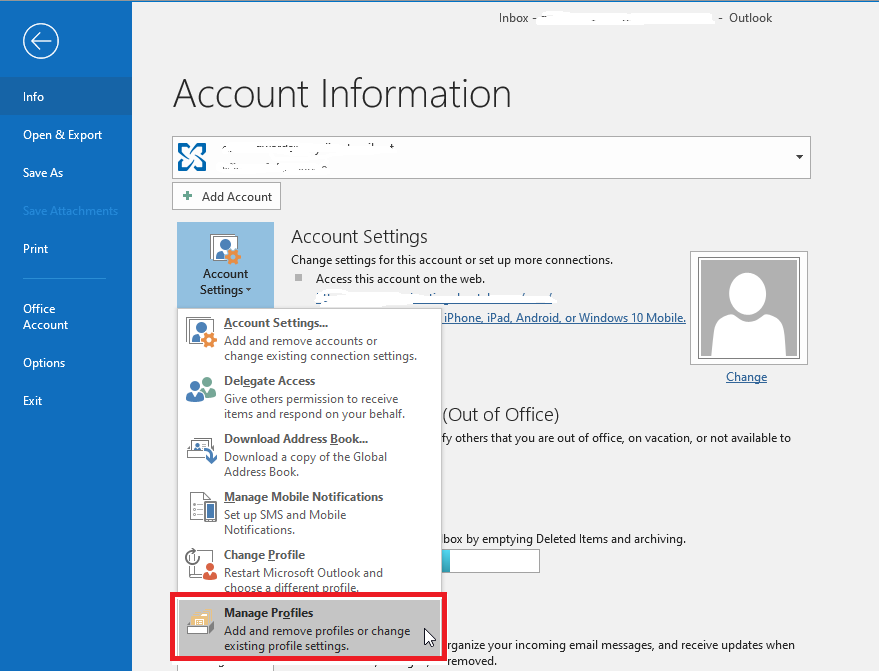
Click on Account Settings, and then click Manage Profiles (Figure 2).
Figure 2
In the Mail Setup window, click on Email Accounts... (Figure 3)
Figure 3

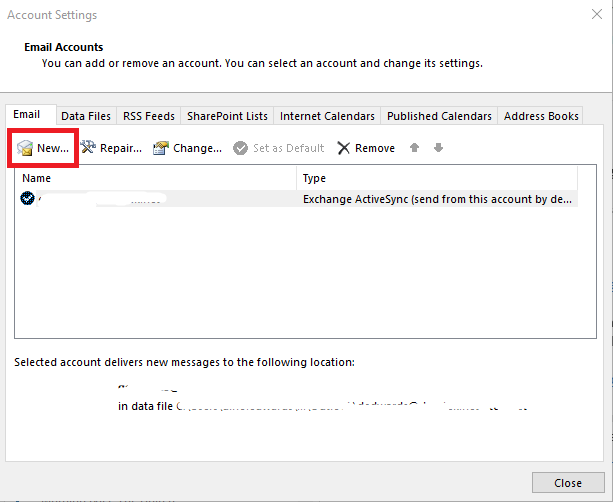
In the Email Accounts window, click on New... (Figure 4).
Figure 4
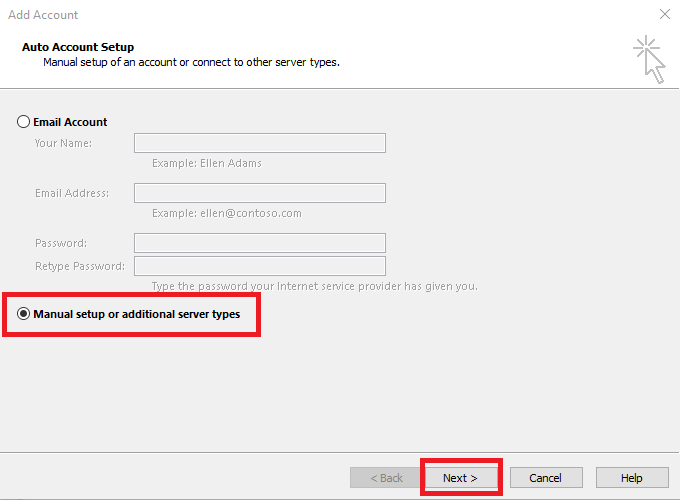
In the Auto Account Setup window, select Manual setup or additional server types and click Next (Figure 5).
Figure 5
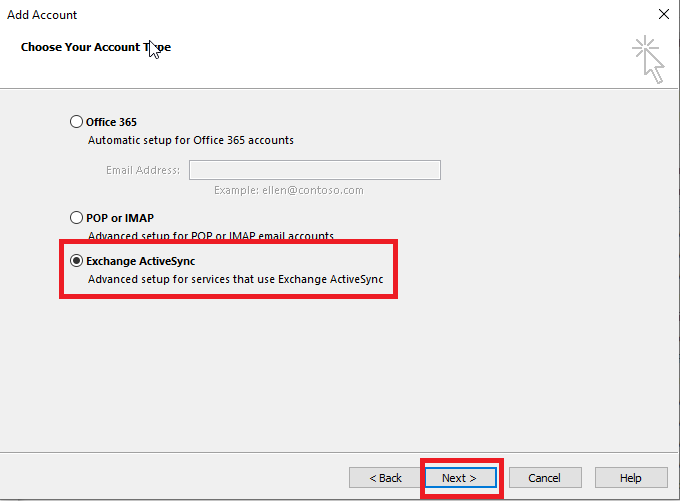
On the Choose Your Account Type window, select Exchange ActiveSync and click Next (Figure 6).
Figure 6
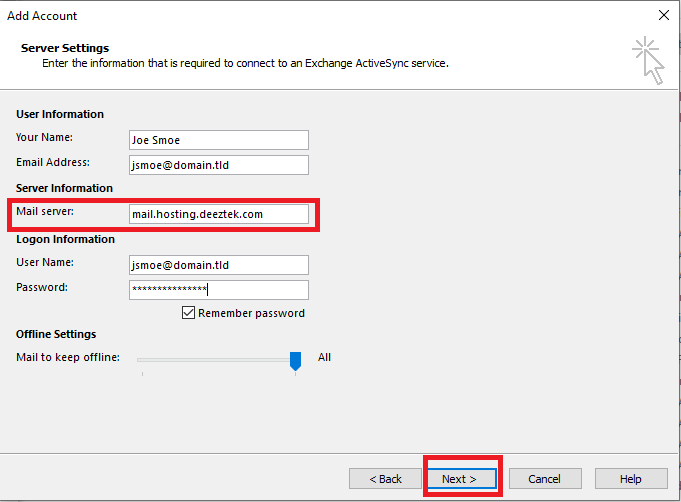
On the Server Settings window, fill out the all fields ensuring you set the Mail server field to mail.hosting.deeztek.com and click Next (Figure 7):
Figure 7
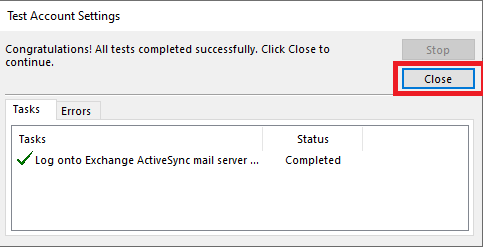
If everything went well, you should see the following window indicating that Outlook connected successfully to our mail server. Click the Close button to continue (Figure 8).
Figure 8
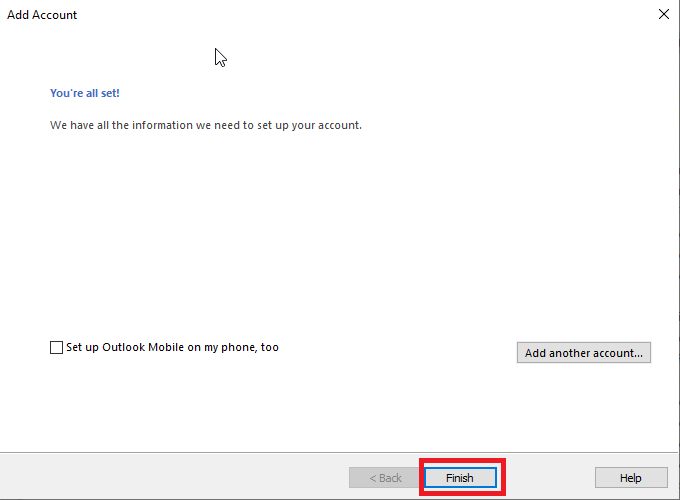
On the following window, click the Finish button (Figure 9).
Figure 9