Configure Thunderbird for Hosted Mail
This guide assumes you are configuring Thunderbird for the first time.
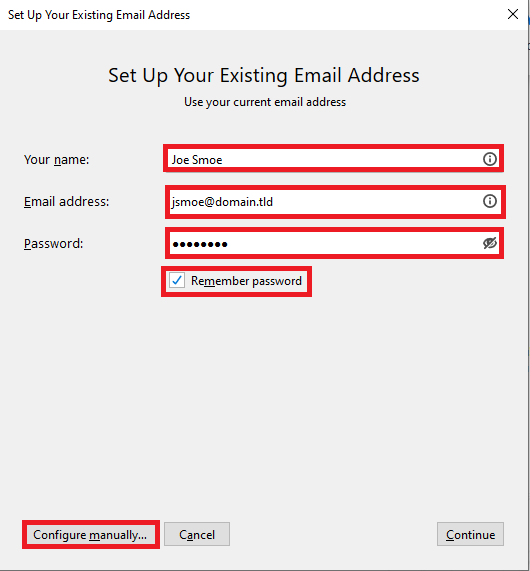
In the Set Up Your Existing Email Address window, enter your full name in the Your name field, your e-mail address in the Email address field and your password in the Password field, ensure Remember password is checked and click the Configure manually.. button (Figure 1).
Figure 1
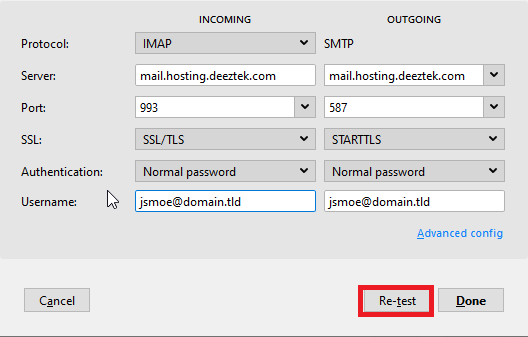
Under the INCOMING, in the Protocol drop-down, ensure IMAP is selected, in the Server field enter mail.hosting.deeztek.com, in the Port drop-down ensure 993 is selected, in the SSL drop-down ensure SSL/TLS is selected, in the Authentication drop-down ensure Normal password is selected.
Under the OUTGOING section, in the Port drop-down ensure 587 is selected, in the SSL drop-down ensure STARTTLS is selected, in the Authentication drop-down ensure Normal password is selected and click the Re-test button. (Figure 2).
Figure 2
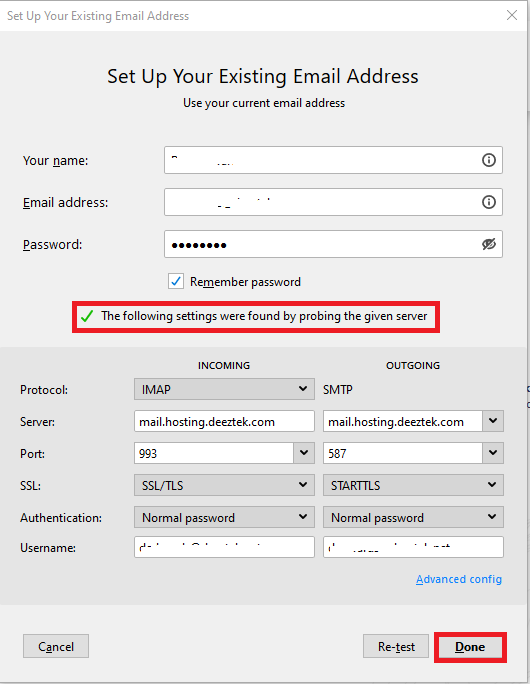
If you entered the correct settings above, Thunderbird will attempt to probe the mail server and upon success will output The following settings were found by probing the given server. Click the Done button (Figure 2).
Figure 2
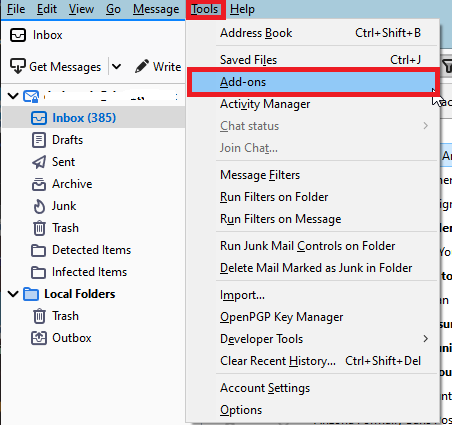
From the main Thunderbird window, right-click to the right of the Quick Filter icon and on the resultant menu, select Menu Bar (Figure 3).
Figure 3

Thunderbird should now have a top menu bar (Figure 4).
Figure 4

Figure 4
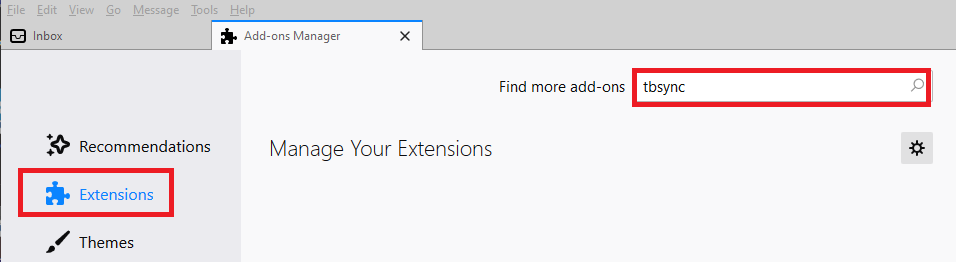
In the Add-ons Manager, ensure Extensions is selected on the left-hand pane and in the Find more add-ons search field, enter tbsync and click the icon to perform the search (Figure 5).
Figure 5
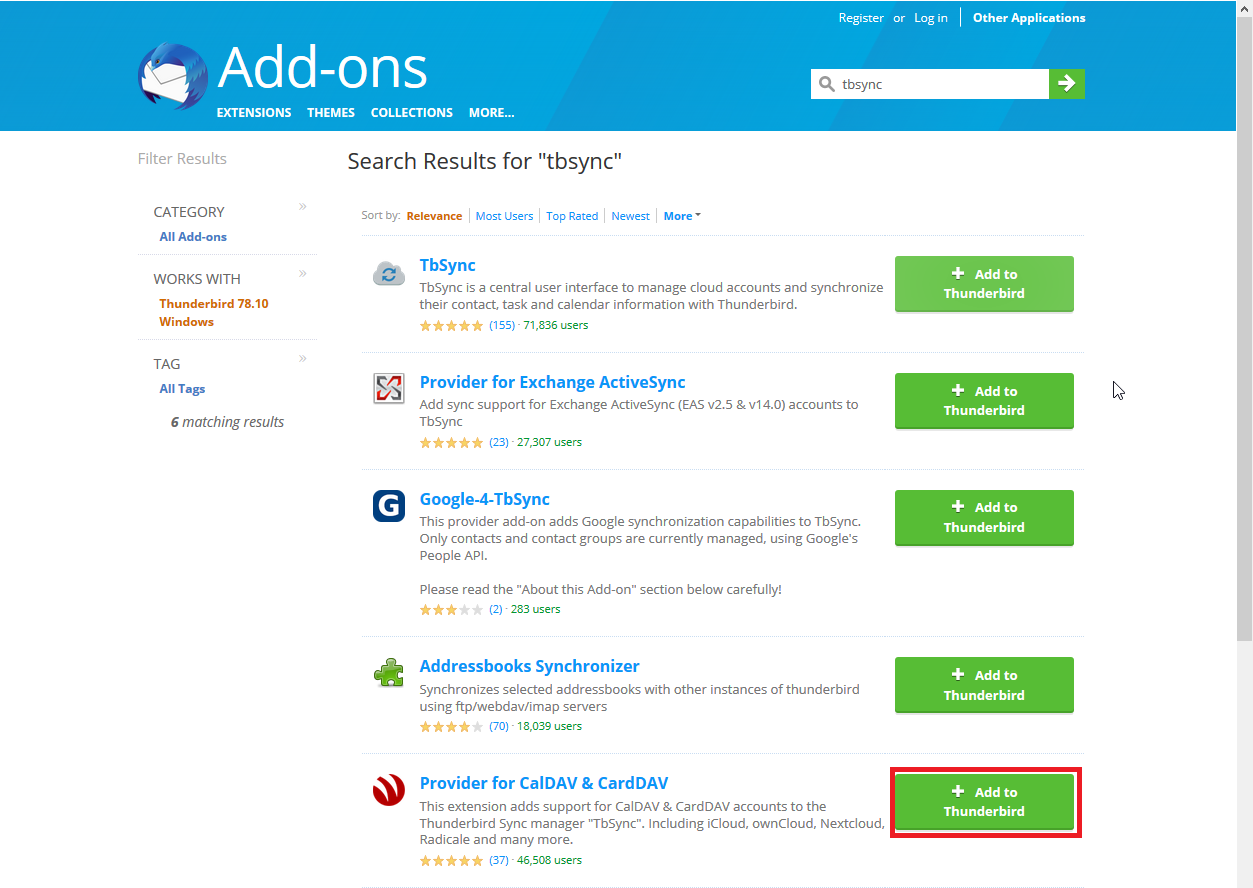
In the Search Results for "tbsync" window, click on the Add to Thunderbird button to the right of TbSync (Figure 6).
Figure 6

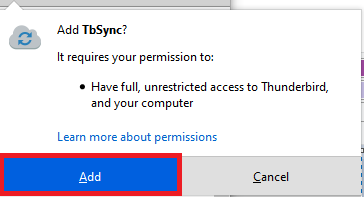
In the Add TbSync? confirmation window on the top-right, click the Add button (Figure 7).
Figure 7
Back the Search Results for "tbsync" window, scroll down the results and locate Provider for CalDAV & CardDAV and click on the Add to Thunderbird button to the right of Provider for CalDAV & CardDAV (Figure 8).
Figure 8
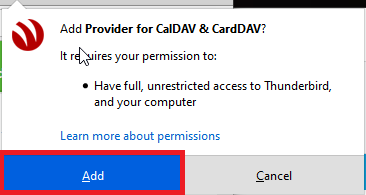
In the Add Provider for CalDAV & CardDAV? confirmation window on the top-right, click the Add button (Figure 9).
Figure 9
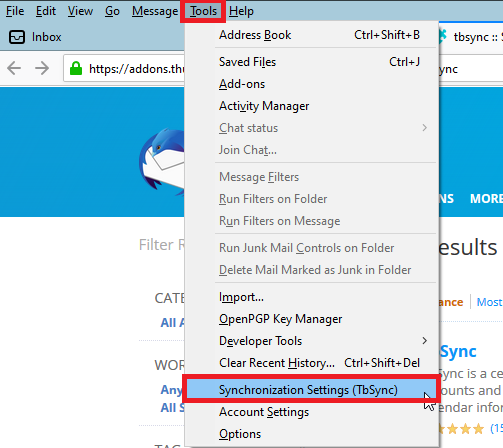
Next, click on Tools --> Synchronization Settings (TbSync) (Figure 10).
Figure 10
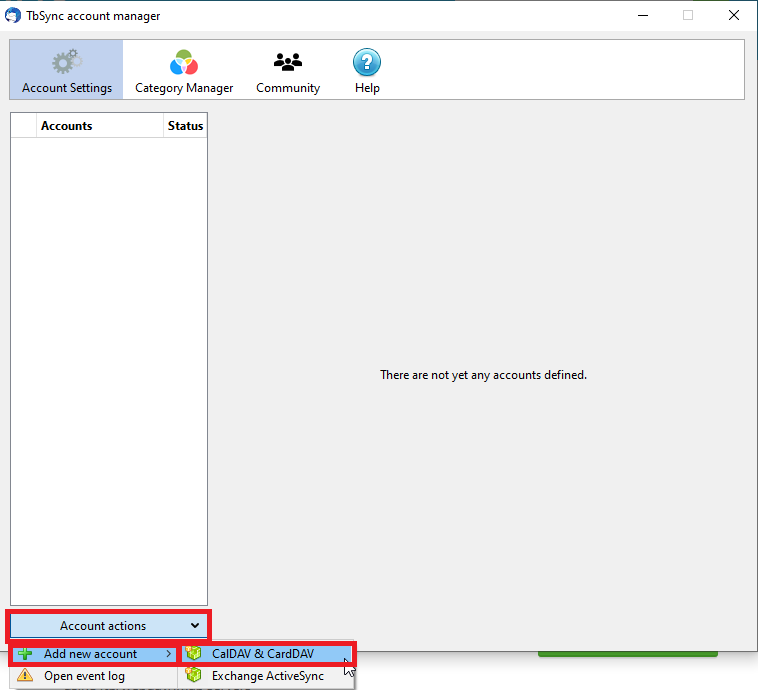
In the TbSync account manager window, click on the Account actions --> Add new account --> CalDAV & CardDAV (Figure 11).
Figure 11
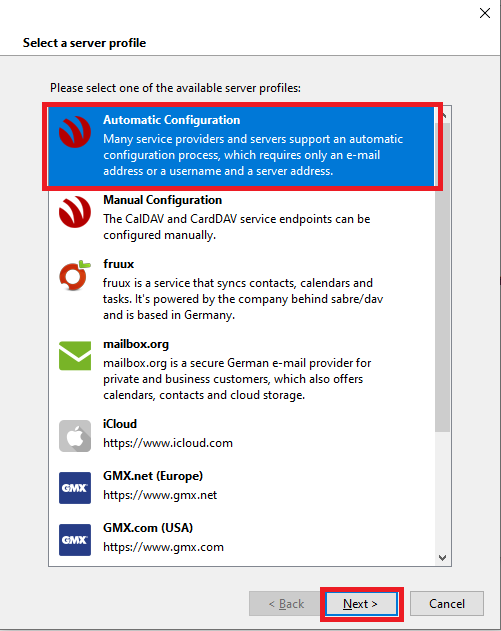
In the Select a server profile window, select Automatic Configuration and click the Next button (Figure 12).
Figure 12
In the Enter account information window, enter a friendly name in the Account name field, your e-mail address in the User name field, your password in the Password field and clickl the Next button (Figure 13).
Figure 13

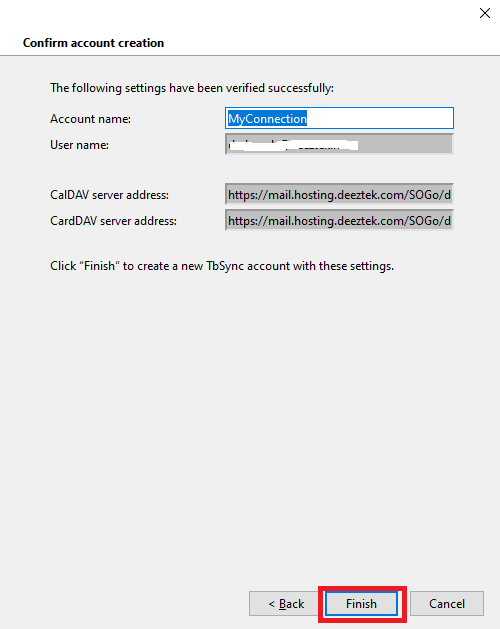
In the Confirm account creation window, click the Finish button (Figure 14).
Figure 14
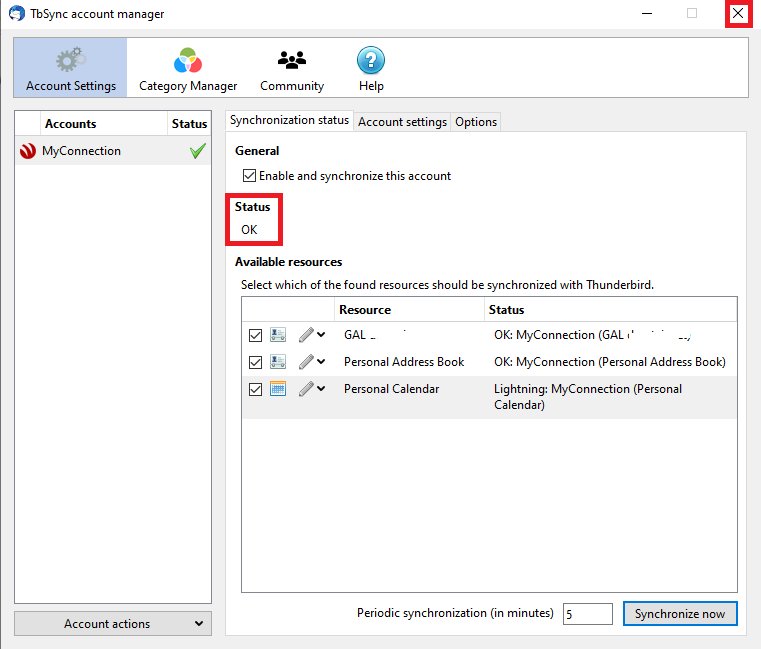
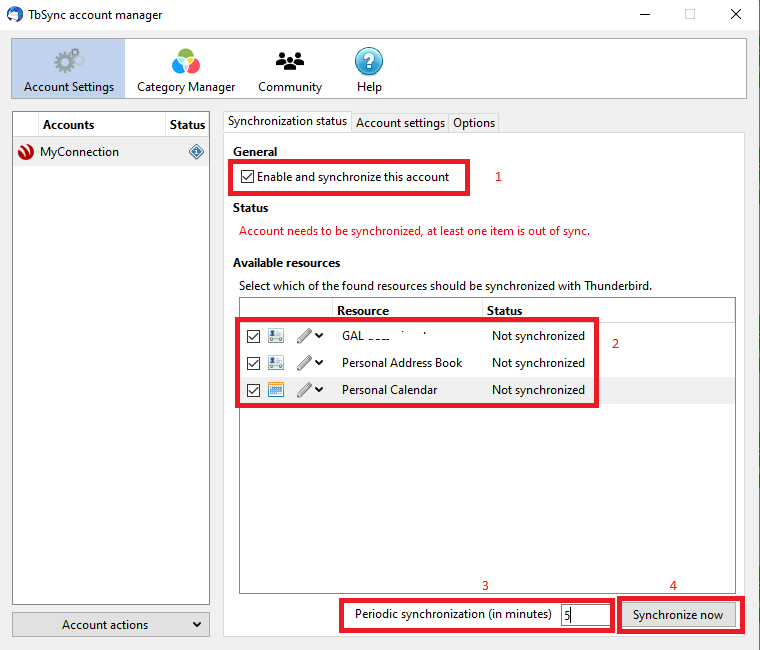
Back in the TbSync account manager window, place a check mark on Enable and synchronize this account (1), under Available resources, place a checkmark on GAL, Personal Address Book, Personal Calendar (2), set the Periodic synchronization (in minutes) to 5 minutes (3) and click the Synchronize now (4) button (Figure 15).
Figure 15
If everything goes well, you should get an OK under Status. Then you can close the TbSync account manager window (Figure 16).
Figure 16