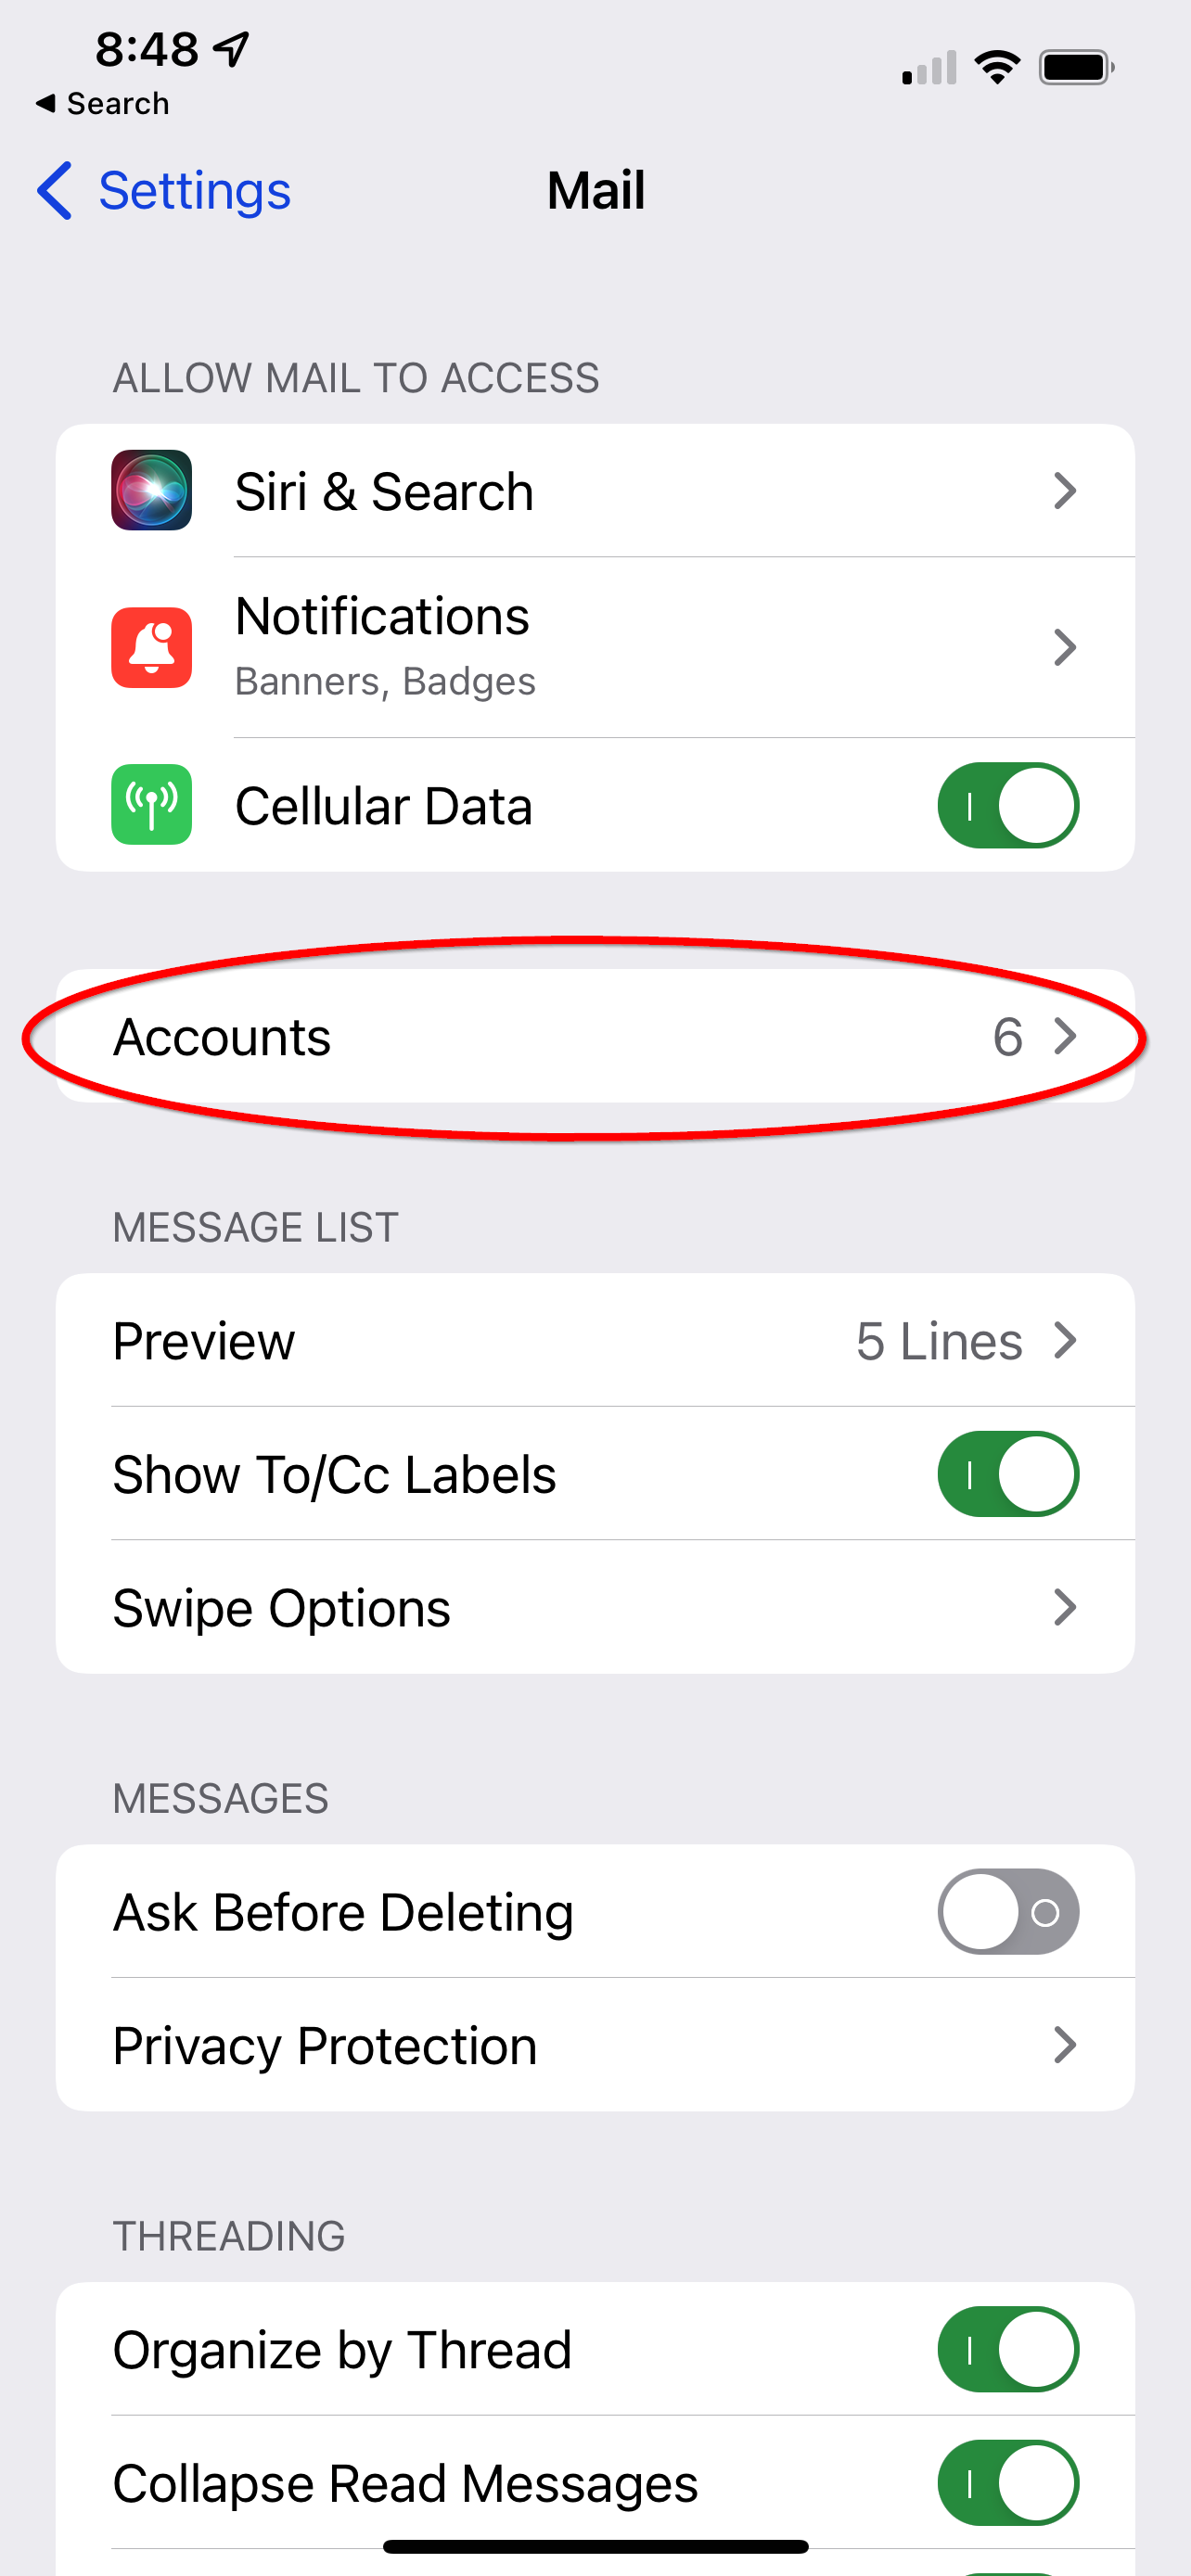
Navigate to the "Settings" application and select "Mail" as pictured:
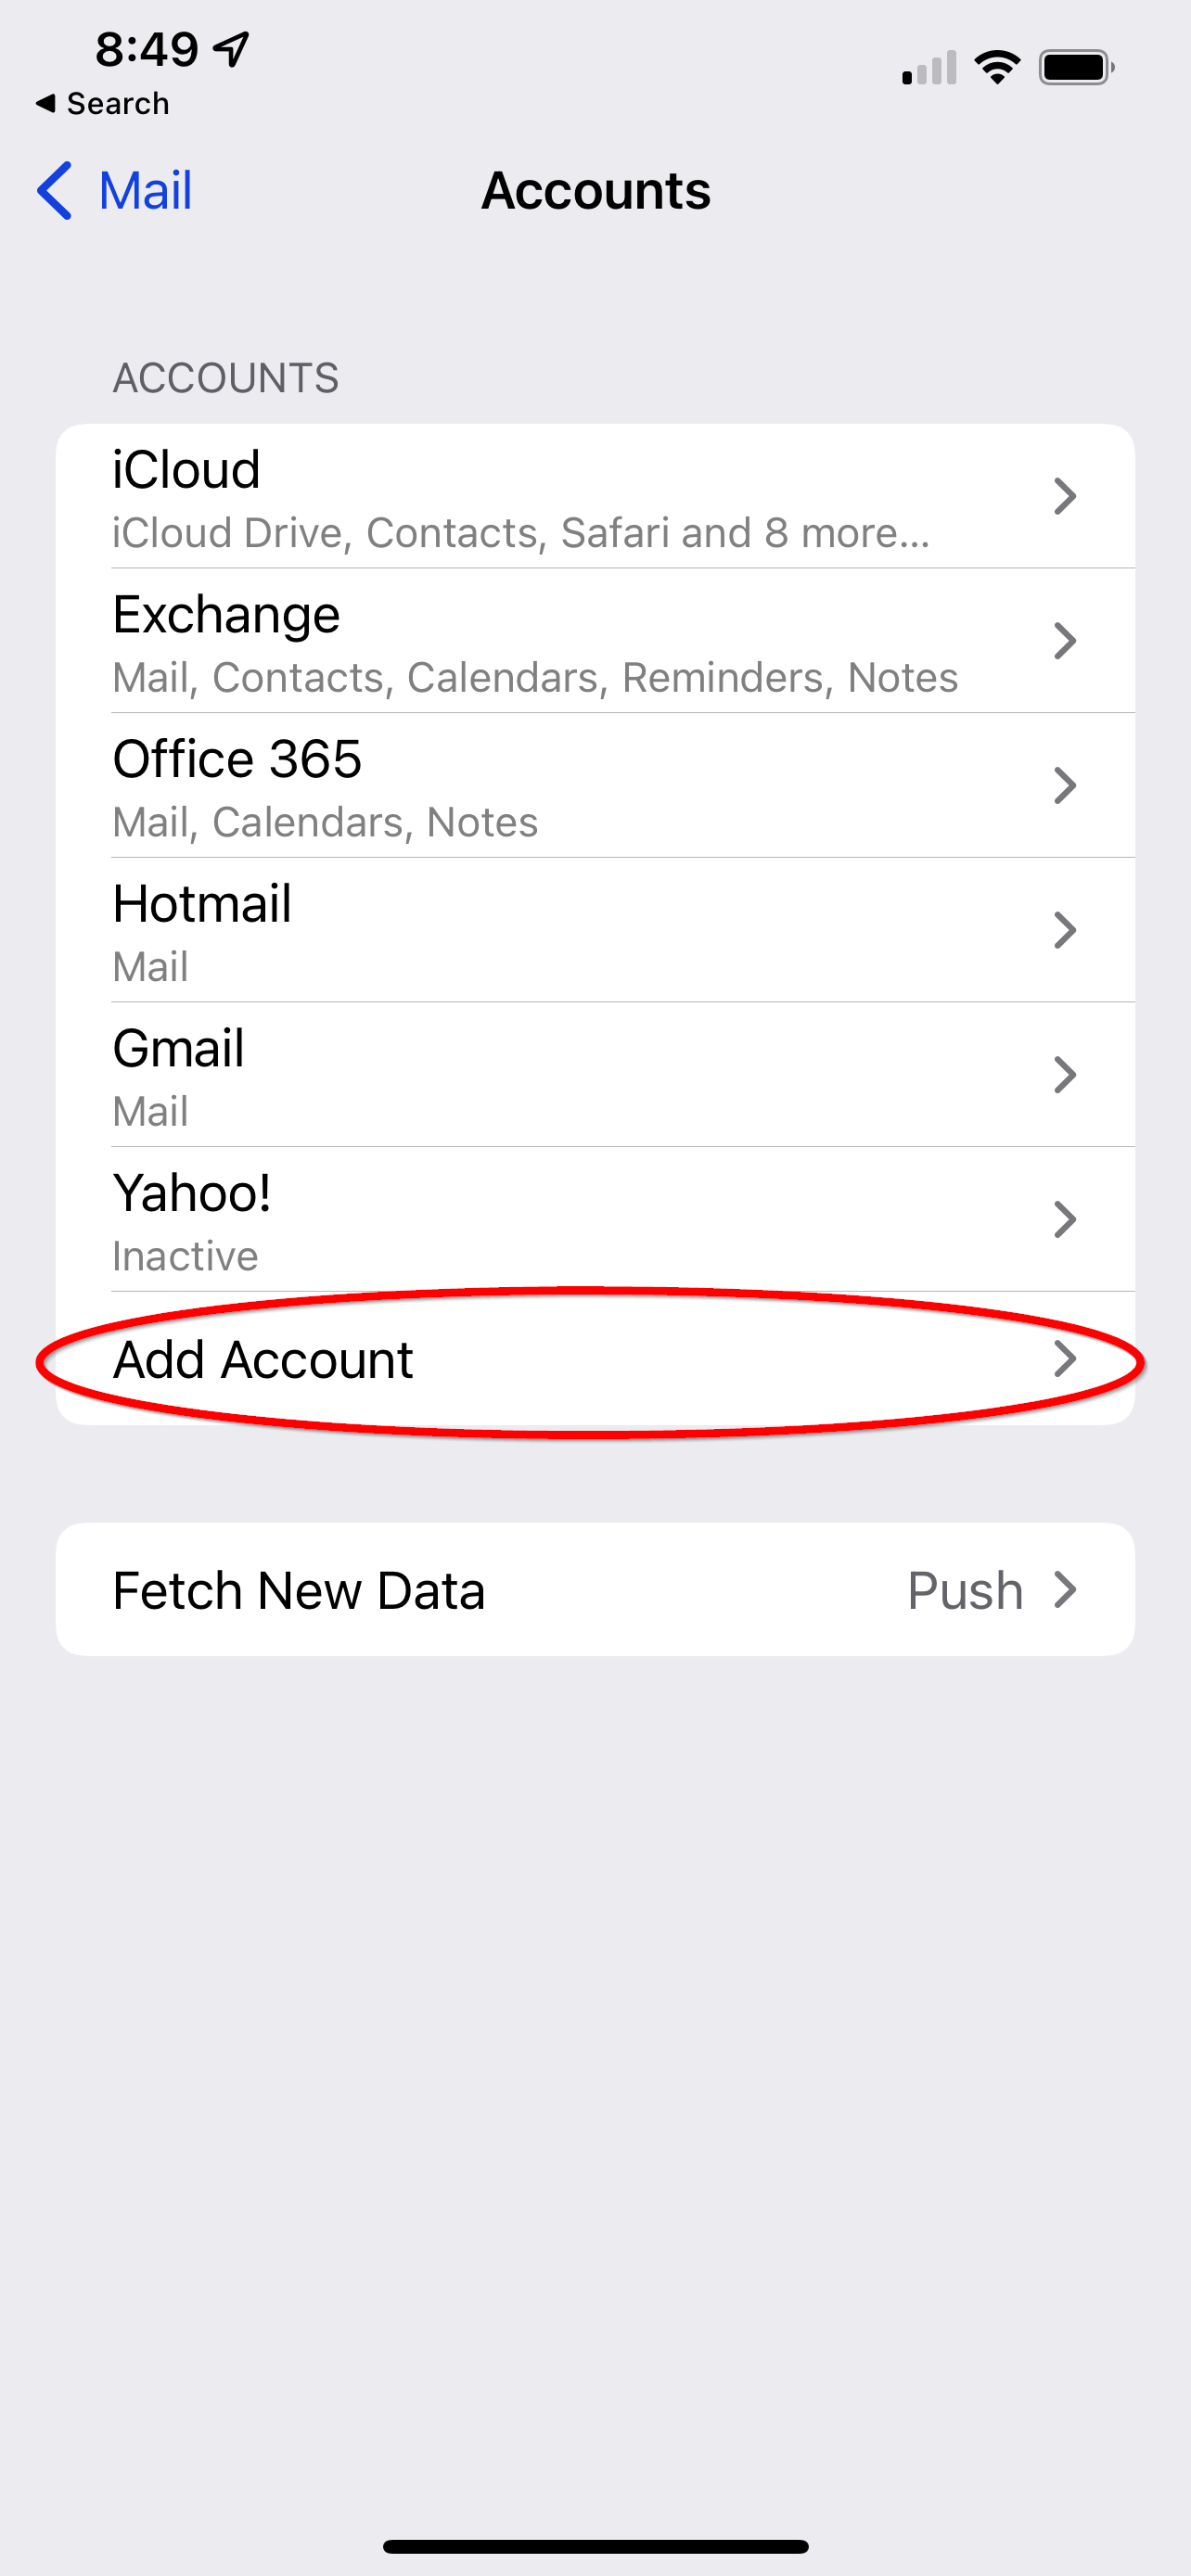
From the "Mail" options select "Accounts" as pictured:
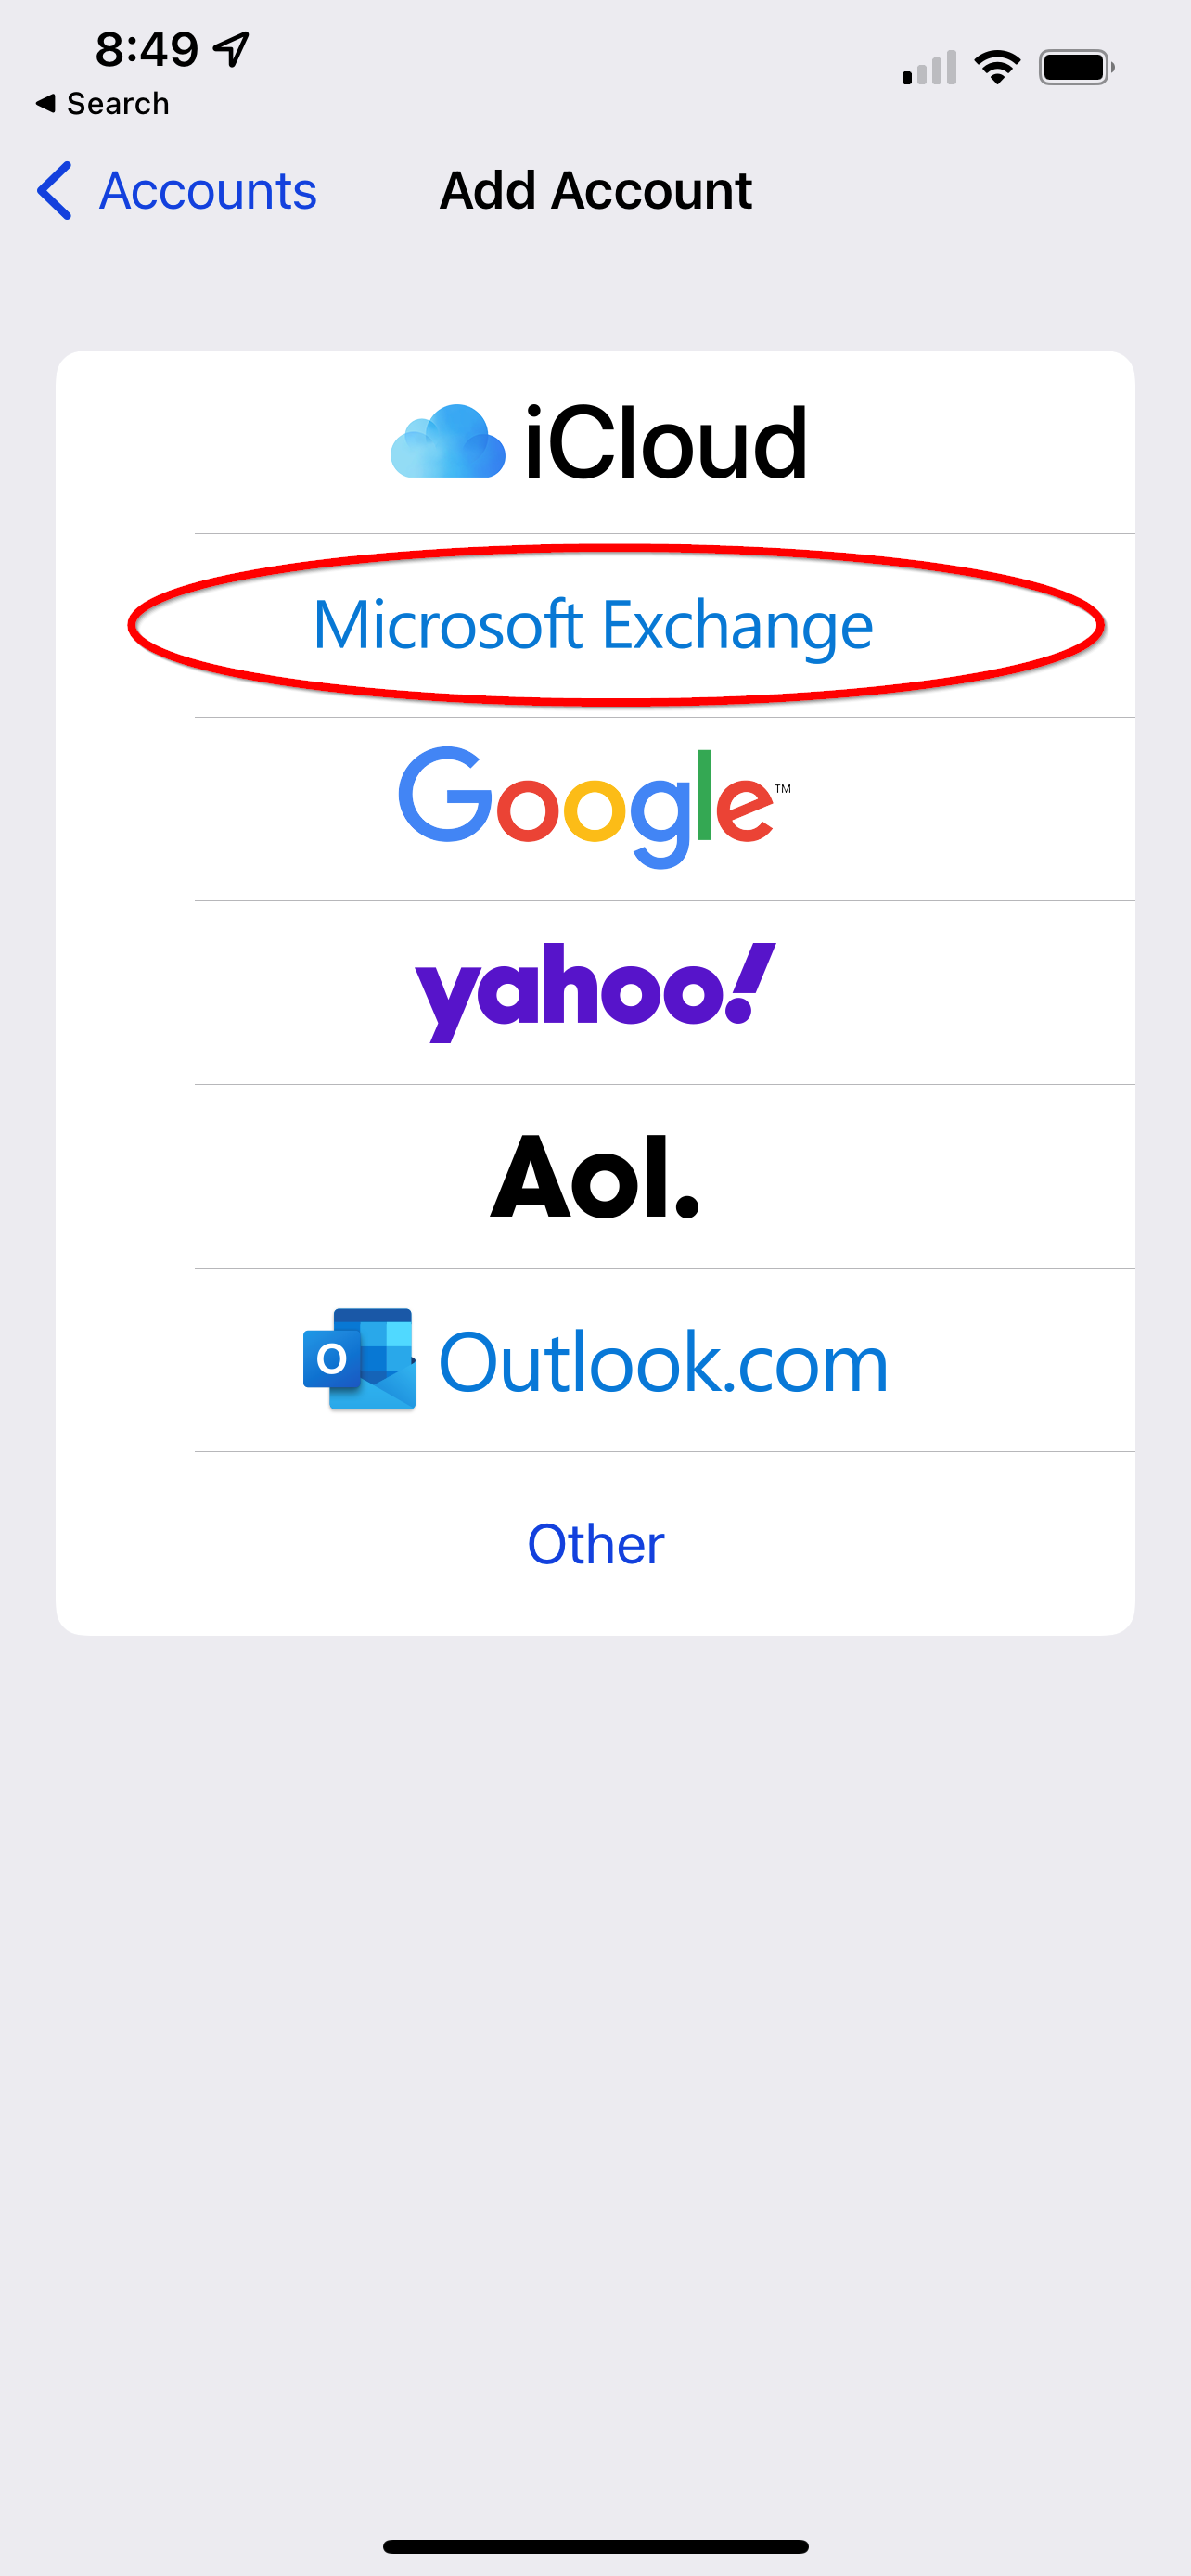
Select the "Add Account" option:
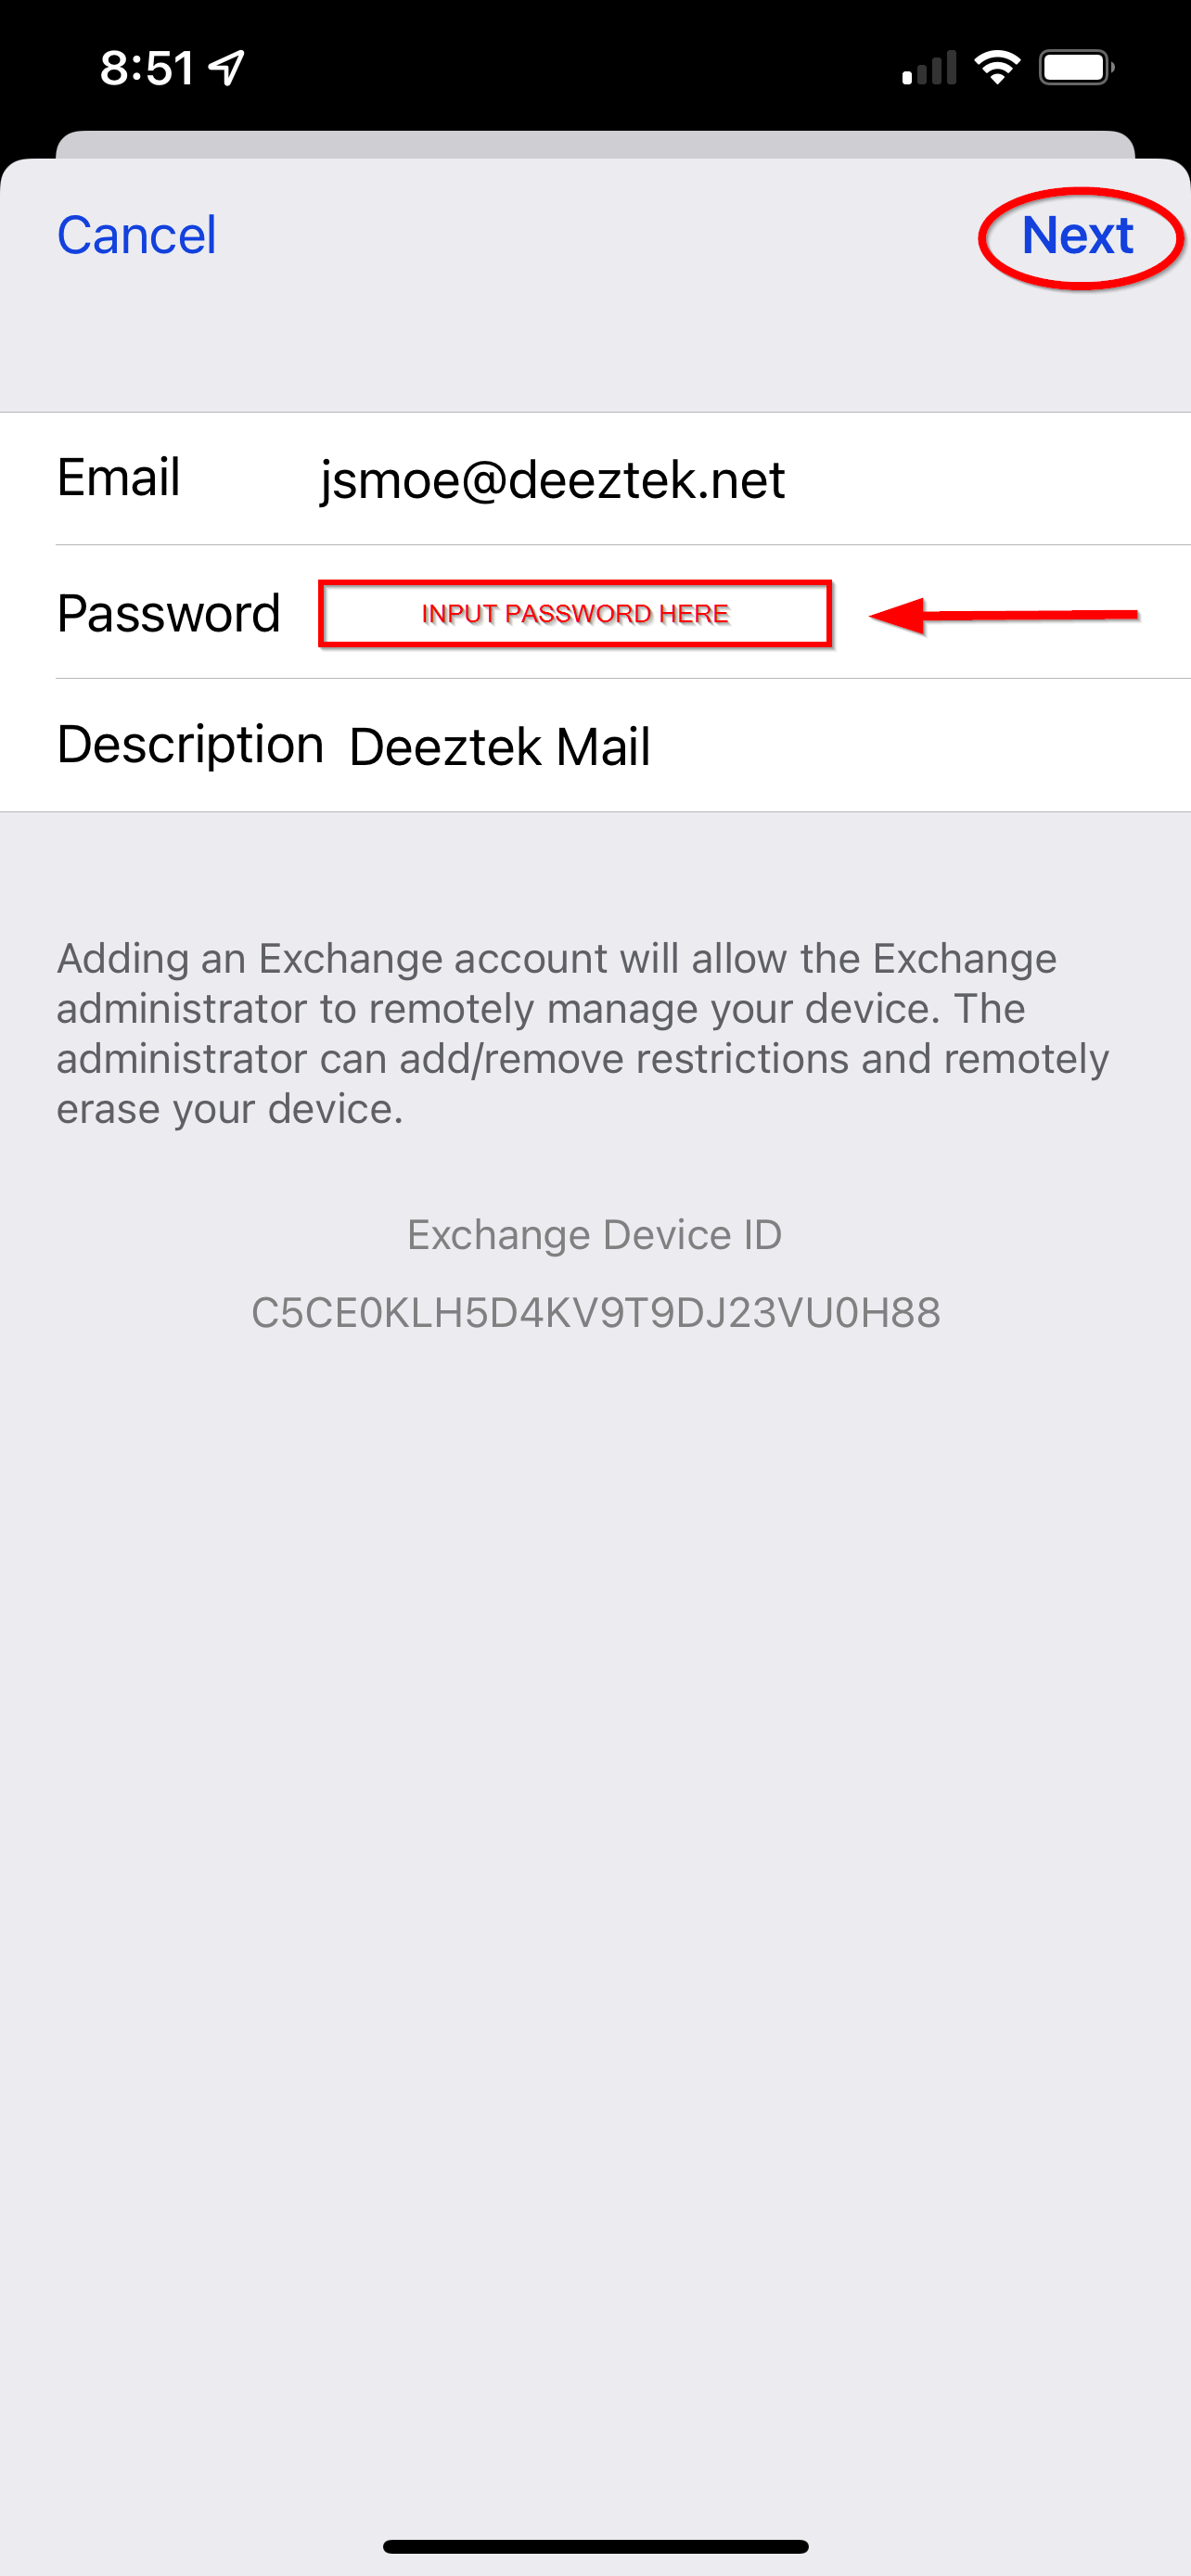
Select the "Microsoft Exchange" option:
Input your account email address and a friendly description (this can be anything like like to help you remember the purpose of this account), when finished select "Next":
Select the "Configure Manually" option when prompted:
Confirm your account email address and description then input your account password into the appropriate field. When finished select "Next."
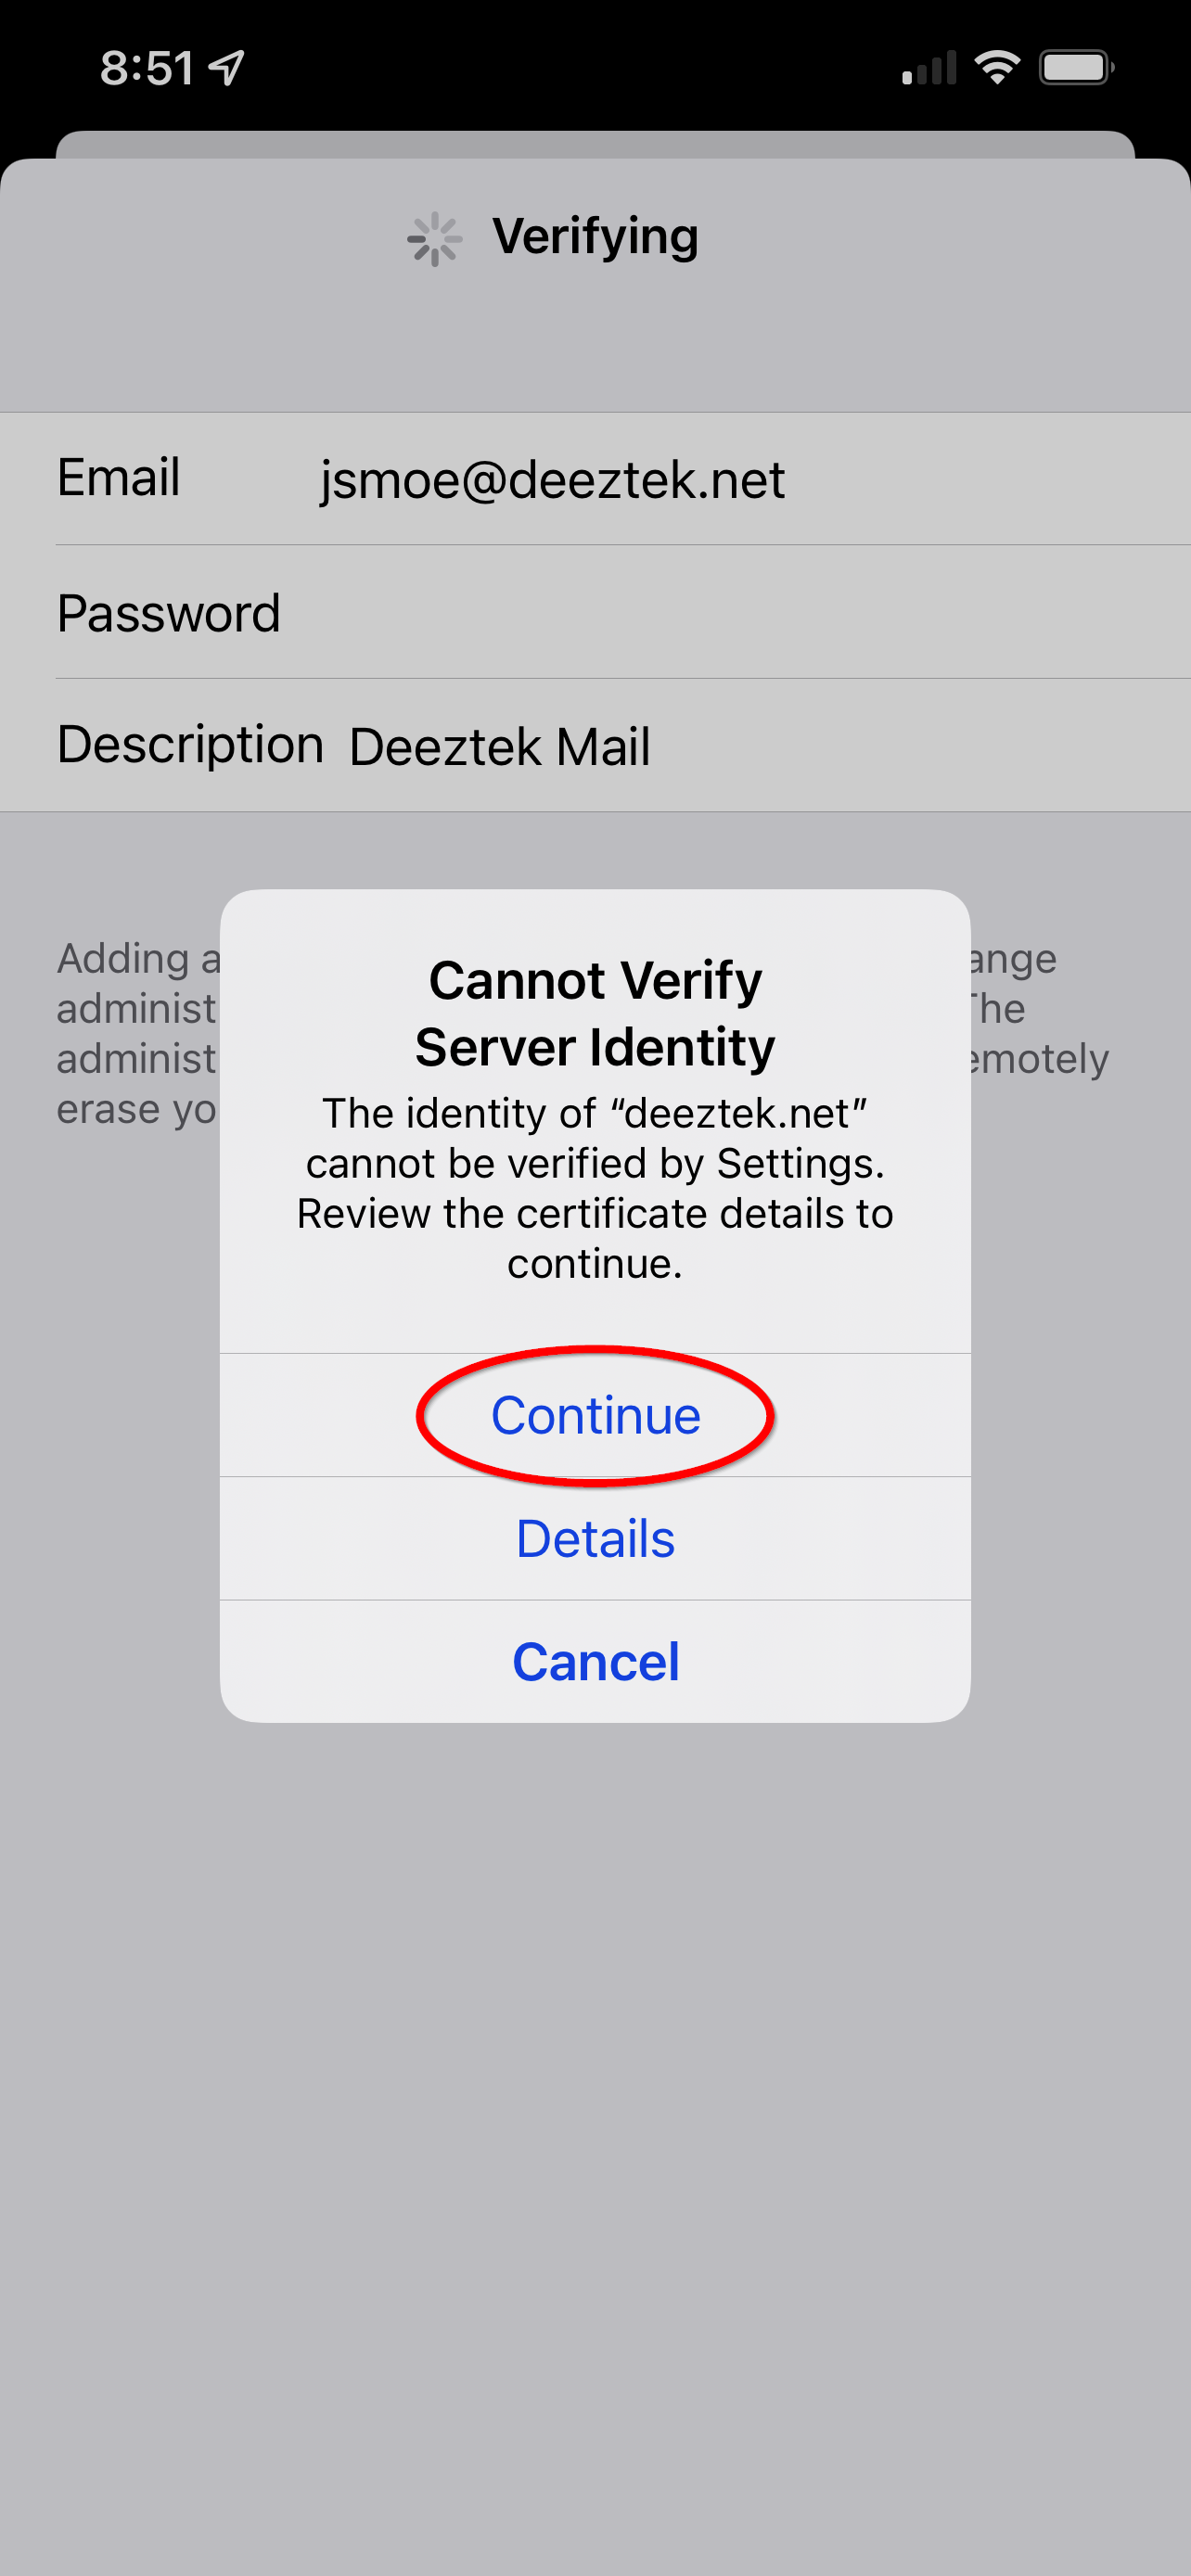
If you receive the below warning please select "Continue."
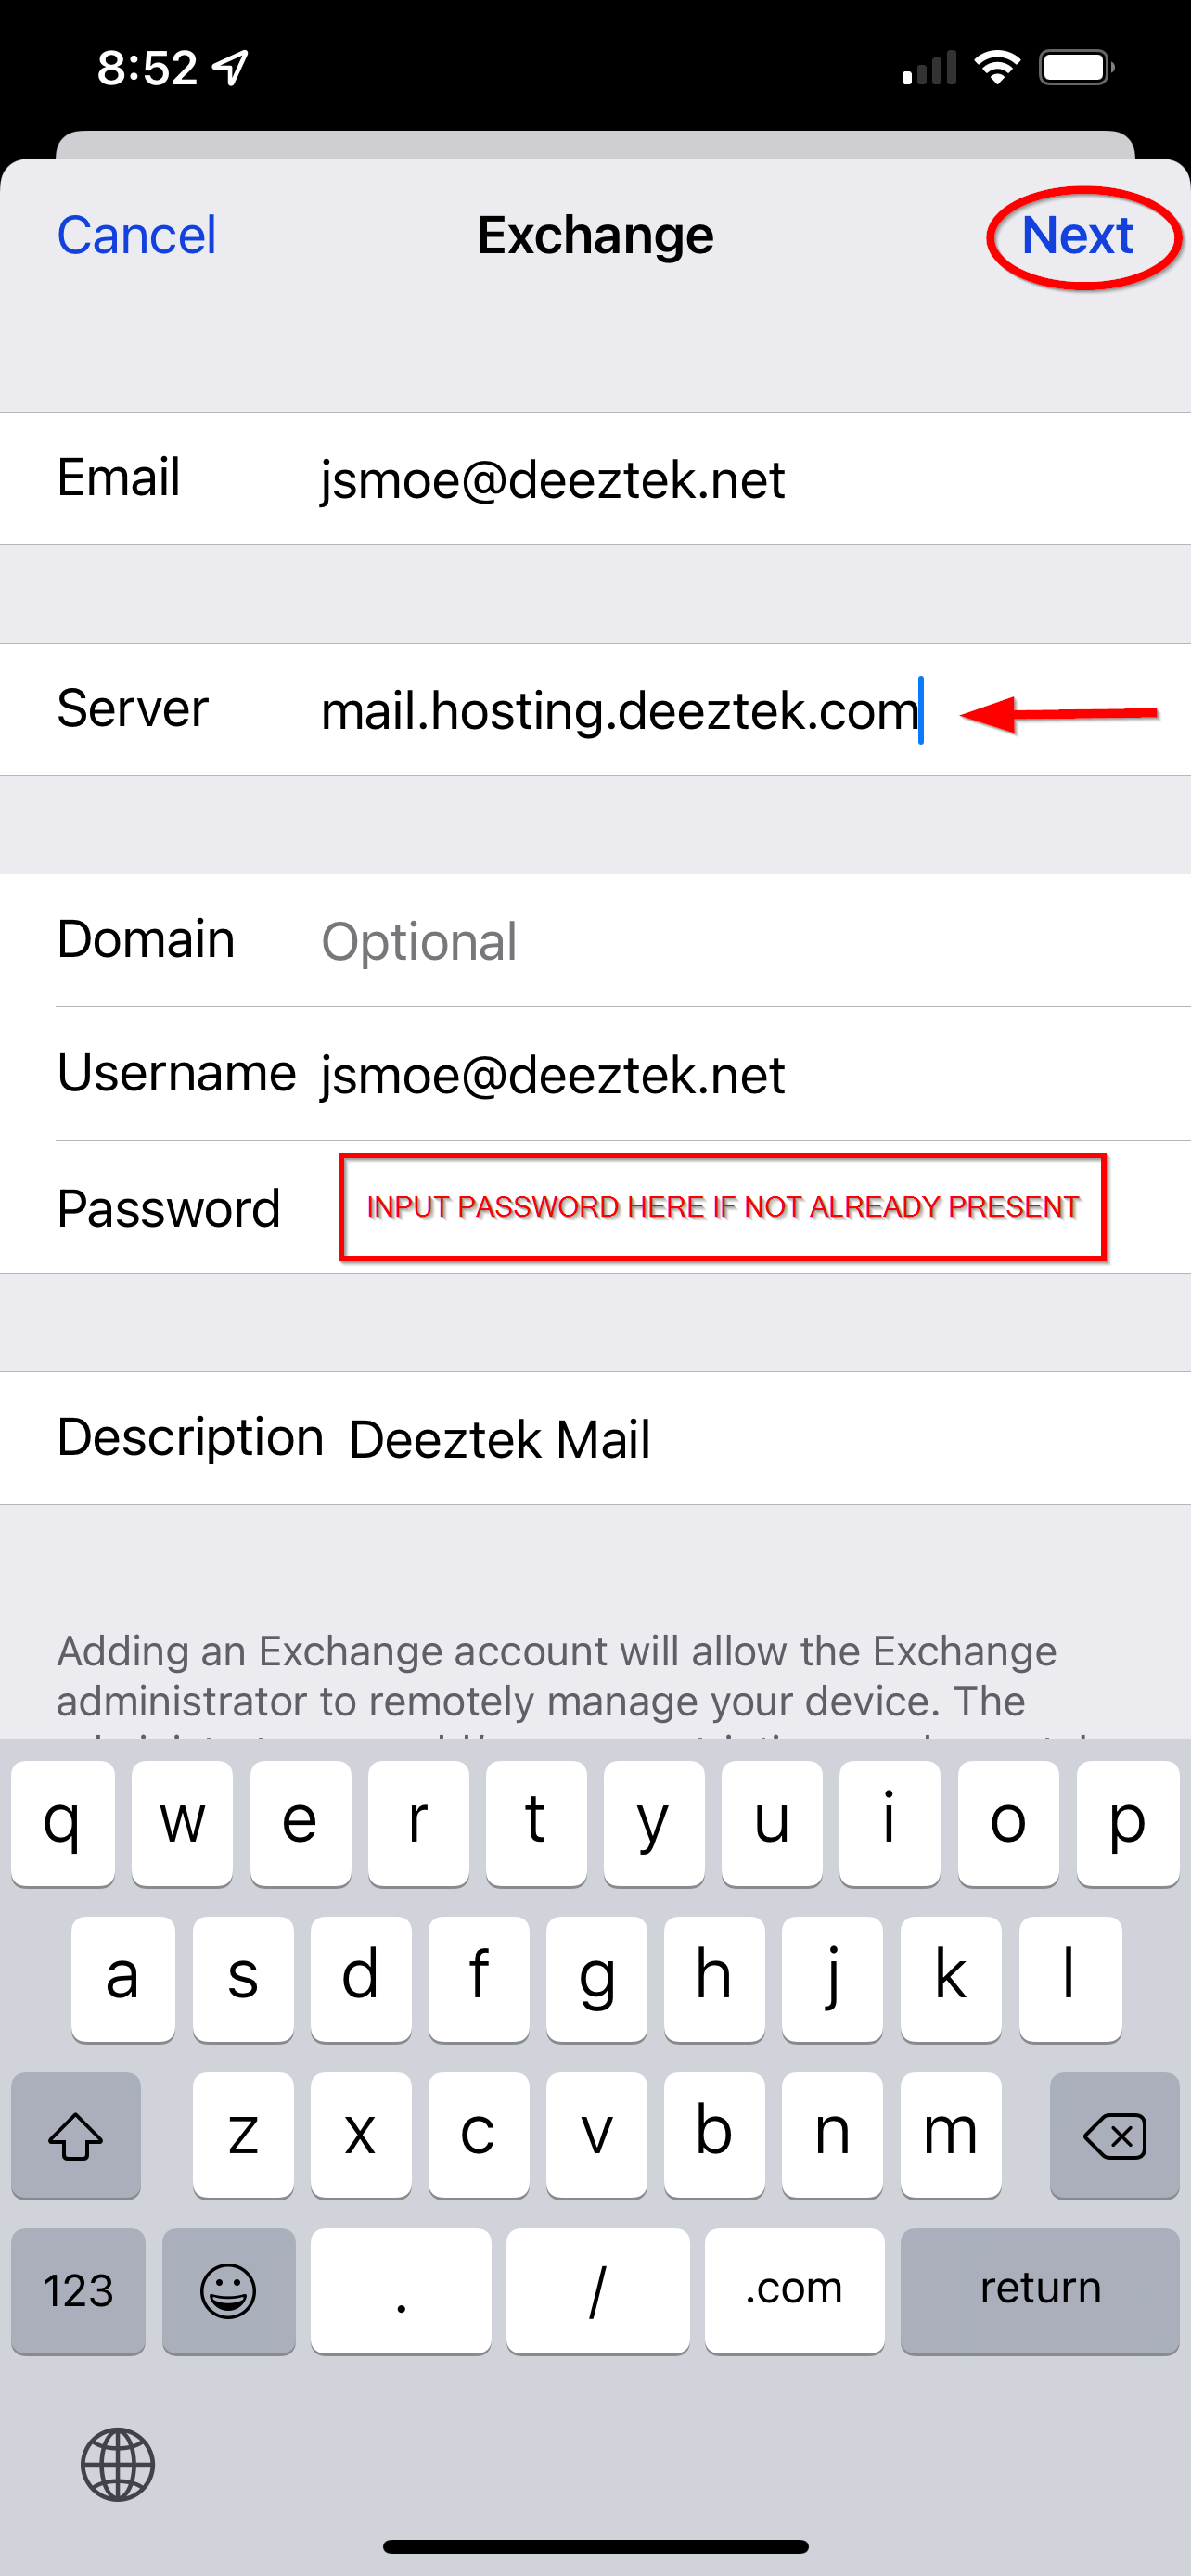
Input the address as shown in the "Server" field and verify that other account details are correct as configured so far, if the "Password" field is blank you will need to input your password again. We finished select "Next":
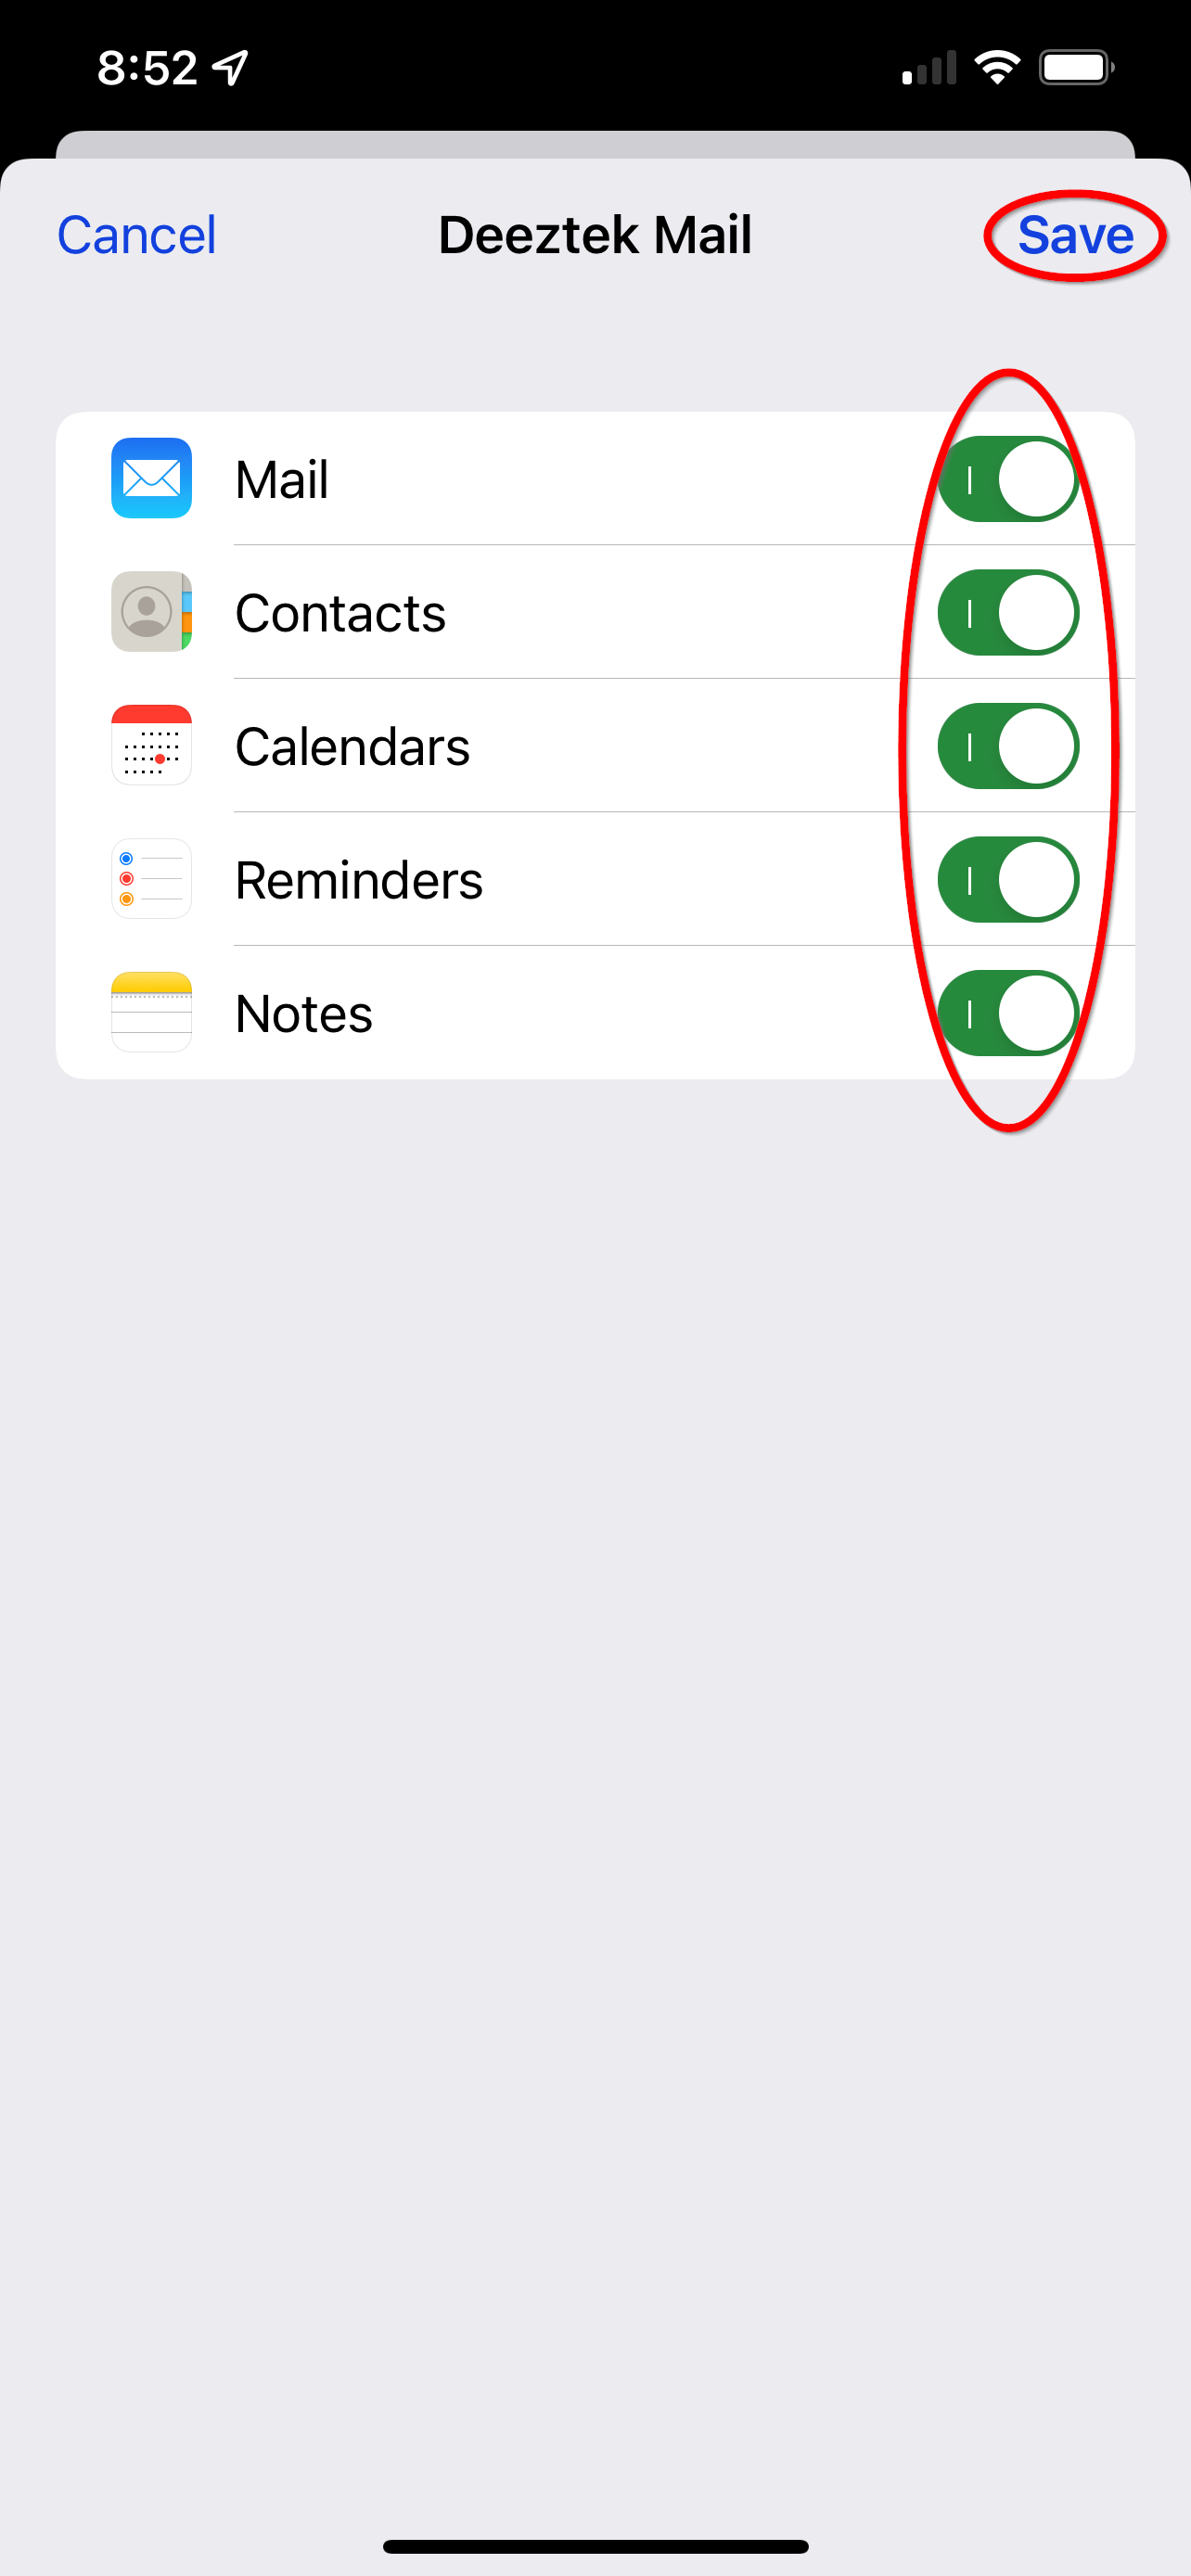
Move the sliders to on or off for each item your would like to synchronize for this mail account. When finished select "Save" and your account setup is complete: