Zammad Monitoring with Zabbix
Zammad Configuration
Click on Settings --> Users --> New User and create a new user for Zabbix by filling out FIRSTNAME, LASTNAME, EMAIL, PASSWORD and setting the PERMISSIONS to Agent (Figure 1):
Figure 1

Once the user is created, locate the user, click the 3 dots under ACTIONS column and click on View from user's perspective option from the corresponding menu (Figure 2):
Figure 2

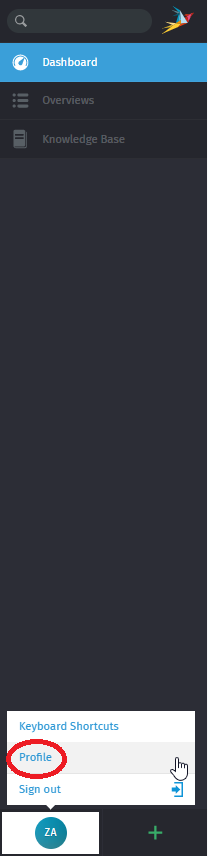
Click the user's initials on the bottom left of the screen and click on the Profile option from the corresponding menu (Figure 3):
Figure 3
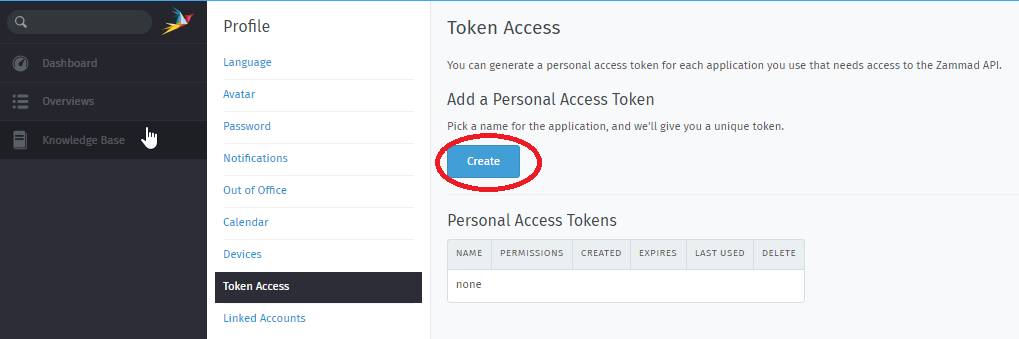
Under the Profile section, click Token Access --> Create (Figure 4):
Figure 4
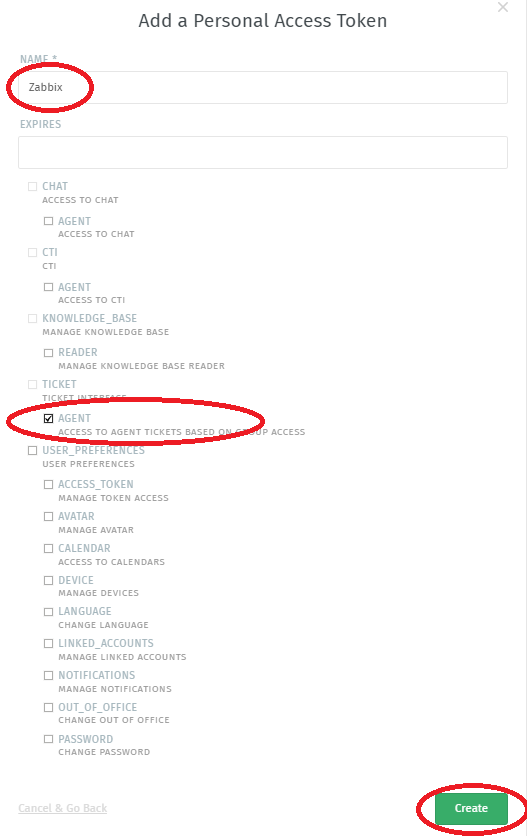
In the Add a Personal Access Token window, in the name field enter Zabbix, check AGENT under TICKET and click the Create button (Figure 5):
Figure 5
On the resulting Your New Personal Access Token window, ensure you copy the token and click the OK, I've copied my token button (Figure 6):
Figure 6

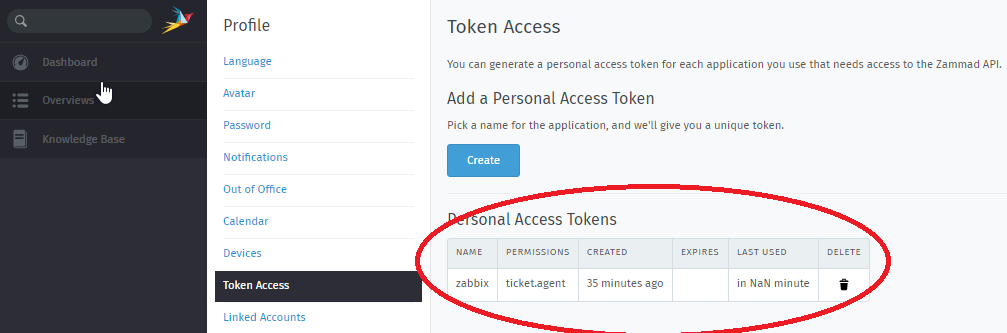
In the Token Access page, under the Personal Access Tokens you should see the following entry (Figure 7):
Figure 7
Zabbix Configuration
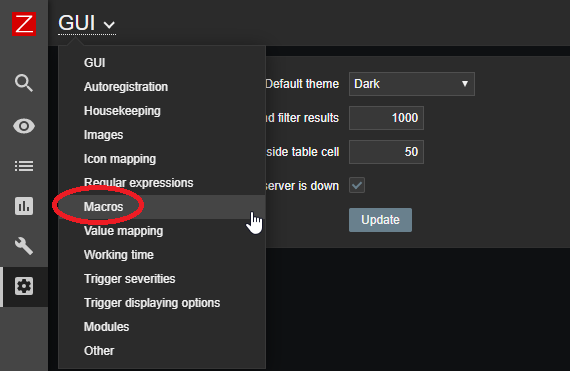
Click on Administration --> General -->GUI --> Macros (Figure 8):
Figure 8
Under the Macros page, click on the Add link to add a new Macro (Figure 9):
Figure 9

In the new Macro entry enter {$ZABBIX.URL} in the Macro field, enter the URL to the Zabbix serverand in the Value field and click the Update button below (Figure 10):
Figure 10

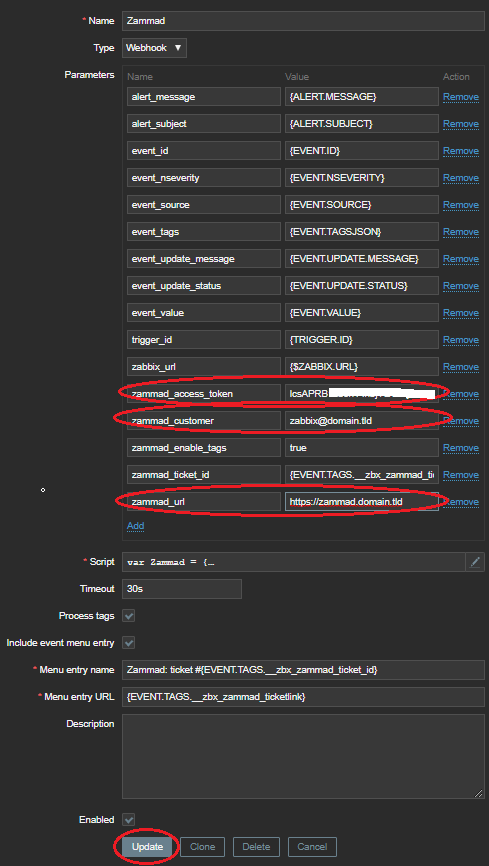
Click on Administration --> Media Types --> Zammad. In the zammad_access_token field enter the Personal Access Token you created earlier the Zammad, in the zammad_url field enter the the URL to your Zammad installation, in the zammad_customer field enter the e-mail address of the Zammad user you created earlier and click the Update button (Figure 11):
Figure 11
Click on Administration --> Users --> Zabbix-User (where Zabbix-User is a user already created in Zabbix). Once in the User page, click on Media and then click the Add button (Figure 12):
Figure 12

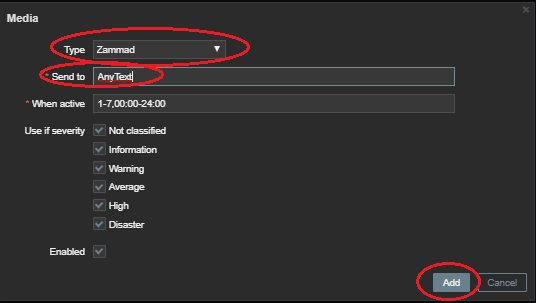
In the Media window, in the Type field, select Zammad, in the Send to field enter AnyText (this field is not used but it's required to be filled in) and click the Add button (Figure 13):
Figure 13
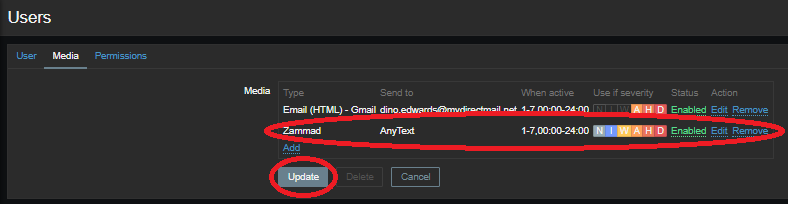
Back in Users --> Media , you should see the newly added Zammad media type. Ensure you click the Update button to save your changes (Figure 14):
Figure 14