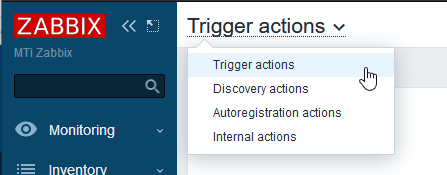
Configure Zabbix Docker
Configure Zabbix Server to point to zabbix-agent container
Figure 1
-
Clear 127.0.0.1 from IP address field
-
Enter zabbix-agent in the DNS name field
-
Set Connect to field to DNS
-
Click the Update button (Figure 2)
Figure 2

Configure Zabbix Server Timezone
Edit /opt/zabbix-docker/.env_web uncomment the following line:
#PHP_TZ=Europe/Riga
PHP_TZ=America/New_York
Configure Zabbix Server Server Name
Edit /opt/zabbix-docker/.env_web and set the following line:
ZBX_SERVER_NAME=Composed installation
to a server name that you like (Example: ZBX_*SERVER_*NAME=Widgets, Inc)
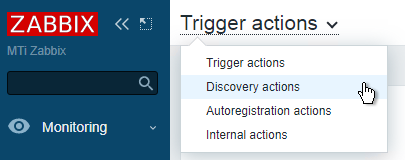
Configure Zabbix Auto Discover
Figure 3
-
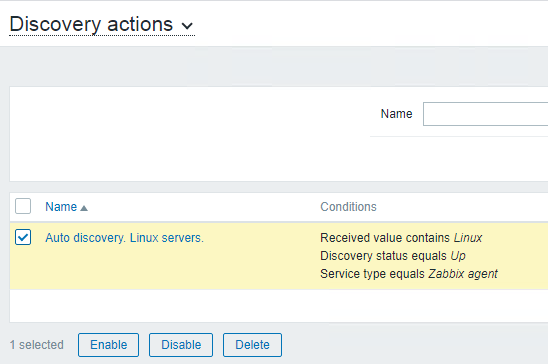
Select Auto discovery. Linux servers and click Enable (Figure 4) to enable Linux hosts auto discovery
Figure 4
Enable Zabbix Notifications
Figure 5
-
Ensure you have already configured notifications under Administration --> Media types.
-
Click the Disabled link under the Status column in the Report problems to Zabbix administrators item in order to change the status to Enabled (Figure 6).
Figure 6

Enable Zabbix FreeNAS Monitoring
-
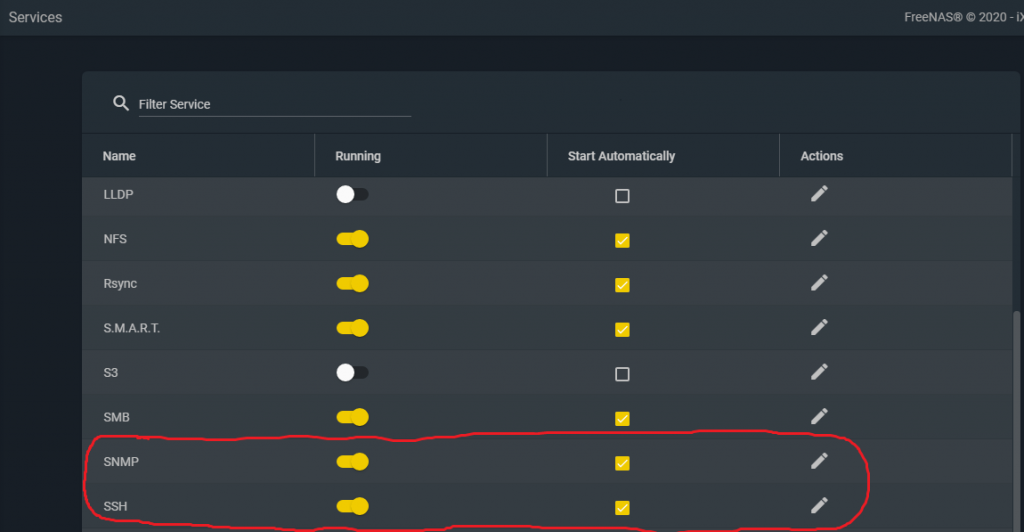
On FreeNAS server enable SNMP by going to Services --> SNMP and set it to Running and Start Automatically and enable SSH by going to Services --> SSH and set it to Running and Start Automatically (Figure 7).
Figure 7
-
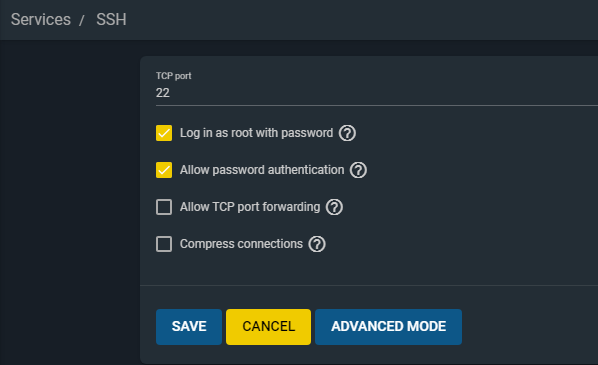
On FreeNAS server, under Services, click on SSH --> Actions and ensure Log in as root with password and Allow password authentication checkboxes are checked and click the Save button (Figure 8).
Figure 8
-
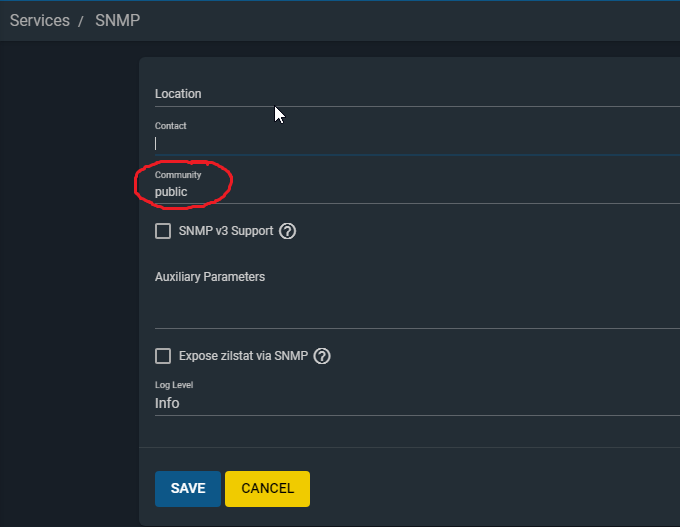
On FreeNAS server, under Services, click on SNMP --> Actions and note the Community string (default is public) or change as required and optionally set the Log Level to Info if you wish to get more information out of FreeNAS and click the Save button (Figure 9).
Figure 9
-
Using WinSCP or scp download the following file from the FreeNAS server:
/usr/local/share/snmp/mibs/FREENAS-MIB.txt
-
Upload the FREENAS-MIB.txt file to the Zabbix Docker server in the following directory:
/opt/zabbix-docker/zbx_env/var/lib/zabbix/mibs
-
Restart the Zabbix docker stack:
cd /opt/zabbix-docker && docker-compose down
cd /opt/zabbix-docker && docker-compose up -d
-
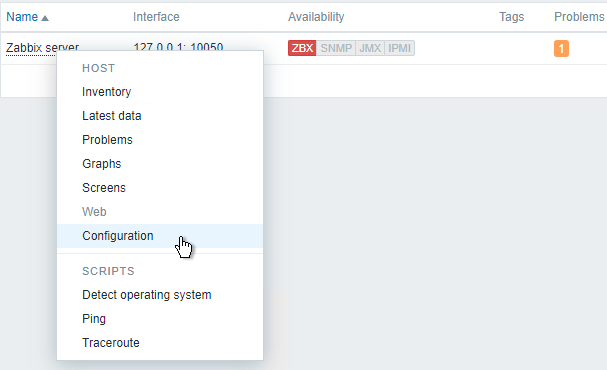
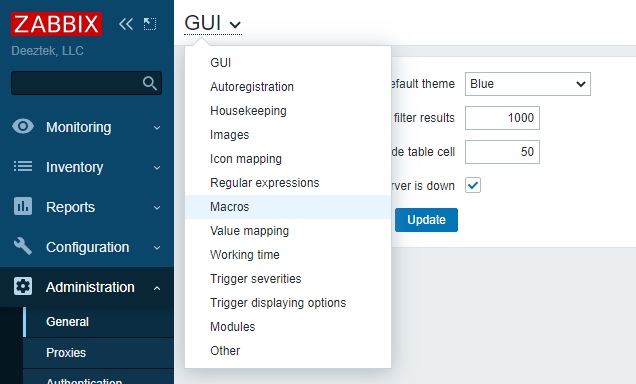
On the Zabbix server navigate to Administration --> General --> GUI drop-down --> Macros (Figure 10)
Figure 10
-
Ensure the Value field of the {$SNMP_COMMUNITY} Macro is set to public or whatever value you set the FreeNAS Community string from above and click the Update button (Figure 11).
Figure 11

-
Using a web browser download the following templates from Zabbix Share:
SNMP Intefaces discovery
SNMP Interfaces discovery
SNMP Generic
FreeNAS 11 SNMP
-
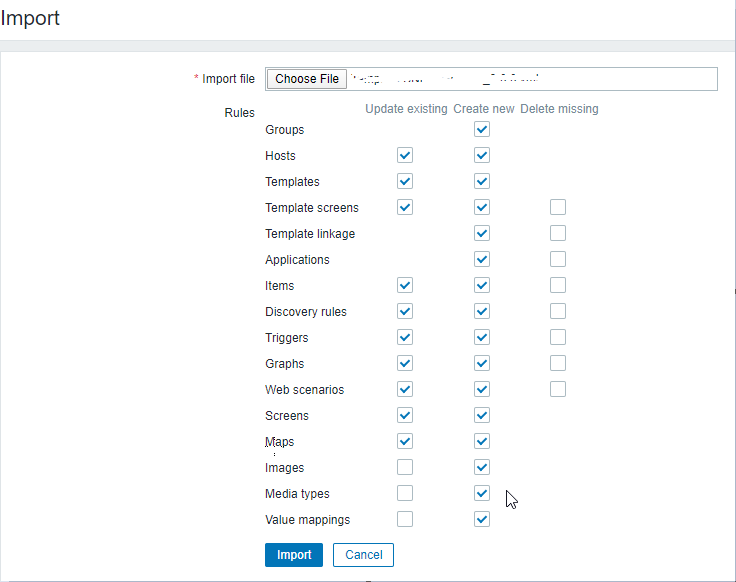
On the Zabbix server navigate to Configuration --> Templates --> Import and import each of the templates you downloaded above ensuring the Rules are set like below before each import (Figure 12):
Figure 12
-
On the Zabbix server navigate to Configuration --> Hosts --> Create Host
-
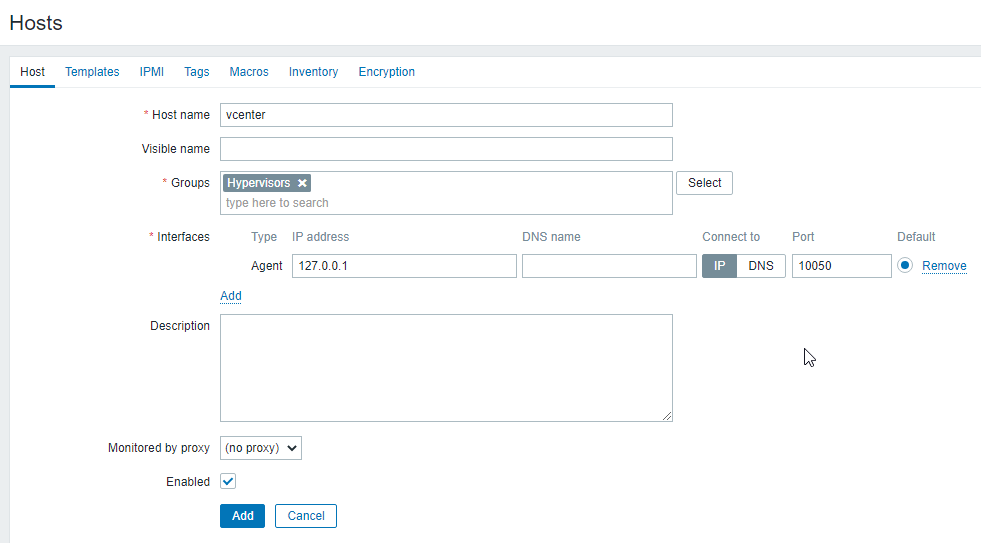
In the Host tab, fill out the Host name, groups and interfaces where 192.168.xxx.xxx is the IP of your FreeNAS host (Figure 13)
Figure 13

-
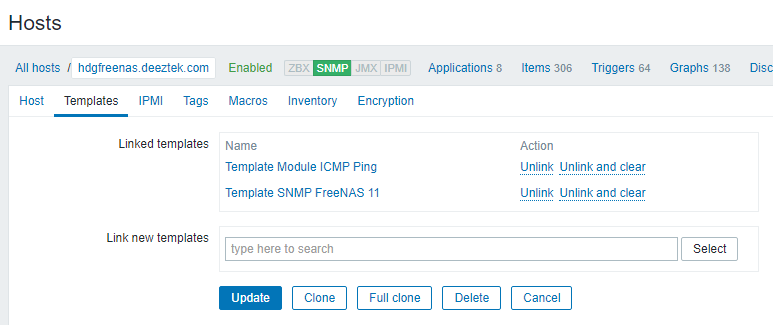
In the Templates tab, ensure you link the Template Module ICMP Ping and the Template SNMP FREENAS 11 templates and click the Update button (Figure 14)
Figure 14
-
Wait 10-15 minutes before Zabbix starts pulling data from the FreeNAS server. If successful, Monitoring --> Hosts should show the FreeNAS server listed with SNMP turned green (Figure 15)
Figure 15

Enable Zabbix VMware Monitoring
Original Guide URL:
https://bestmonitoringtools.com/vmware-monitoring-with-zabbix-esxi-vcenter-vm-vsphere/
-
Enable (Remove the # from front of each line) on the following entries in /opt/zabbix-docker/.env_srv and save the file:
ZBX_STARTVMWARECOLLECTORS=3
ZBX_VMWAREFREQUENCY=60
ZBX_VMWAREPERFFREQUENCY=60
ZBX_VMWARECACHESIZE=128M
ZBX_VMWARETIMEOUT=120
Restart the Zabbix docker stack:
cd /opt/zabbix-docker && docker-compose down
cd /opt/zabbix-docker && docker-compose up -d
Figure 16
-
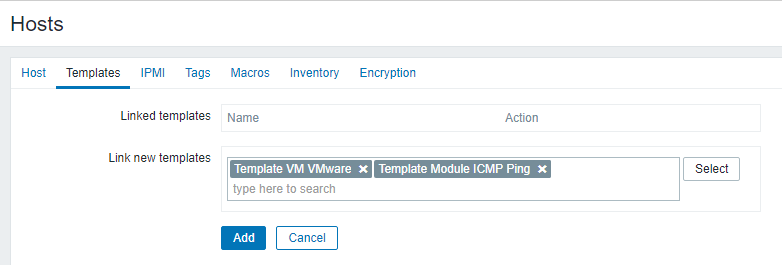
Click the Templates tab and select Template VM VMware and Template Module ICMP Ping templates (Figure 17)
Figure 17
-
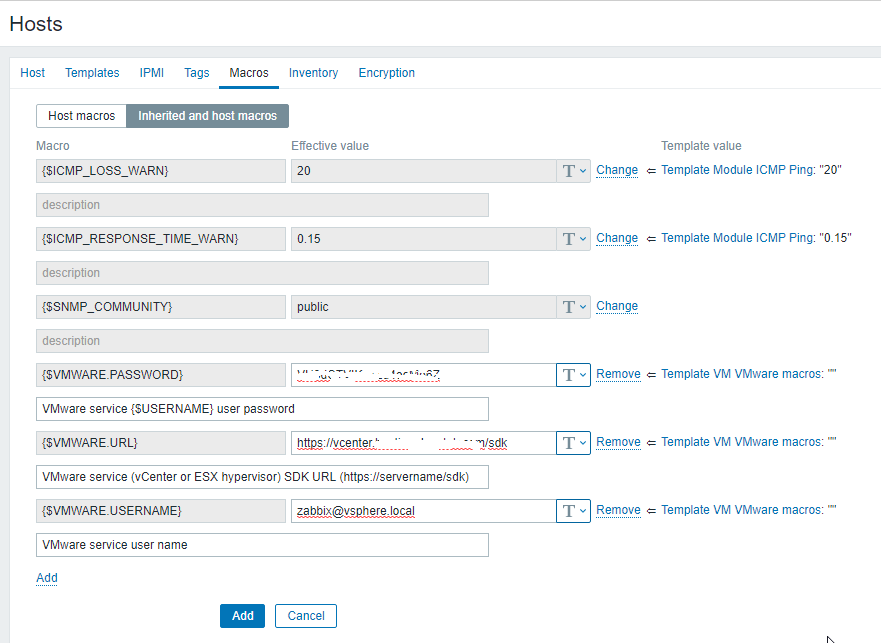
Click the Macros tab and then click Inherited and host macros button.
-
Click the Change link next to each of the following fields and fill out the value of each field with the Password, URL (https://vcenter/sdk) and Username of your Vcenter/VMware server and click the Add button (Figure 18):
{$VMWARE.PASSWORD}
{$VMWARE.URL}
{$VMWARE.USERNAME}
Figure 18
-
VMware/Vcenter discovery can take hours to complete.
-
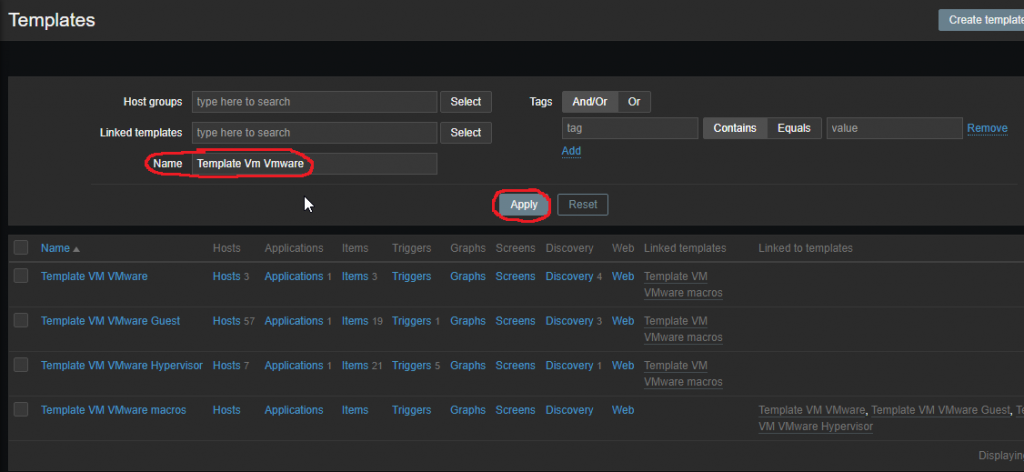
Navigate to Configuration --> Templates. In the Name field enter Template Vm Vmware and click the Apply button to locate the Template Vm Vmware template (Figure 19):
Figure 19
-
On the Template Vm Vmware entry click on the Discovery link (Figure 20):
Figure 20

-
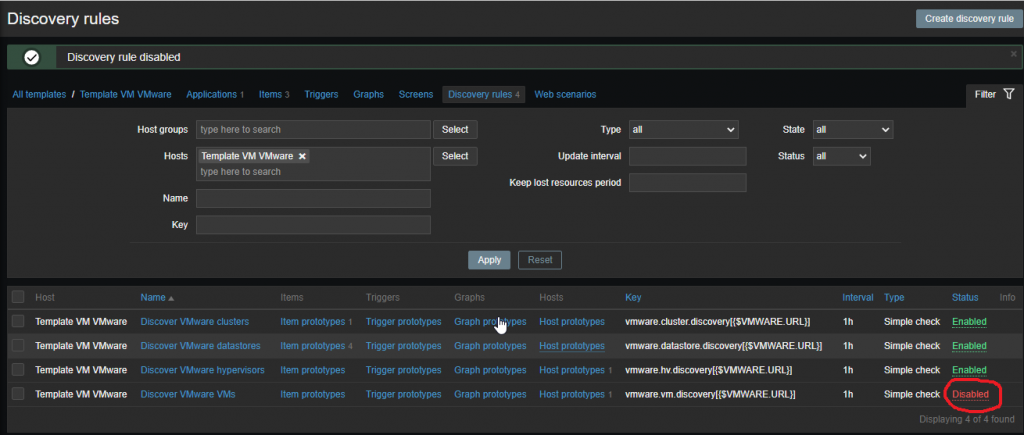
On the Discovery rules screen, click on the Enabled link on the Discover Vmware VMs entry to change the status to Disabled (Figure 21):
Figure 21
-
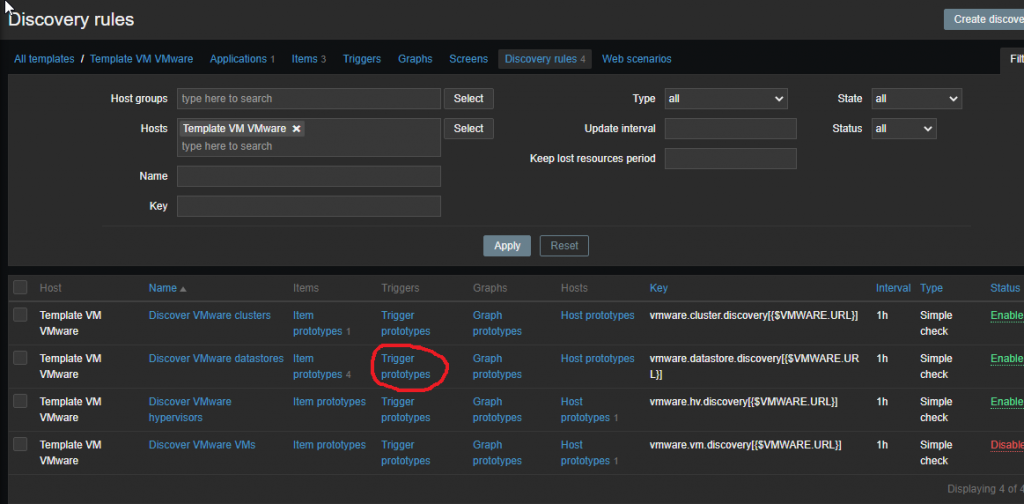
Next, click on the Trigger prototypes on the Discover VMware datastores entry (Figure 22):
Figure 22
-
On the Trigger prototypes screen, click the Create trigger prototype button (Figure 23):
Figure 23

-
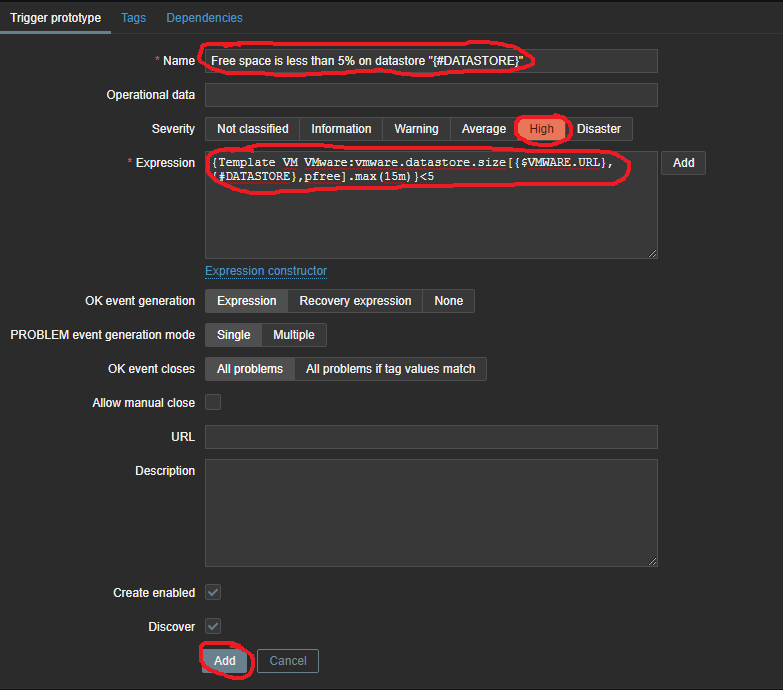
On the Trigger prototype screen, in the Name field enter the following:
Free space is less than 5% on datastore "{#DATASTORE}"
-
In the Severity field set it to High
-
In the Expression field enter the following:
{Template VM VMware:vmware.datastore.size[{$VMWARE.URL},{#DATASTORE},pfree].max(15m)}<5
Figure 24