Zammad Monitoring with Zabbix
Zammad Configuration
Click on Settings --> Users --> New User and create a new user for Zabbix by filling out FIRSTNAME, LASTNAME, EMAIL, PASSWORD and setting the PERMISSIONS to Agent (Figure 1):
Figure 1

Once the user is created, locate the user, click the 3 dots under ACTIONS column and click on View from user's perspective option from the corresponding menu (Figure 2):
Figure 2

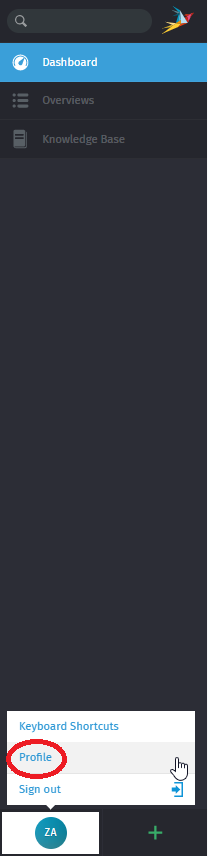
Click the user's initials on the bottom left of the screen and click on the Profile option from the corresponding menu (Figure 3):
Figure 3
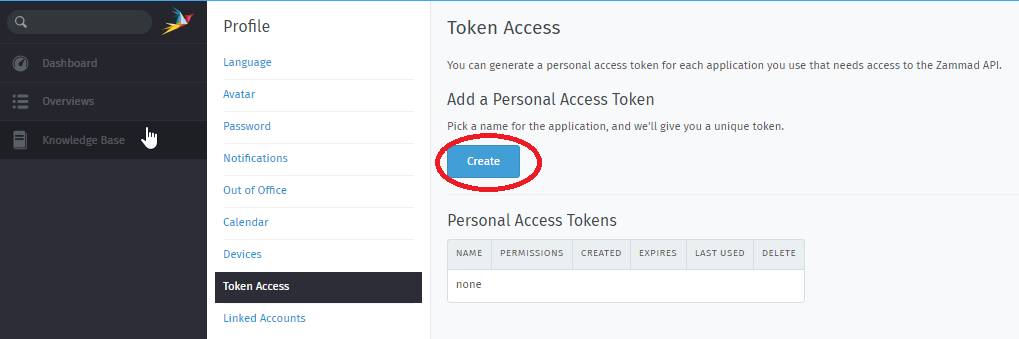
Under the Profile section, click Token Access --> Create (Figure 4):
Figure 4
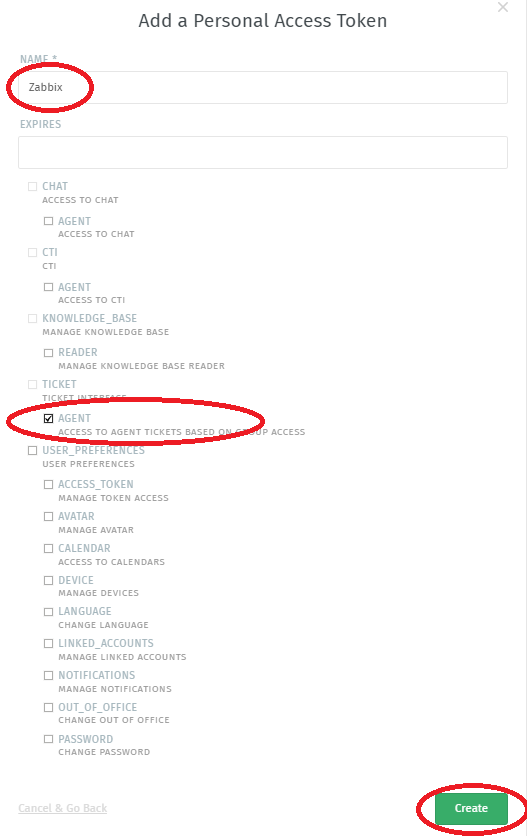
In the Add a Personal Access Token window, in the name field enter Zabbix, check AGENT under TICKET and click the Create button (Figure 5):
Figure 5
On the resulting Your New Personal Access Token window, ensure you copy the token and click the OK, I've copied my token button (Figure 6):
Figure 6

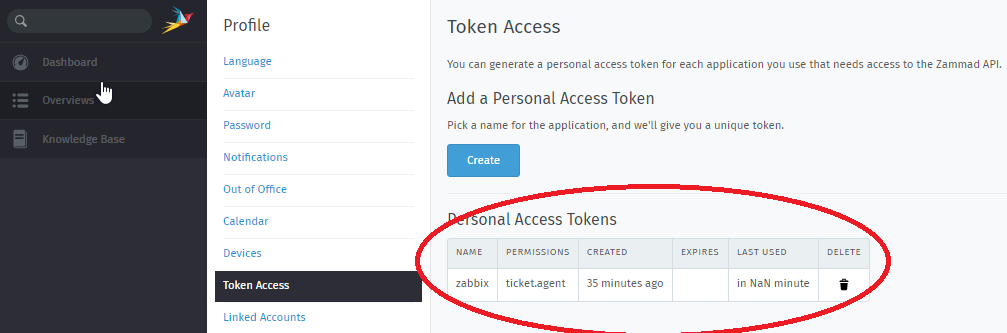
In the Token Access page, under the Personal Access Tokens you should see the following entry (Figure 7):
Figure 7