Truenas Monitoring with Zabbix
Enable SNMP on Truenas Host
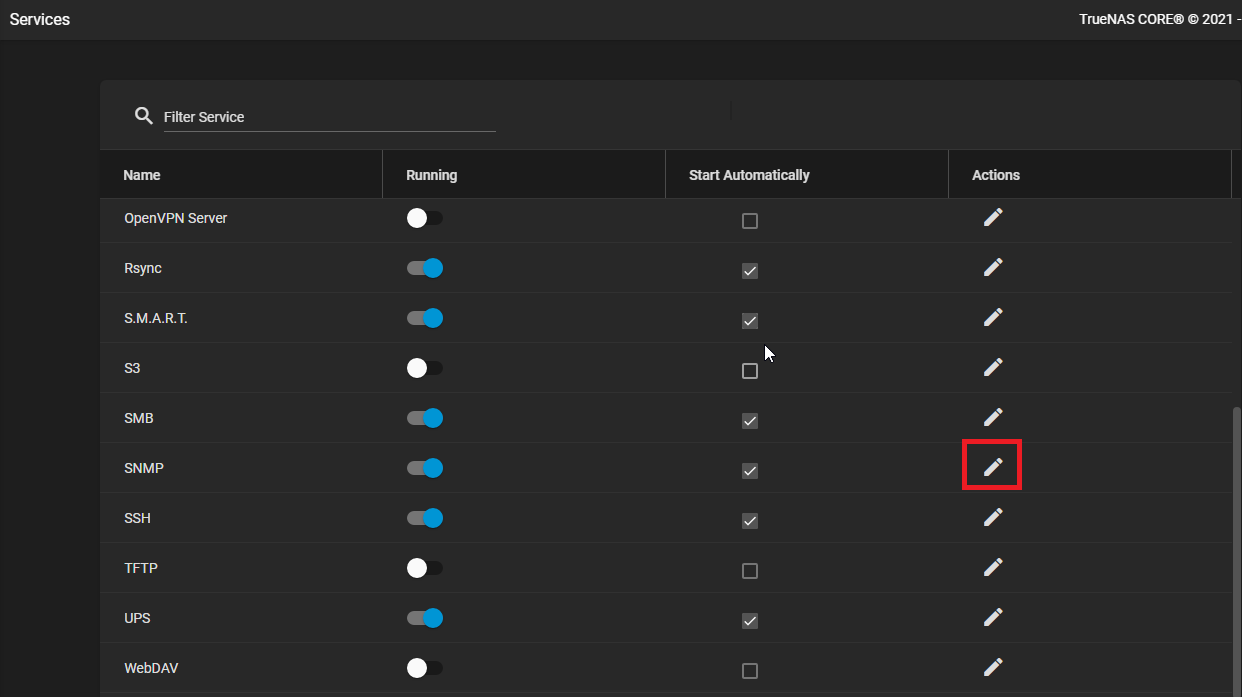
- Login to your Truenas host and navigate to Services.
- Locate the SNMP service and click the
 icon (Figure 1).
Figure 1
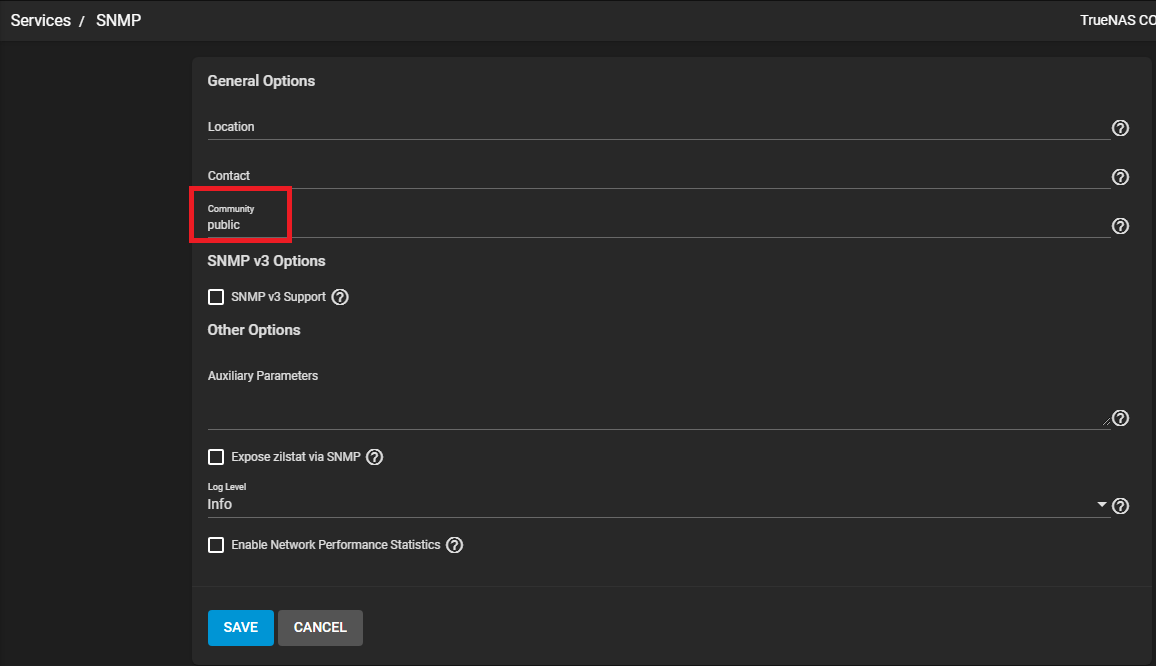
- Take note of the Community value which by default should be set to public (Figure 2) and click the CANCEL button to go back to Services.
Figure 2
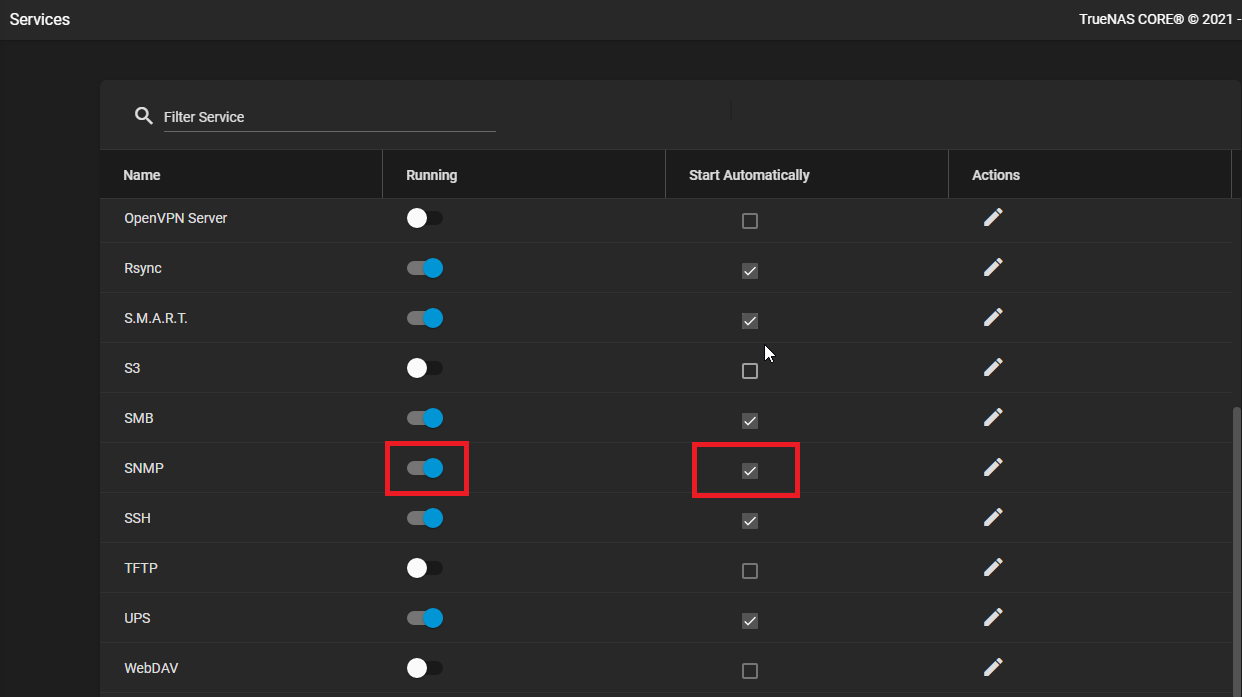
- In the SNMP service, ensure the Start Automatically is checked and slide the Running slider to the right so that it turns blue to indicate the service is running (Figure 3).
Figure 3
LoadImport the SNMP Freenas 11 Template into Zabbix Server
- Download the template_freenas_11_snmp.xml template from this article or download it from the Zabbix Community Templates Github page.
- On your Zabbix server navigate to Configuration ---> Templates --> Import.
- On the Import page, click the Choose File button and navigate to the location of the downloaded template_freenas_11_snmp.xml file and click Open.
- Back to the Import page, click the Import button (Figure 4).
Figure 4

Add Truenas Host to Zabbix server
- On your Zabbix server
andnavigate to Configuration ---> Host ---> Create Host. - In the Host name field enter the name of your Truenas host
- Set the Groups field to a an existing group or create a new one.
- In the Interfaces section add the IP address of your Truenas host in the Agent IP address field
- Click the Add link and in the resultant menu select the SNMP option (Figure 4).
Figure 4

- In the SNMP field enter the IP address of your Truenas host again.
- Ensure the SNMP version field is set to SNMPv2.
- In the SNMP community field enter the community value you got from the Truenas SNMP service above (Default: public) (Figure 5).
Figure 5

Click the Templates link on top of the screen