Reduce Virtual Machine Disk Size (VMDK) on VMWare ESXi
Original Article: https://woshub.com/shrinking-vmdk-virtual-disk-vmware-esxi/
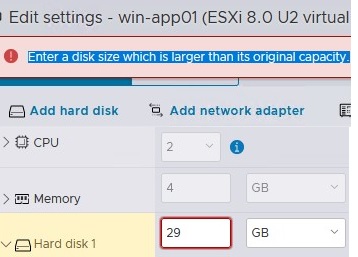
In this article, we will look at how to reduce the size of a virtual machine’s hard disk (VMDK) in VMware ESXi. From the vSphere Client GUI, you cannot reduce the size of a virtual disk (only the option to increase the VM disk size is available). An error occurs when you try to specify a smaller VM disk size: Enter a disk size which is larger than its original capacity.
Before you can reduce the size of the virtual disk on the VMWare ESXi datastore:
cp vmname.vmdk backup_vmname.vmdk
cp vmname-flat.vmdk backup_vmname-flat.vmdk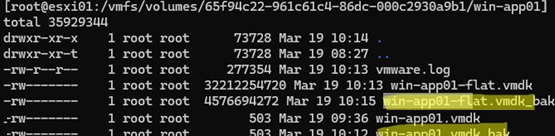
Reducing the virtual disk file in VMware is a two-step process:
How to Shrink Disk Partition in the Guest OS
First of all, reduce the size of the disk partition in the guest operating system
If the VM has a Windows guest OS installed:
diskmgmt.msc);
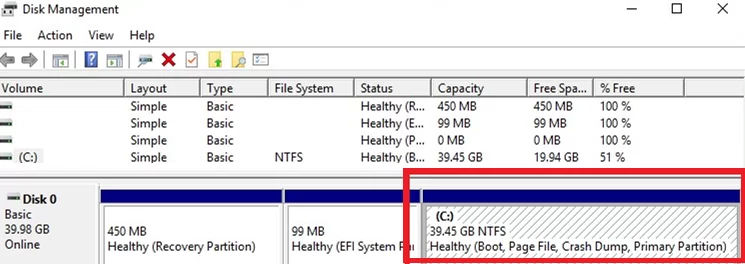
In this case, the WinRE Recovery Partition is to the right of the partition we want to shrink. To shrink the partition in Windows, there should be no other partitions to the right of the partition you are trying to shrink. You need to either move the winre.wim recovery image from a separate partition to the system one, or move the recovery partition to the beginning of the partition table (both options are described in detail in the post: Cannot extend volume blocked by a recovery partition);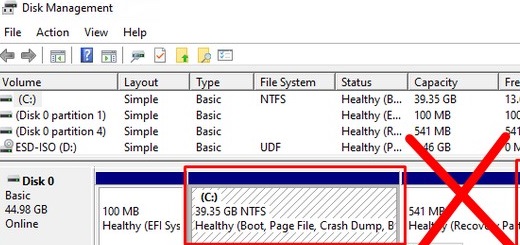 You can now reduce the size of the main partition. In modern versions of Windows, you can reduce the size of the partition without rebooting; in older versions, you have to use the
 sdelete tool. Click on the partition and select Shrink Volume;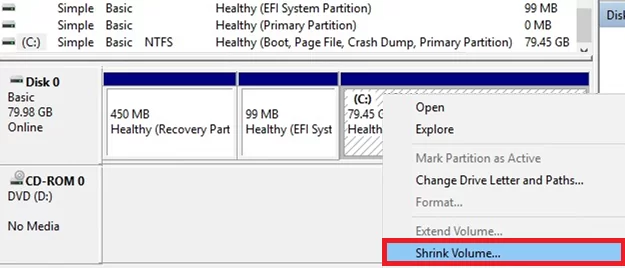 Suppose you need to reduce VM disk size by 40GB. In the Enter the amount of space to shrink in MB box, type 40960 MB (
40 GB x 1024) and click Shrink;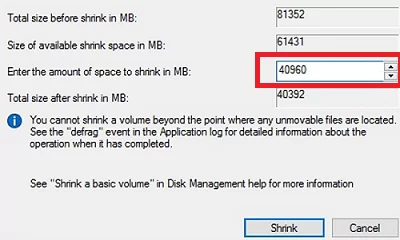 When the shrink task is complete, 40GB of unallocated space will appear to the right of your main partition.
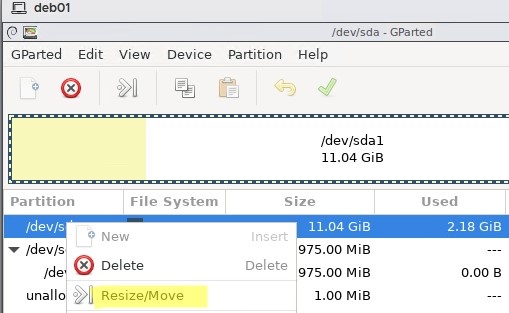
For the Linux VMs, you can boot the virtual machine from a GParted LiveCD (GNOME Partition Editor) if you need to reduce the size of the root partition. Shrink partitions using the GParted GUI’s Resize/Move menu. Move partitions if necessary. To apply changes, select Edit -> Apply all operations. The tool will resize partitions and reduce the file system using Rezise2fs.
Boot the Linux guest VM and check that everything is working correctly.
Reduce the Size of a VMware Virtual Machine Disk (VMDK)
You can now reduce the size of the VMDK file on the VMware VMFS file system.
cd /vmfs/volumes/datastore/test-VM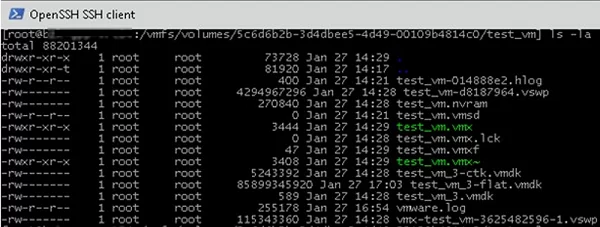 List the virtual disk configuration file (*.vmdk) using the cat command:
# cat test_vm_3.vmdkThe size of the vmdk disk is set in the #Extent description section (after the RW symbols). In this case, it is 167772160 (
80 GB *1024*1024*1024 / 512); 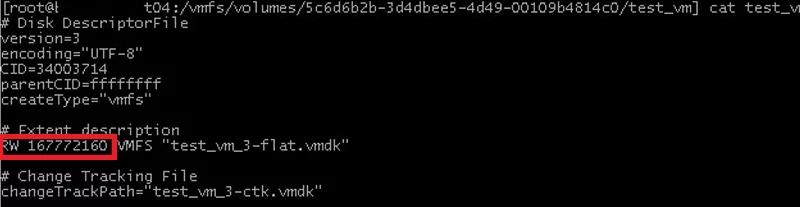 I want to reduce my VMDK disk by 40 GB. This means that I have to specify 83886080 in the Extent description section. This value is calculated as follows:
 167772160 (current disk size) – 83886080 (40 GB*1024*1024*1024 / 512);
Edit the virtual disk configuration file using vi: # vi test_vm_3.vmdk
Use the down arrow key to scroll to the line containing the disk size and press i (to edit it). Specify the new size of the virtual disk. Press ESC to exit the edit mode and then type :wq -> Enter to save the changes; 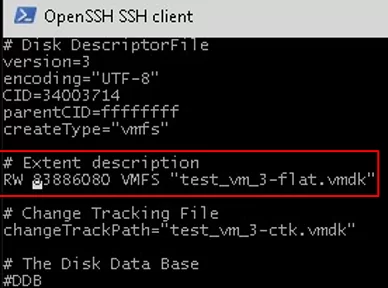 The remaining step is to migrate the VM to another datastore using Storage VMotion. The virtual machine properties will show the new virtual disc size after the virtual machine files are moved.
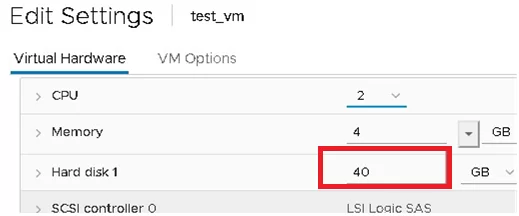
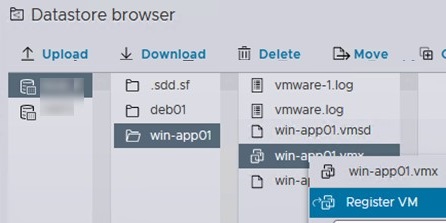
Then go to the Storage section, find the VMFS/NFS datastore where the VM is located -> click Datastore Browser, find the VM directory, click on the VMX file, and select Register.
Or you can clone the VMDK file using this command:
vmkfstools -i test_vm_3.vmdk test_vm_3_newsize.vmdk
Then delete the original VMDK file and clone the disk again, to revert to its original name:
rm test_vm_3.vmdk
rm test_vm_3-flat.vmdk
vmkfstools -i test_vm_3_newsize.vmdk test_vm_3.vmdk
Make sure that the new size of the virtual disk is now displayed in the VM properties.
Then start the VM, logon to the guest OS, and check that the unallocated space has disappeared, and the disk size has been reduced.
Shrink a VMDK Disk Using VMware vCenter Converter Standalone
You can reduce the size of virtual machine hard disks using the VMware vCenter Converter Standalone. This free GUI tool allows you to clone a source VM and set the size of the new disk to be smaller than the original (there must be free space on the guest file system).
Cons:
Pros:
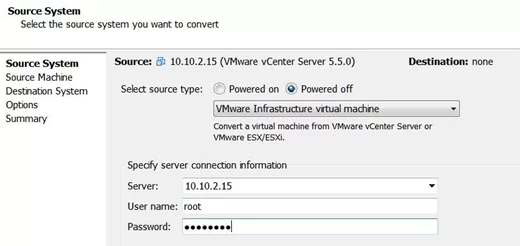
Run VMware Converter and specify the ESXi host or vCenter address.
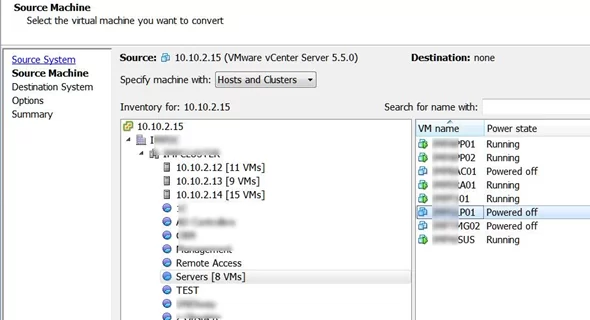
Select the source VM.
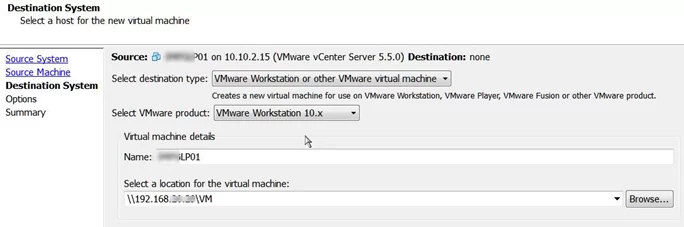
Set the virtual hardware settings for your new (destination) VM.
Go to the disk edit mode (Data to copy -> Edit).
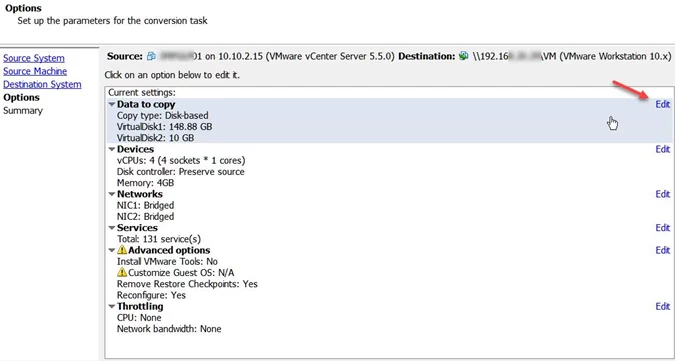
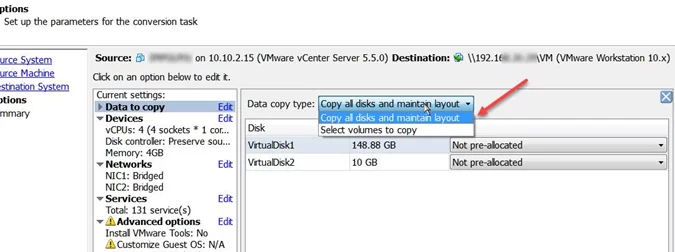
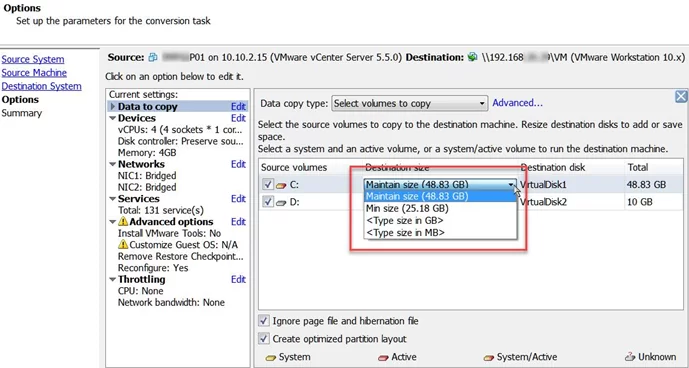
Select the copy mode: Select volumes to copy.
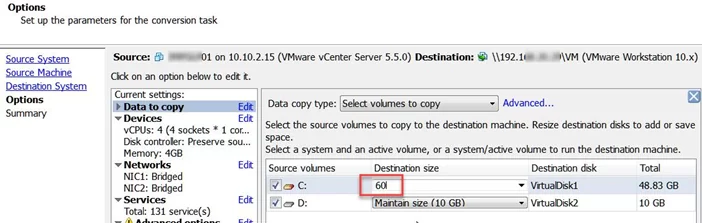
Specify the new virtual disk size for your new VM. In my example, 48 GB on the virtual disk is occupied by the guest OS, and the total disk size is 150 GB. We will reduce the size of the virtual disk to 60 GB.
Run the VM conversion process. When finished, turn off the source VM and power on the new one. Check that the virtual disk size has been reduced. The original VM can then be removed.