How to send/receive encrypted email from Microsoft Outlook
Introduction
An external user is someone who has their email hosted outside the domain and control of the Hermes Secure Email Gateway. For example, an external user would have their email hosted with an email service like Gmail, yahoo etc. Typically, this external user has the need to send/receive encrypted email with an internal user i.e. someone who is inside the domain and consequently the control of the Hermes Secure Email Gateway.
Prerequisites and Goals
-
The external user will be using Microsoft Outlook to send/receive email
-
The external user has been issued a secure email certificate from the Hermes Secure Email Gateway
-
The external user has installed the secure email certificate into their Microsoft Outlook
-
The internal user has sent a signed email to the external user and the external user has imported the internal user's certificate from that signed email into their Outlook contact for that internal user
-
The external user has configured their Outlook to send signed/encrypted email to the internal user
If all of the above sounds complicated, don't worry. This guide will walk you through every step of the way to get everything configured correctly.
Assumptions
For the purposes of this tutorial, we will use two email accounts. First, support@deeztek.com will be the internal user account i.e. someone inside the domain and control of the Hermes Secure Email Gateway and computerservices@gmail.com will be the external user account i.e. someone outside the domain and control of the Hermes Secure Email Gateway. The reason we make this distrinctiondistinction is because sending secure email from internal users is automatic, however sending secure email from external users requires configuring Outlook first.
This guide also assumes you have already received an email with an attached .pfx file. A .pfx file is nothing more than a password protected certificate that you have to install into your Outlook email client. In order to install the certificate, you must have the password which should had been given to you already.
Instructions
-
Open the email with the subject Your PFX Certificate File with the attached .pfx file (Figure 1)
Figure 1

-
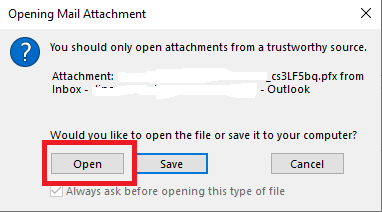
Double-click on the attached key.pfx file. If you get an opening attachment warning, click the Open button (Figure 2)
Figure 2
-
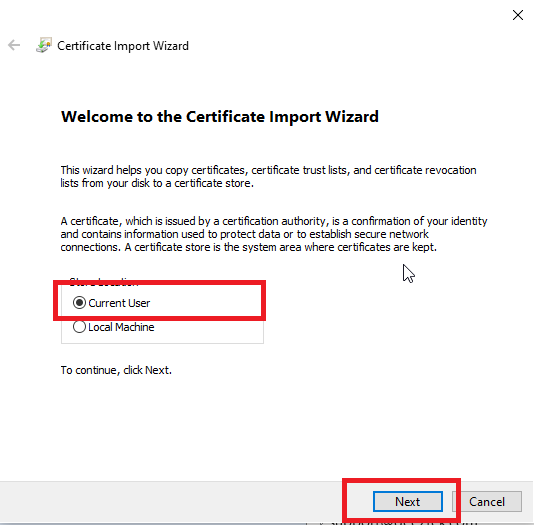
On the Certificate Import Wizard window, ensure Current User is selected and click the Next button (Figure 3)
Figure 3
-
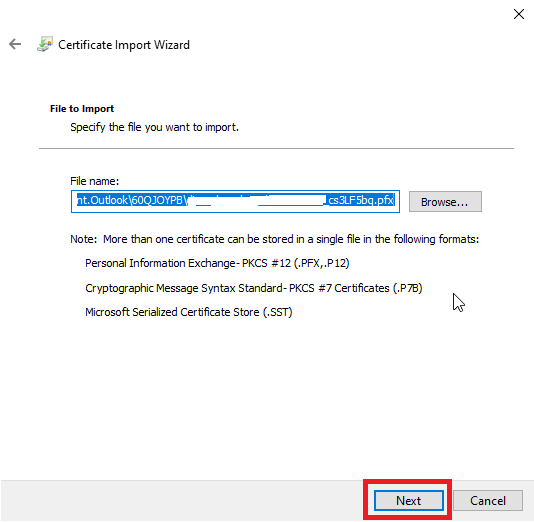
On the File to Import window, simply click the Next button again (Figure 4)
Figure 4
-
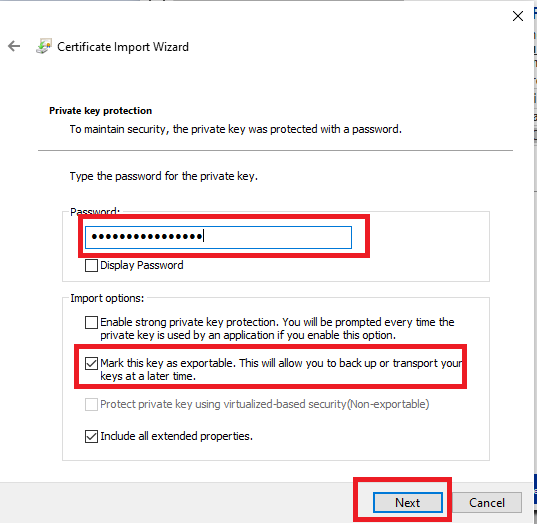
On the Private key protection window, enter the certificate password you were provided in the Password field, ensure Mark this key as exportable options is checked and click the Next button (Figure 5)
Figure 5
-
On the Certificate Store window ensure that Automatically select the certificate store based on the type of certificate is selected and click the Next button (Figure 6)
Figure 6

-
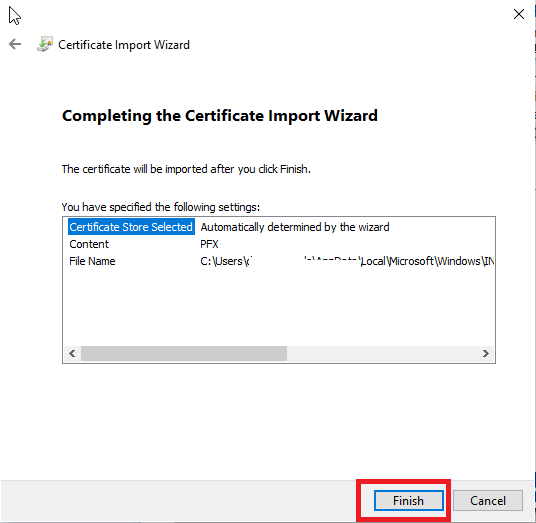
On the final Completing the Certificate Import Wizard window simply click the Finish button (Figure 7)
Figure 7
-
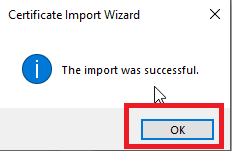
You should get a The Import was successful window. Click OK to close that window (Figure 8)
Figure 8
-
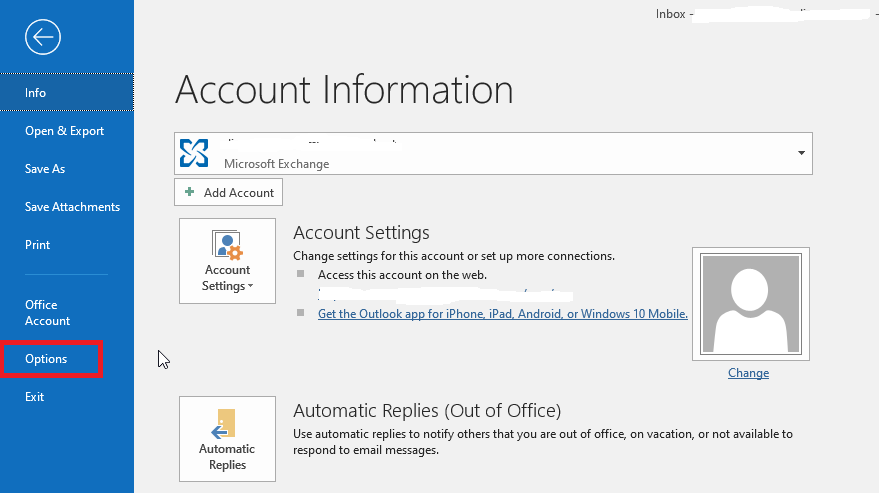
Next, back in your Outlook, click on File --> Options (Figure 9)
Figure 9
-
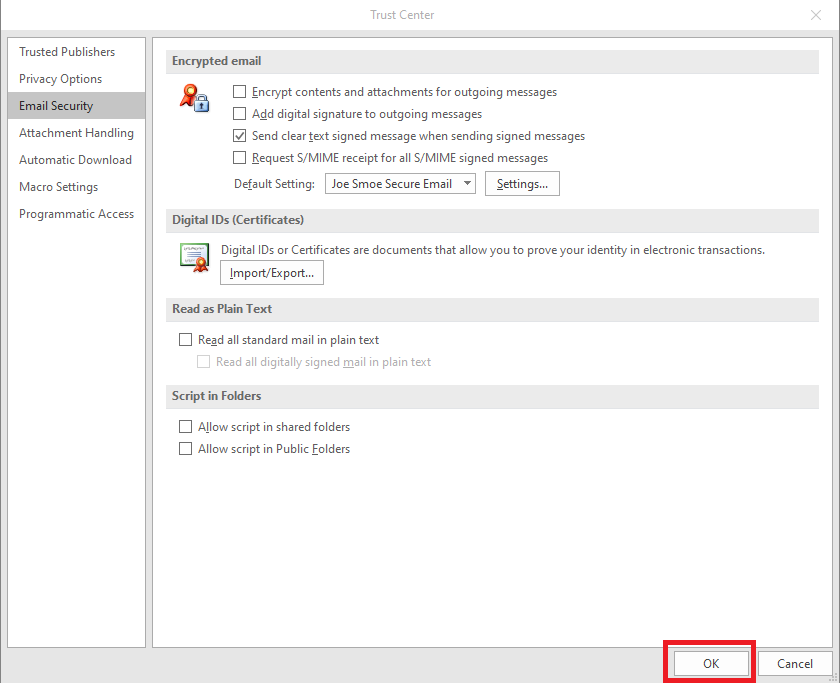
In the Outlook Options window, click on the Trust Center option on the left and then click on the Trust Center Settings button (Figure 10).
Figure 10

-
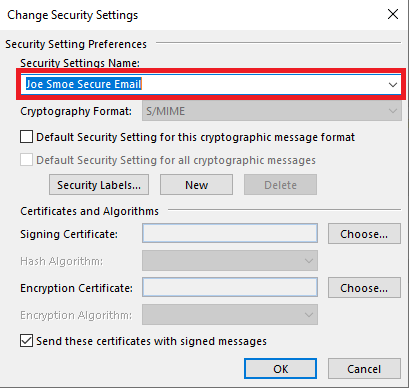
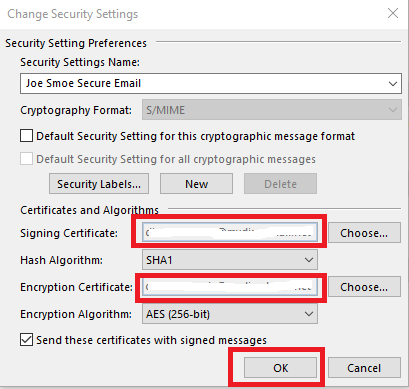
Next, inIn theChangeTrustSecurity SettingsCenter window, click on Email Security a under Encrypted email section click theChooseSettings button (Figure 11)
Figure 11
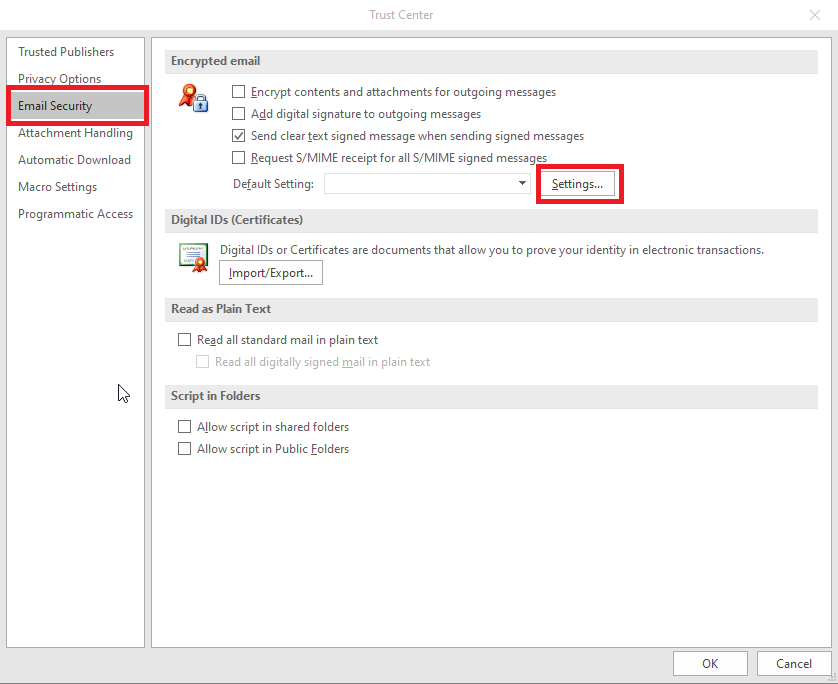
Figure 12
-
inclick on theConfirmChoose button on the Signing Certificate section (Figure 13).
Figure 13
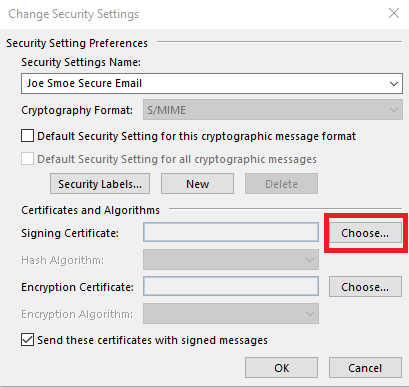
Figure 14

On the More choices list of certificates, select the certificate with your e-mail address, ensuring the Valid From field has an end date in the future and then click on the OK button (Figure 1215). It's possible you have more than one certificate installed in your machine, so you must ensure you select the correct certificate. If you are unsure, ask your for help with your IT department.
Figure 15
Figure 12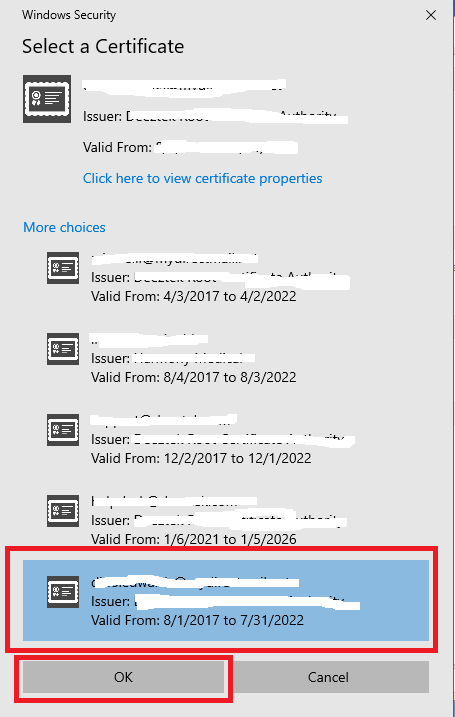
-
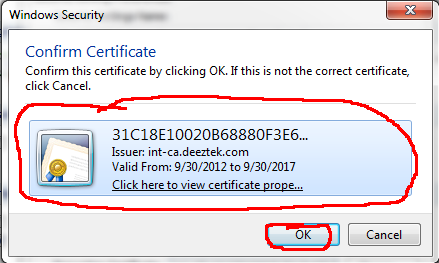
Next, back in the
TrustChangeCenterSecurity Settings window,youthewillSigningnoticeCertificatethat inand theDefaultEncryptionSettingCertificatesection,sectionsit'sshouldno longer blank and it has beenbe filledbyinMy S/MIME Settings..followed bywith youremaile-mail address.Your Outlook is now ready to send encrypted messages.Click the OKbutton to exit theTrust Centerwindowbutton (Figure1316).
Figure 1316
Next, back in the Trust Center window, click the OK button to return back to Outlook (Figure 17).
Figure 17
-
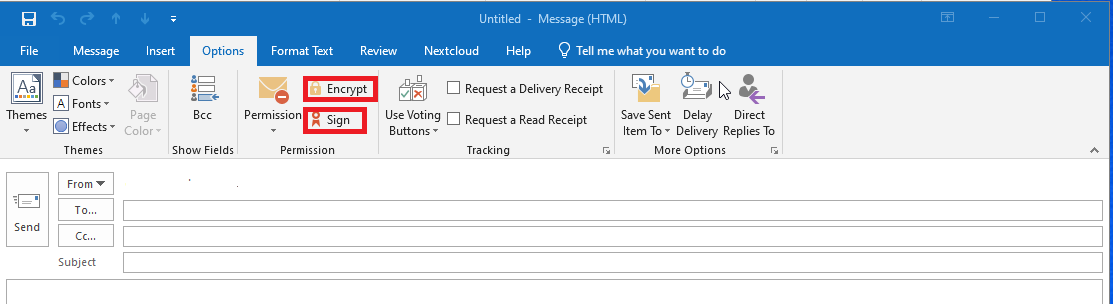
Next, back in
yourOutlookOutlookHome window, click New Email to compose a new email message. Inexamplethe compose messagebelow,window,noticeclicktheonnewOptionsenvelopeandwith the padlock icon innote theoptionsEncryptsectionandofSignthe message. This means that Outlook will try to encrypt this message destined forbuttonssupport@deeztek.com(internal user)(Figure1418).
Figure 1418
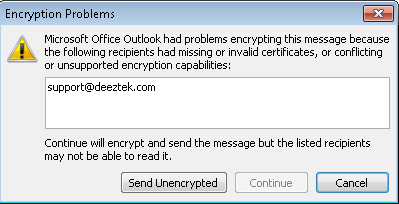
Click the Send button and you will immediately get an Encryption Problems window (Figure 15). The reason this happens is because there is no personal certificate saved for support@deeztek.com in your Outlook contacts so it's only possible to send an unencrypted message to that individual. Click the Send Unencrypted button and the message will go out as normal.
Figure 15
-
In order to send an encrypted message to
that individualsomeone, youneedmusttofirstsavehave thatindividual'person'spersonalpubliccertificatekey. That's usually accomplished by having that person send you an e-mail message that's signed with their public key and then you can import that person and their public key into your Outlook contacts.Pleasenote
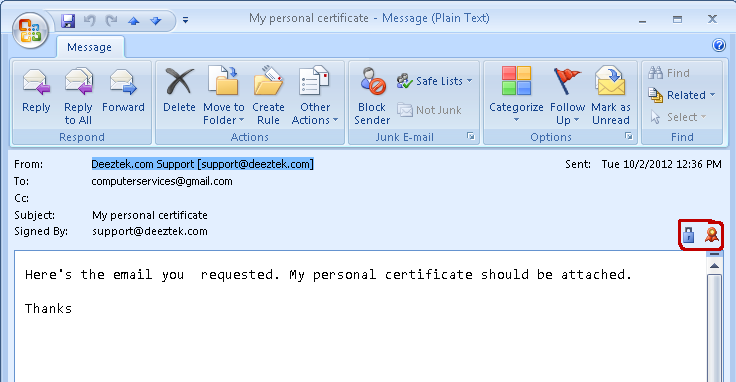
Once you receive that email, double-click it and open it. Please note that you MUST double-click the email message since the email is encrypted it will NOT preview in Outlook. Once you have the message open you willl notice a padlock icon and a ribbon icon to the right of the message. This means that the message has been encrypted and signed by the sender (Figure 16).
Figure 16
-
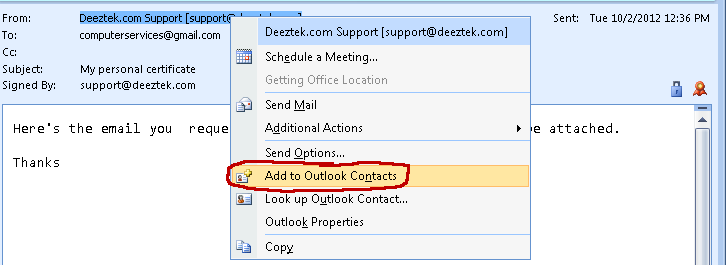
Next, right-click on the From field on the message and on the resultant drop-down menu click on Add to Outlook Contacts (Figure 17)
Figure 17
-
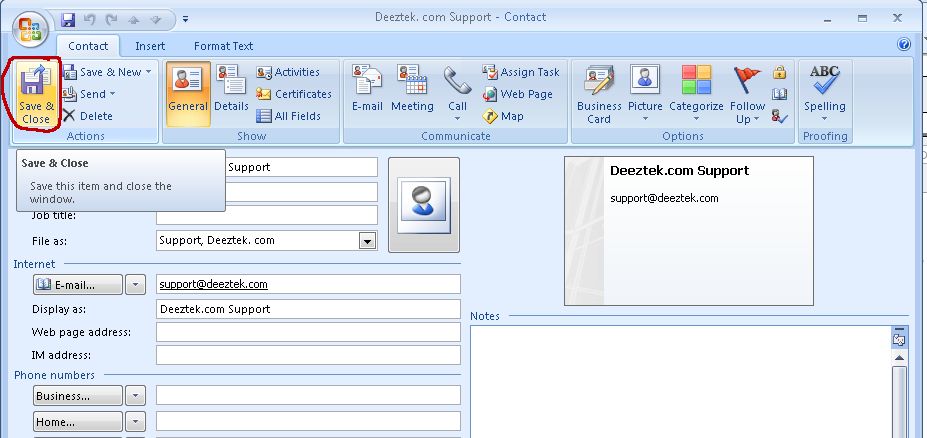
Next, on the Contact window, make any necessary changes you may want and click on the Save & Close window (Figure 18)
Figure 18
-
Saving the contact in your Outlook contacts also saves that individuals personal certificate. Once that certficate is saved in your Outlook contacts, you will be able to send encrypted emails to that individual without Outlook complaining.