Getting Started
Set Timezone
Ensure the timezone is set correctly in your machine. From an SSH/Console prompt, run the following command to set your timezone where ZONE is your preferrred timezone (Example: sudo timedatectl set-timezone EST)
sudo timedatectl set-timezone ZONEYou can get a listing of all the time zones by running the following command:
sudo timedatectl list-timezonesAccess Hermes SEG Administrator Console
Using a browser, access the Hermes SEG Administrator Console at https://<IP_ADDRESS>/admin/ where <IP_ADDRESS> is the IP address of your server.
If you have recently rebooted your system, you may get a 500 Internal Server Error when attempting to access the Hermes SEG Administrator Console. This usually means that the Authentication Server has not initialized yet. This error usually goes away on its own. Wait a couple of minutes and try refreshing your browser again.
Login with the following default credentials
- Username: admin
- Password: ChangeMe2!
Set System Settings MySQL Database Credentials
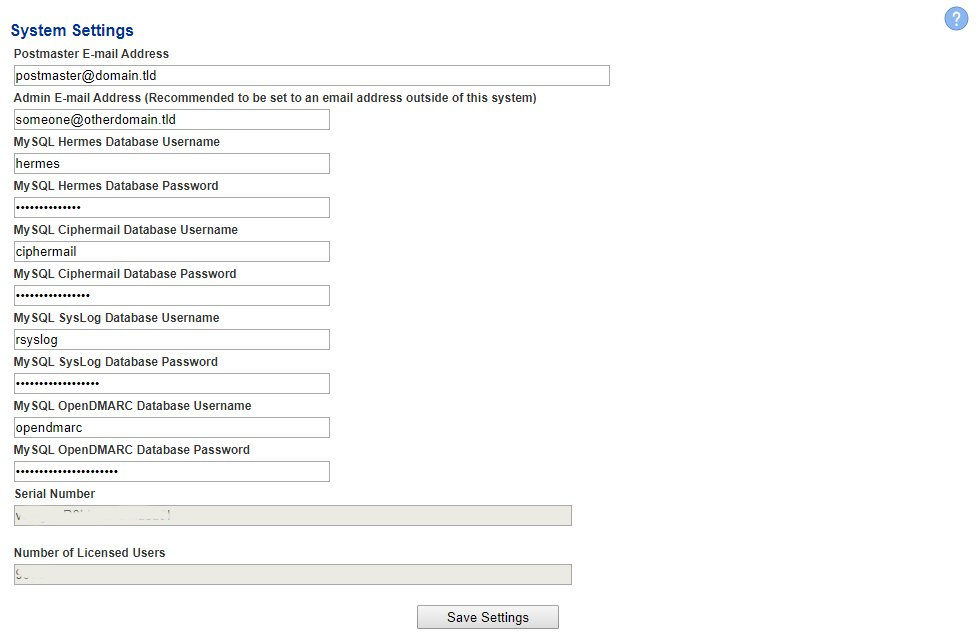
On initial login to the Hermes SEG Administrator Console, the system will automatically navigate you to the System Settings page in order to set the MySQL Database Credentails.
- If this is a brand new installation, Do NOT fill in Postmaster E-mail Address field yet. If this is a system restored from backup, DO fill in the Postmaster E-mail Address field with an email address that contains a domain that your system relays e-mail.
- Do NOT fill in the Admin E-mail Address field yet.
- Fill in the MySQL Hermes Database Username you set during installation.
- Fill in the MySQL Hermes Database Password you set during installation.
- Fill in the MySQL Ciphermail Database Username you set during installation.
- Fill in the MySQL Ciphermail Database Password you set during installation.
- Fill in the MySQL SysLog Database Username you set during installation.
- Fill in the MySQL SysLog Database Password you set during installation.
- Fill in the MySQL Opendmarc Database Username you set during installation.
- Fill in the MySQL Opendmarc Database Password you set during installation.
- Click the Save Settings button (Figure 1).
Figure 1
Set Network Settings
Figure 2
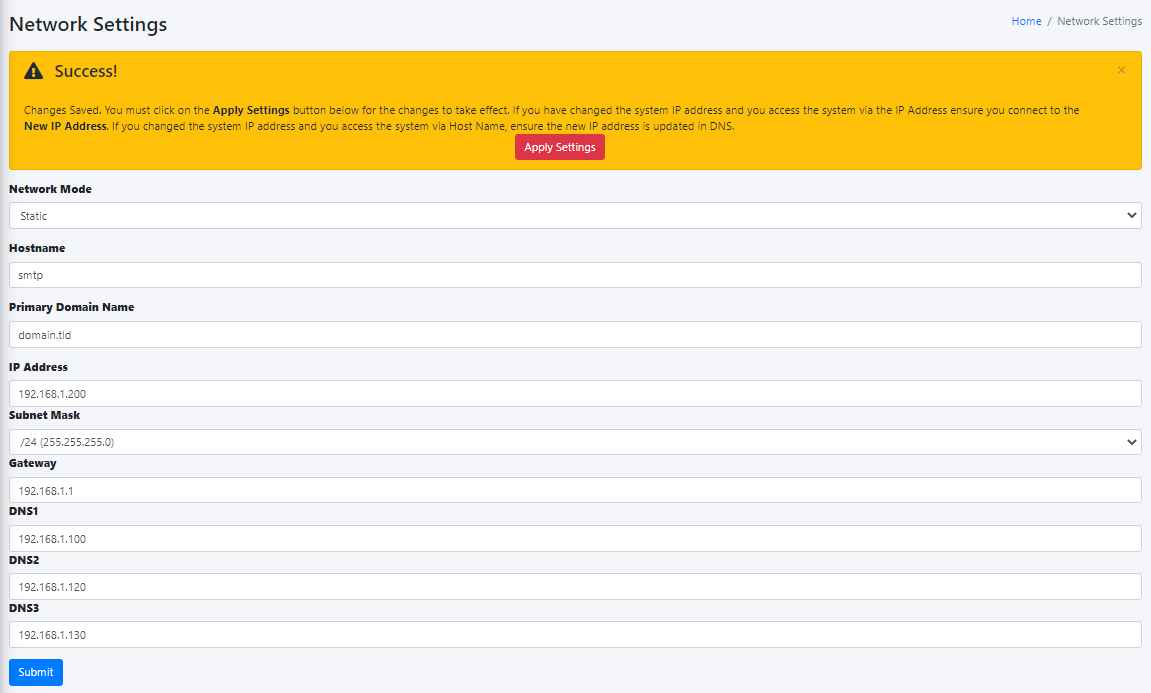
- If you changed Hermes SEG IP Address, your browser will most likely time out. Remember, to access the Hermes SEG Administrator Console Web GUI at https://<NEW_IP_ADDRESS/admin/ where is the <NEW_IP_ADDRESS> is the IP you set above.
Setup Relay Domains
In order for Hermes SEG to deliver email, you must first set the domain(s) that Hermes SEG will process email for along with their corresponding email server(s). You can add as many domains and email servers as required. An email server can be configured as an IP address or a Host Name as long as the Hermes SEG can reach it over Port TCP/25. Multiple domains can be pointed to the same email server if necessary.
- From the Hermes SEG Administrator Console, navigate to Gateway --> Relay Domains
- Under the Relay Domain Destination Type, select whether you are adding an IP Address Destination to an email server or a Host Name Destination to an email server.
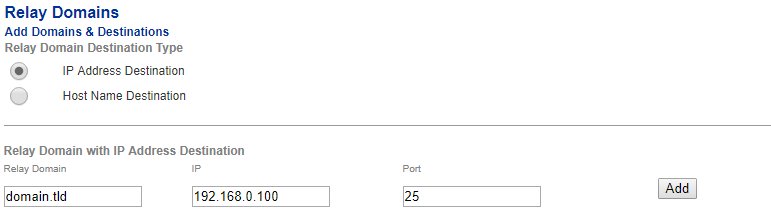
If you are adding an IP Address Destination
In the Relay Domain field enter the domain name, in the IP field enter the email server's IP address, in the Port field enter the email server's port number (if other than 25) and click the Add button (Figure 3).
Figure 3
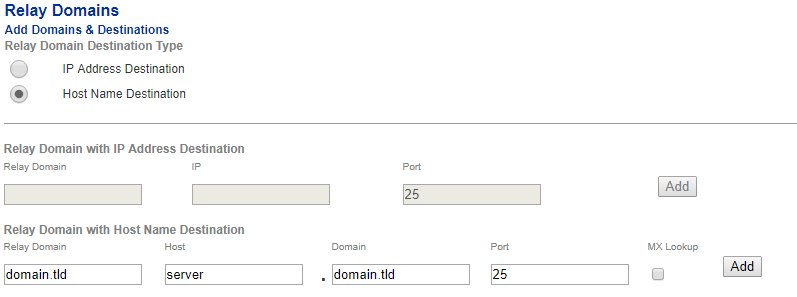
If you are adding a Host Name Destination
In the Relay Domain field enter the domain name, in the Host field, enter the email server's Host Name part of the FQDN address (without the domain part), in the Domain field, enter the email server's domain part of the FQDN address, in the Port field enter the email server's port number (if other than 25), check the MX Lookup checkbox if necessary and then click the Add button (Figure 4).
Figure 4
Set System Settings Postmaster & Admin E-mail Address
- From the Hermes SEG Administrator Console, navigate to System --> System Settings.
- Fill in Postmaster E-mail Address field with an email belonging to a Relay Domain you setup above.
- Fill in the Admin E-mail Address field with an email of domain outside of the system (i.e. a domain that the system does not relay email Ex: someone@hotmail.com).
- Click the Save Settings button.
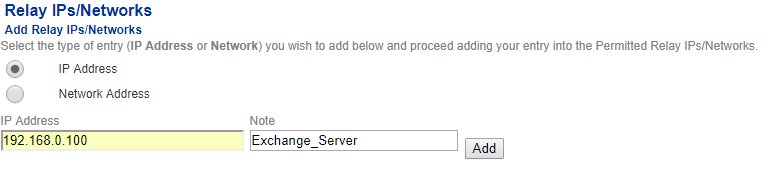
Setup Relay IPs & Networks
In addition to inbound email, if the email server(s) you added will also be sending outbound email through the Hermes SEG (recommended), you must allow their IP address(es) to send (relay) email through the Hermes SEG.
- From the Hermes SEG Administrator Console, navigate to Gateway --> Relay IPs & Networks
- Ensure IP Address is selected and the under the IP Address field enter the IP Address of the email server that you want to allow to send email through the Hermes SEG, under the Note field, enter a short description identifying the email server (ensure that you don't use any spaces or special characters in the Note field) and click the Add button (Figure 5)
Figure 5
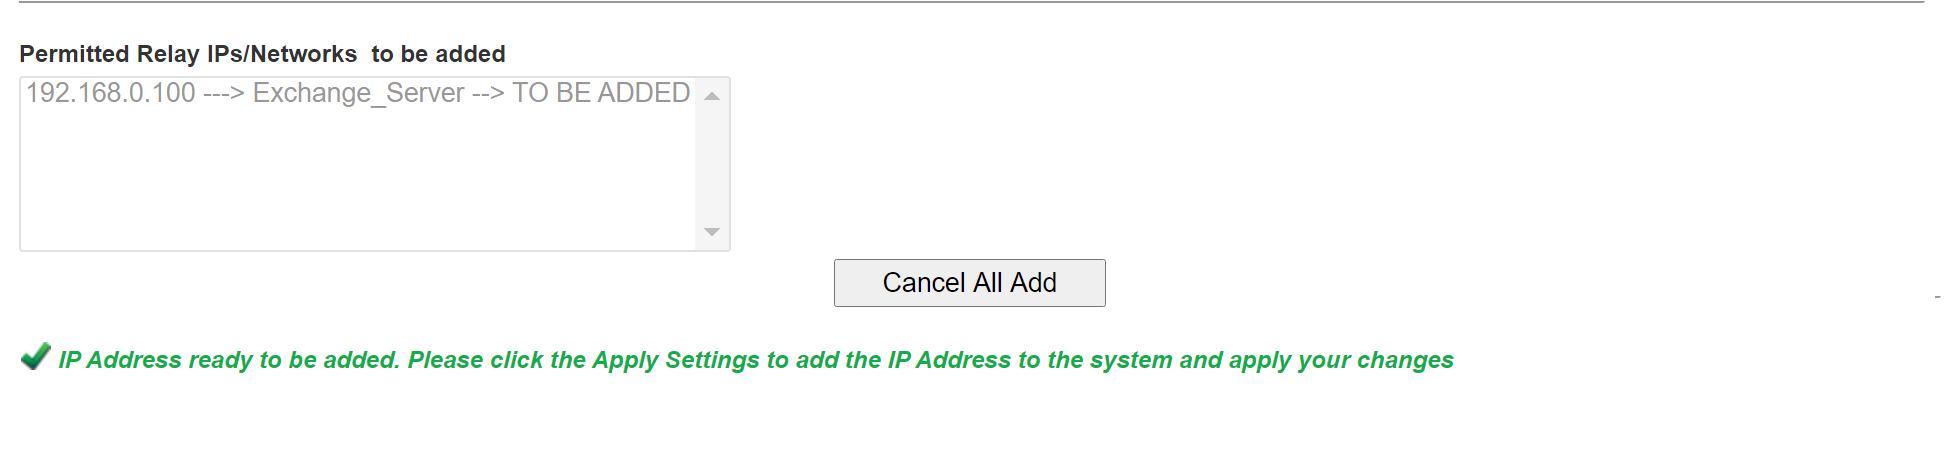
- Repeat as necessary for every email server that you want to allow to send outbound email through the Hermes SEG.
- As you add entries, you will notice that each entry shows up under the Permitted Relay Ips/Networks to be added section (Figure 6)
Figure 6
- After you are finished adding all your permitted email servers, you must apply the settings in order for the changes to take effect. On the bottom of the page, click on the Apply Settings button (Figure 7)
Figure 7
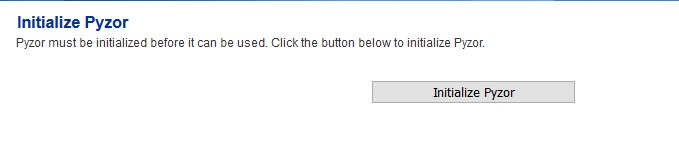
Initialize Pyzor
Pyzor is a collaborative, networked system to detect and block spam using digests of messages. Vipul's Razor is a distributed, collaborative, spam detection and filtering network.
Hermes SEG uses both of these components for better spam detection. Both of these components must be initialized before Hermes SEG can use them.
-
From the Hermes SEG Administrator Console, navigate to Content Checks --> Initialize Pyzor and click on the Initialize Pyzor button. Wait for successful completion before proceeding further (Figure 8).
Figure 8
Initialize Vipul's Razor
Before attempting to initialize Vipul's Razor, ensure the Hermes SEG has outbound Internet access. Initialization can take a few minutes to complete, so please be patient.
-
From the Hermes SEG Administrator Console, navigate to Content Checks --> Initialize Vipul's Razor and click on the Initialize Razor button. Wait for successful completion before proceeding further (Figure 9).
Figure 9

Clear Bayes Database
The Bayes Database tries to identify spam by looking at what are called tokens; words or short character sequences that are commonly found in spam or ham.
On a new Hermes SEG installation, it's always best to ensure a clean Bayes Database before you start processing email.
- From the Hermes SEG Administrator Console, navigate to Content Checks --> Clear Bayes Database and click on the Clear Database button. Wait for successful completion before proceeding further (Figure 10).
Figure 10

Add Internal Recipients Manually
Hermes SEG requires a listing of Internal Recipients in order to process incoming email and deliver that email to the correct recipient mailboxes which are located on an email server(s) which were previously specified on Setup Relay Domains section above.
Hermes SEG also supports automatic import of recipients via AD/LDAP but that feature is only available with a Hermes SEG Pro License. If you have a SEG Pro License and you wish to utilize AD/LDAP Recipient import, please see Add Internal Recipients Automatically with AD/LDAP Directory of this guide below.
-
From the Hermes SEG Administrator Console, navigate to Gateway --> Internal Recipients
-
Click the Create Recipient(s) button (Figure 11):
Figure 11

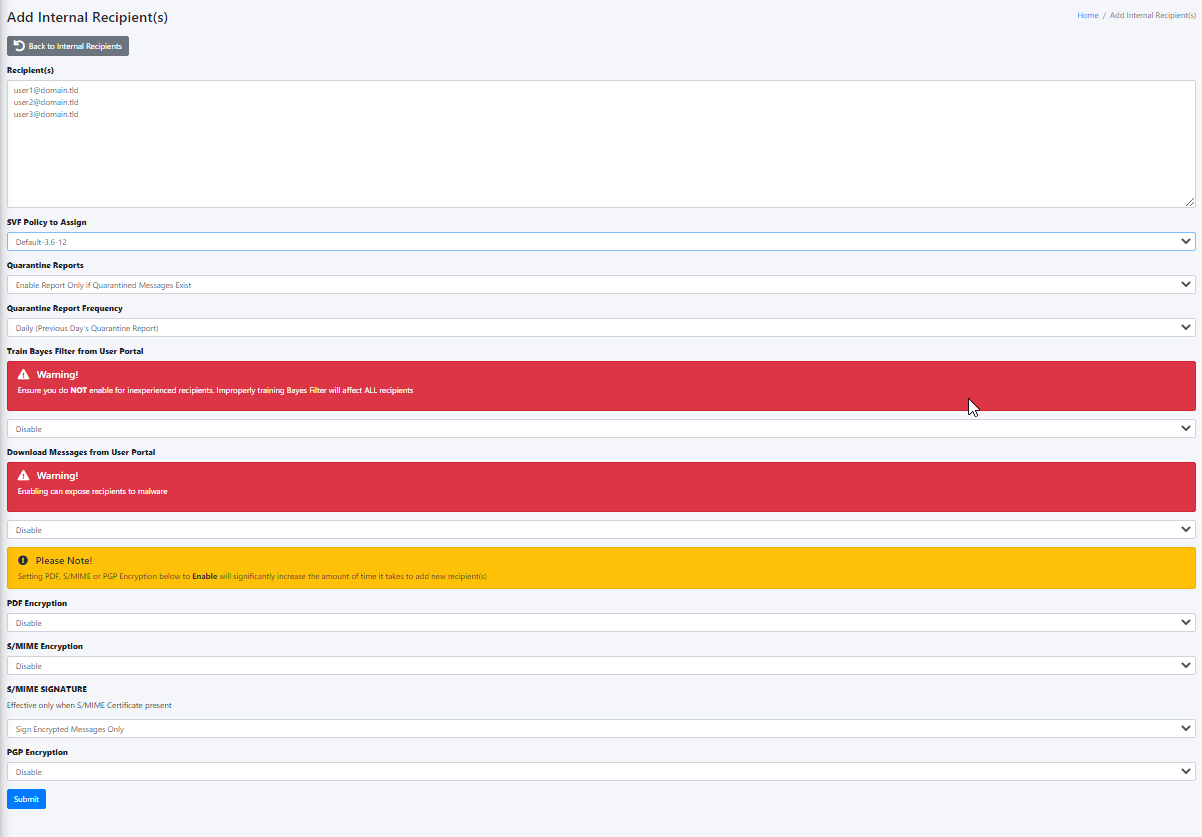
In the Add Internal Recipient(s) page, in the Recipient(s) field, enter an e-mail address each in each own line, select the appropriate options in the SVF Policy to Assign, Quarantine Reports, Quarantine Report Frequency, Train Bayes Filter from User Portal, Download Messages from User Portal, PDF encryption, S/MIME Encryption, S/MIME SIGNATURE, PGP Encryption drop-downs and click the Submit button (Figure 12):
Figure 12
Add Internal Recipients Automatically with AD
Hermes SEG requires a listing of Internal Recipients in order to process incoming email and deliver that email to the correct recipient mailboxes which are located on an email server(s) which were previously specified on Section 2 Setup Relay Domains of this guide above, The system will ONLY allow you to add recipients with domains that were specified under Section 2 Setup Relay Domains of this guide above.
This method will allow you to add Internal Recipients automatically via an AD connection. Please note, this feature is ONLY available if you have a Hermes SEG Pro License.
In order to import Internal Recipients via AD, you must first create an AD connection. In order to create an AD connection, you must first validate the connection and once succesful, you will be able to save the connection.
Validate & Save AD Connection
-
From the Hermes SEG Administrator Console, navigate to System --> AD Integration
-
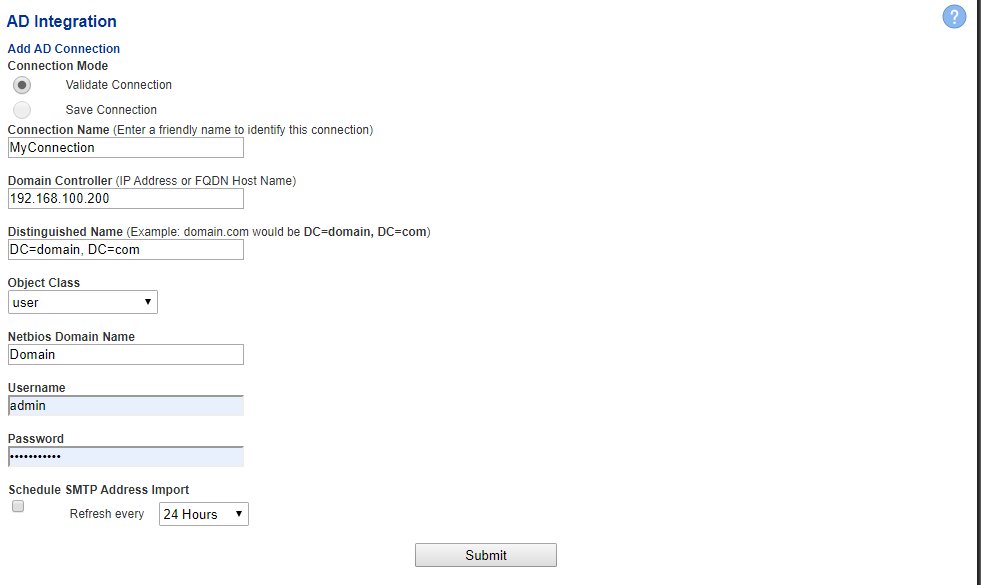
Under the Connection Mode section, you will notice that ONLY the Validate Connection is enabled and selected. The Save Connection option is not available because the connection has not been validated yet
-
Under the Connection Name field, enter a descriptive name for the connection
-
Under the Domain Controller field, enter the IP or the FQDN of a domain controller or simply enter the FQDN of your domain so you don't bind the connection to just one domain controller
-
Under the Object Class field, select the Active Directory Object class you wish to query
-
Under the Distinguished Name field, enter the DN of the recipients locations, or you can simply enter the DN of the entire domain. For example, if your domain is east.domain.tld, your DN should be DC=east, DC=domain, DC=tld. Ask your Administrator if you have any questions
-
Under the Netbios Domain Name enter your domain Netbios name. For example, if your domain is east.domain.tld, your netbios domain could simply be DOMAIN. Ask your Administrator if you have any questions
-
Under the Username field enter a username that has access to enumerating user objects in your domain
-
Under the Password field, enter the password for the username from Step 7
-
If you wish to schedule the automatic import of Internal Recipients on a specified interval, ensure you check the Schedule SMTP Address Import checkbox and select the interval form the drop-down box and click the Submit button (Figure 18)
Figure 18
-
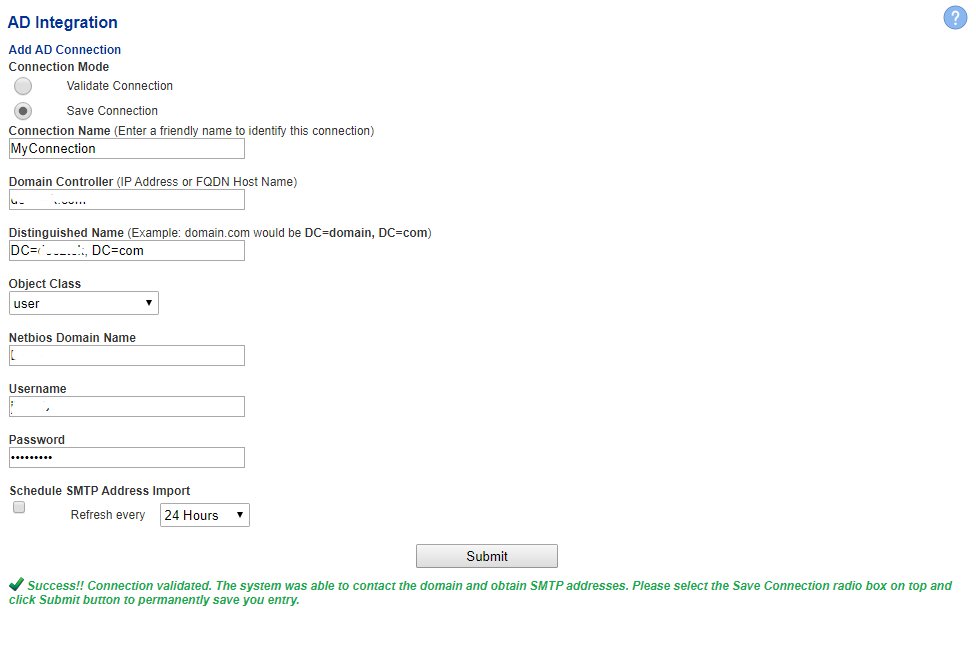
If the AD connection validation is succesful, the system will then enable the Save Connection option under the Connection Mode section. If not, please check the provided information and try again.
-
Once the Save Connection option is enabled under the Connection Mode section, select it and then click the Submit button again to save the connection (Figure 19)
Figure 19
-
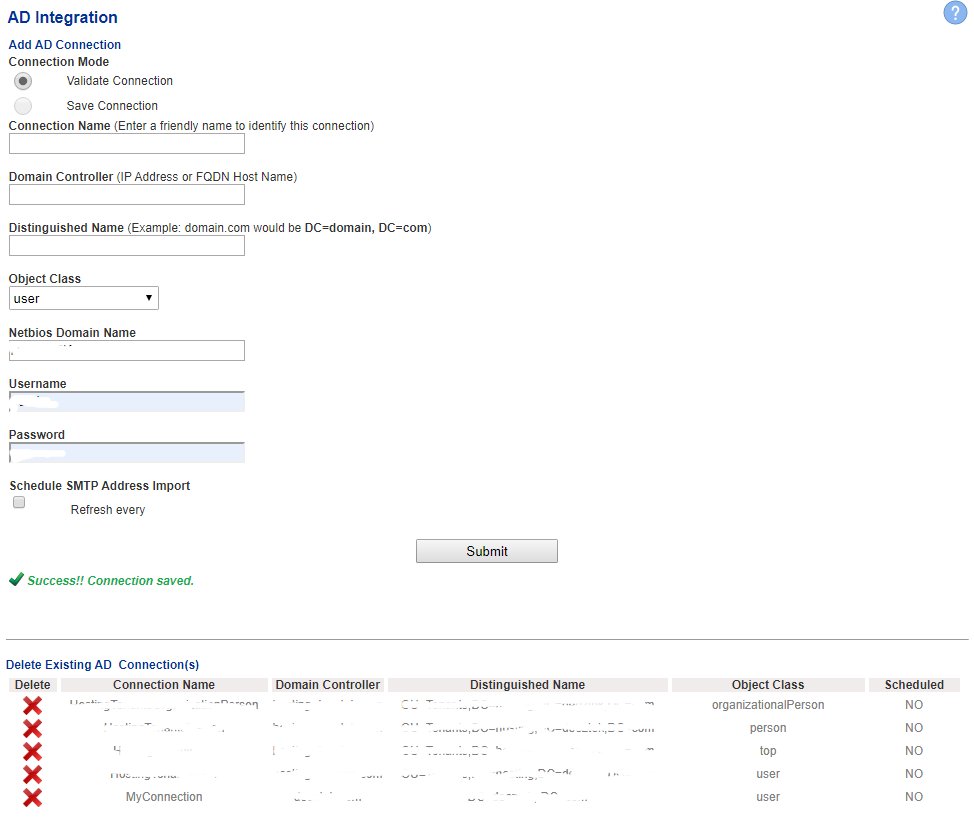
The connection you just added will now show up under the Delete Existing AD Connection(s) section. You can add as many AD connections as required (Figure 20)
Figure 20
Automatically Import Internal Recipients via AD Connection
-
From the Hermes SEG Administrator Console, navigate to Gateway --> Internal Recipients
-
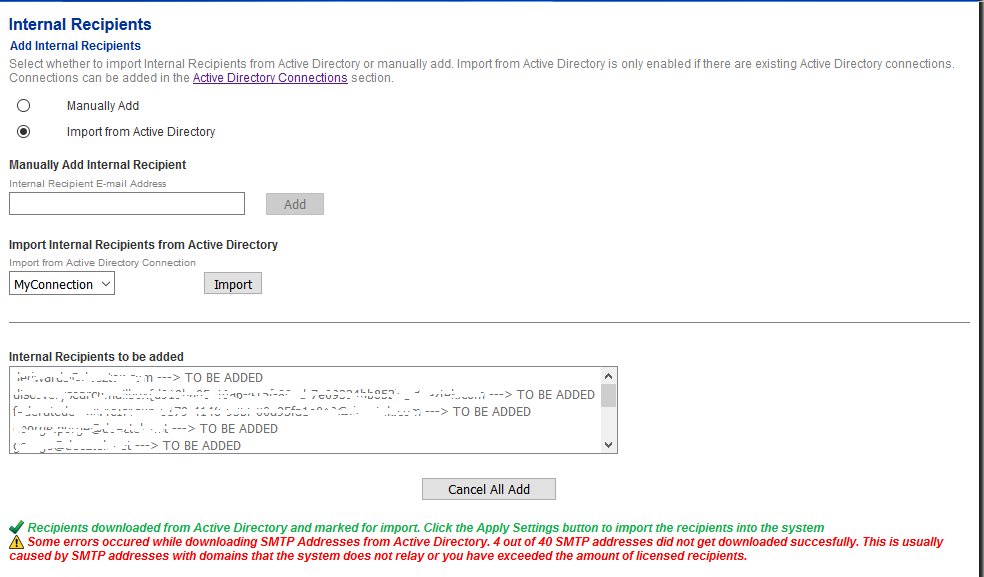
Since you have added an AD connection from the previous steps, the Import from Active Directory option under the Add Internal Recipients section will now be enabled. Selecting the Import from Active Directory option will automatically populate the Import Internal Recipients from Active Directory drop-down with the Active Directory connection(s) you previously added. Ensure the correct connection is selected from the drop-down and click the Import button.
-
The Internal Recipients to be added section, will automatically be populated with SMTP address(es) from Active Directory (Figure 21)
Figure 21
-
Finally, click on the Apply Settings button on the bottom of the page to import all the recipients into your Hermes SEG (Figure 22)
Figure 22

Set Encryption Settings
-
From the Hermes SEG Administrator Console, navigate to Encryption --> Encryption Settings.
-
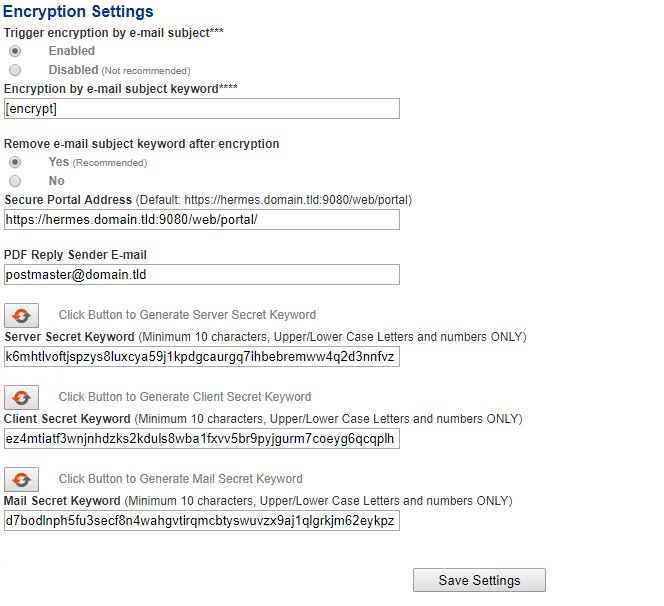
Fill in Encryption by e-mail subject keyword field or leave it set to default [encrypt].
-
Select whether you wish to Remove the e-mail subject keyword after encryption or leave it to default Yes.
-
Fill in the Secure Portal Address. The address should be the Internet accessible FQDN of the Hermes SEG system on port 9080 followed by /web/portal/. Ex: https://hermes.domain.tld:9080/web/portal/
-
Fill in the PDF Reply Sender E-mail field. This must be an email address with a domain that Hermes SEG relays email. Ex: postmaster@domain.tld
-
Click the button for the Server, Client and Mail Secret Keyword fields to generate random keywords, or set your own 10-character minimum uppler/lower case letter/number keywords.
-
Click on the Save Settings button (Figure 23).
Figure 23
Change the Hermes SEG Administrator Console admin Account Password
-
From the Hermes SEG Administrator Console, navigate to System --> Change Password
-
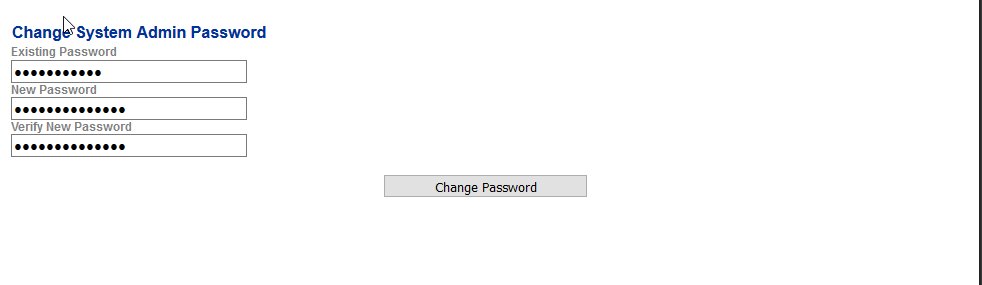
In the Existing Password field, enter the default password of ChangeMe2!
-
In the New Password field enter the new password. Passwords must be at least 8 characters long, they must contain letters, numbers and special characters.
-
In the Verify New Password field, repeat the new password you entered and click on the Change Password button (Figure 24)
Figure 24
Change the Ciphermail Web GUI admin Account Password
-
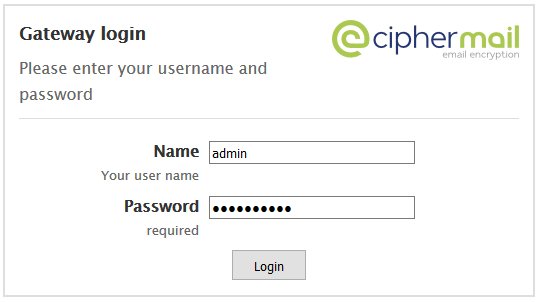
With your web browser navigate to https://:9080/ciphermail where is the IP of your machine and login with the following default credentials (Figure 25):
Username: admin Password: admin
Figure 25
-
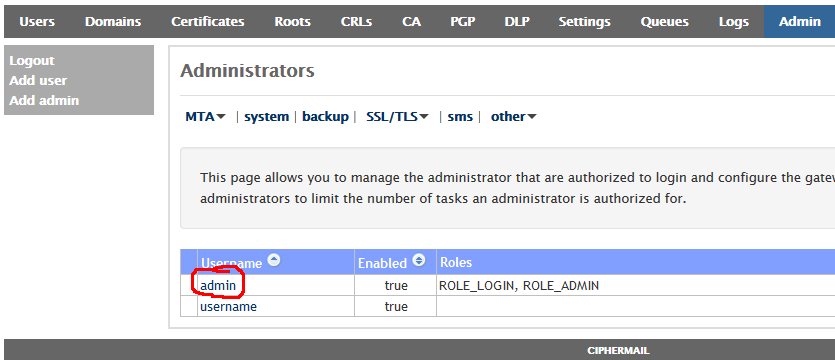
Once logged in, click on the Admin entry on the top menu and on the Administrators page, click on the admin username (Figure 26).
Figure 26
-
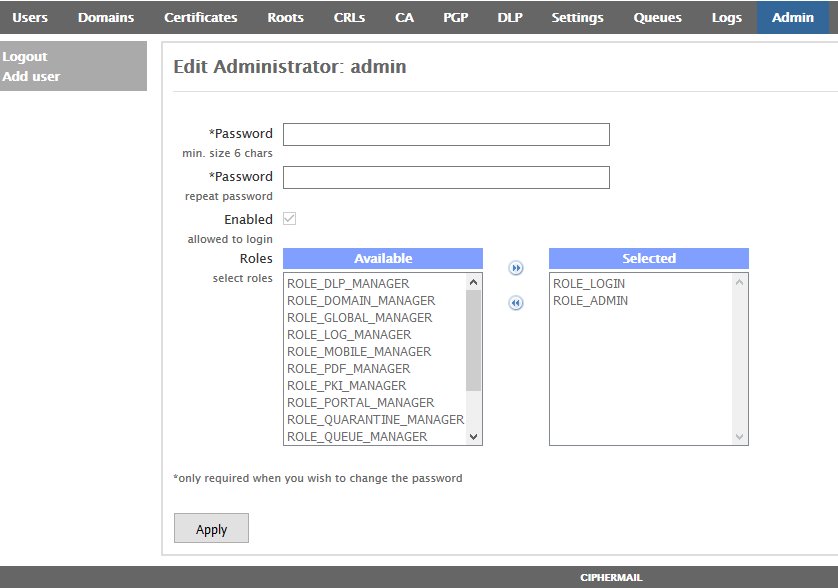
In the Edit Administrator: admin page, enter a new password in the first Password field and then verify it in the second Password field and then click on the Apply button at the bottom of the page (Figure 27). Passwords must be at least 8 characters long, they must contain letters, numbers and special characters.
Figure 27
-
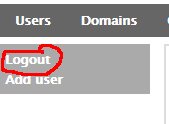
Logout of the Ciphermail Web GUI by clicking on the Logout button on the left of the page (Figure 28).
Figure 28
Recommendations
Add Barracuda and Zen Spamhaus RBLs
-
In order to use the Barracuda RBL you must first register for a free account. Goto http://www.barracudacentral.org/rbl and register for a free account.
-
From the Hermes SEG Administrator Console, navigate to Content Checks --> RBL Configuration
-
Under the Select the type of entry section, ensure Block List is selected. Under the Block List field enter b.barracudacentral.org, under the Weight field enter 3 and then click the Add button.
-
Repeat Step 3 to add zen.spamhaus.org with a weight of 3 also (Figure 29)
Figure 29
-
Finally, click on the Apply Settings button on the bottom of the page to apply the RBL changes (Figure 30)
Figure 30