Sender to Recipient Block/Allow List
The Sender Checks Bypass permits you to either Block or Allow sender email addresses or sender domains to specific Internal Recipients or entire Relay Domains. It's important to note that the Sender Checks occur AFTER the perimeter checks. For example, if you have setup a sender to be allowed but email is still not coming through, it's possible that the sender's IP address is being blocked by the Hermes SEG perimeter checks.
When setting up a sender email address or domain to be allowed or blocked for an entire Relay Domain within Hermes SEG, the system will automatically create separate mappings for every Internal Recipient for that Relay Domain at the time of setup. However, if additional Internal Recipients are added after the the bypass was set, those Internal Recipients will not get the previously set bypasses. In those cases, you will have to manually add those bypasses for the new Internal Recipients.
Add Email Address Sender Check Bypass to Internal Recipient
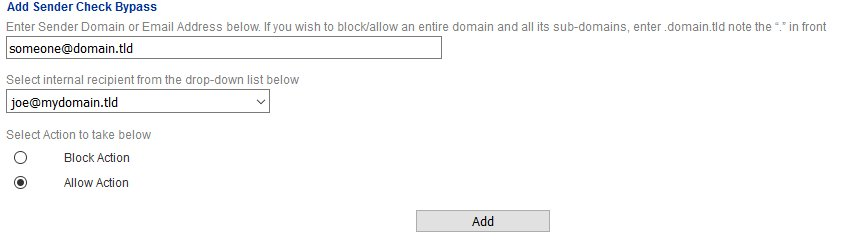
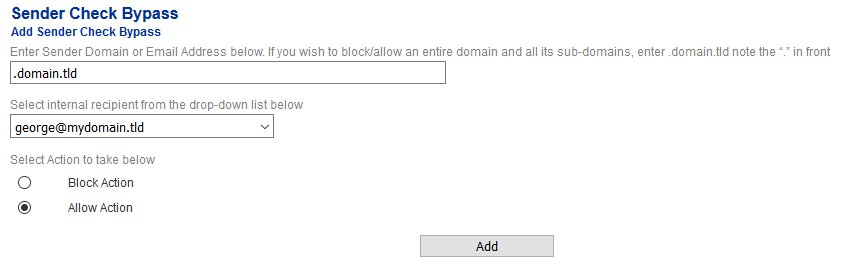
- Under the Sender Domain or Email Address ... field, enter a sender email address.
- Under the Select Internal recipient from the .... drop-down field, select one of the existing Internal Recipients in the system.
- Under the Select Action to take below field, select either a Block or Allow action.
- Click the Add button (Figure 1)
Figure 1
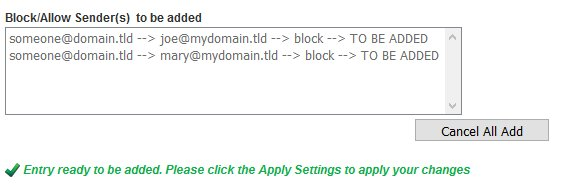
- Each entry you add shows up in the Block/Allow Sender(s) to be added section (Figure 2).
Figure 2
- Continue adding entries as needed. When finished, click on the Apply Settings button on the bottom of the page (Figure 3).
Figure 3

Add Email Address Sender Check Bypass to Relay Domain
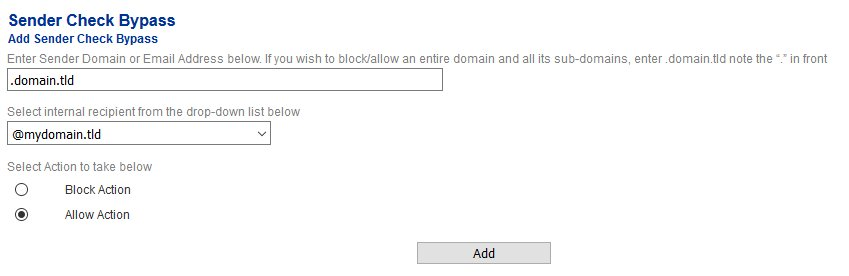
- Under the Sender Domain or Email Address ... field, enter a sender email address.
- Under the Select Internal recipient from the .... drop-down field, select one of the existing Relay Domains in the system. Relay Domains are annotated by a (@) at symbol in front of them. For example, if you have a Relay Domain of mydomain.tld then it will appear as @mydomain.tld in the drop-down field.
- Under the Select Action to take below field, select either a Block or Allow action.
- Click the Add button (Figure 4)
Figure 4

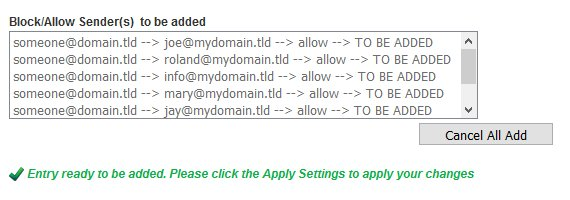
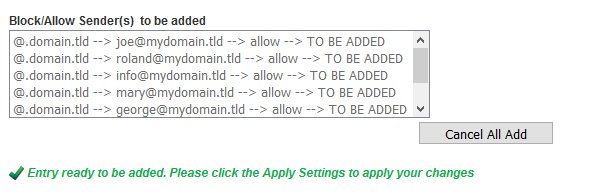
- Since we are mapping an entire Relay Domain to a sender, the system will automatically populate the Block/Allow Sender(s) to be added section with all the Internal Recipients for that domain (Figure 5).
Figure 5
- Continue adding entries as needed. When finished, click on the Apply Settings button on the bottom of the page (Figure 6).
Figure 6
Add Domain Sender Check Bypass to Internal Recipient
- Under the Sender Domain or Email Address ... field, enter a sender domain. If you want to include all the all the sub-domains under a root domain then you would simply enter a (.) dot in front of the domain. For example, if you want to include all the sub-domains for domain.tld, you would simply enter .domain.tld (note the . in front of the domain).
- Under the Select Internal recipient from the .... drop-down field, select one of the existing Internal Recipients in the system.
- Under the Select Action to take below field, select either a Block or Allow action.
- Click the Add button (Figure 7)
Figure 7
- Each entry you add shows up in the Block/Allow Sender(s) to be added section (Figure 8).
Figure 8

- Continue adding entries as needed. When finished, click on the Apply Settings button on the bottom of the page (Figure 9).
Figure 9

Add Domain Sender Check Bypass to Relay Domain
- Under the Sender Domain or Email Address ... field, enter a sender domain. If you want to include all the all the sub-domains under a root domain then you would simply enter a (.) dot in front of the domain. For example, if you want to include all the sub-domains for domain.tld, you would simply enter .domain.tld (note the . in front of the domain).
- Under the Select Internal recipient from the .... drop-down field, select one of the existing Relay Domains in the system. Relay Domains are annotated by a (@) at symbol in front of them. For example, if you have a Relay Domain of mydomain.tld then it will appear as @mydomain.tld in the drop-down field.
- Under the Select Action to take below field, select either a Block or Allow action.
- Click the Add button (Figure 10)
Figure 10
- Since we are mapping an entire Relay Domain to a sender, the system will automatically populate the Block/Allow Sender(s) to be added section with all the Internal Recipients for that domain (Figure 11).
Figure 11
- Continue adding entries as needed. When finished, click on the Apply Settings button on the bottom of the page (Figure 12).
Figure 12

Filter Sender Checks Bypass Entries
Setting a filter will assist you in narrowing down Sender Check Bypass Entries by email address or domain in order to manage them easily.
- In the Filter By field, enter a complete or partial email address or domain and click the Set Filter button. If any matches are found, the Delete Sender Check Bypass listing will be populated with only the entries matching the filter you set (Figure 13).
Figure 13
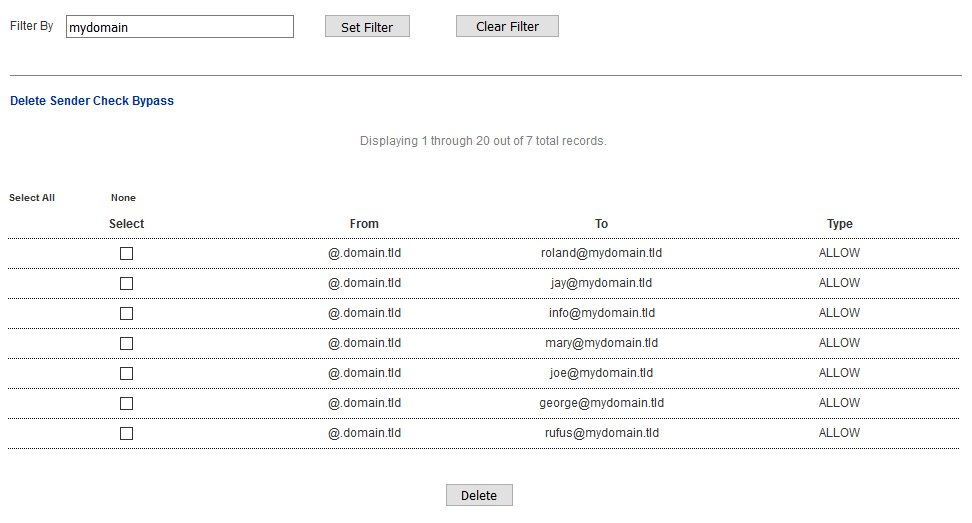
- You can clear a filter you set by clicking the Clear Filter button at any time (Figure 13).
Delete Sender Checks Bypass Entries
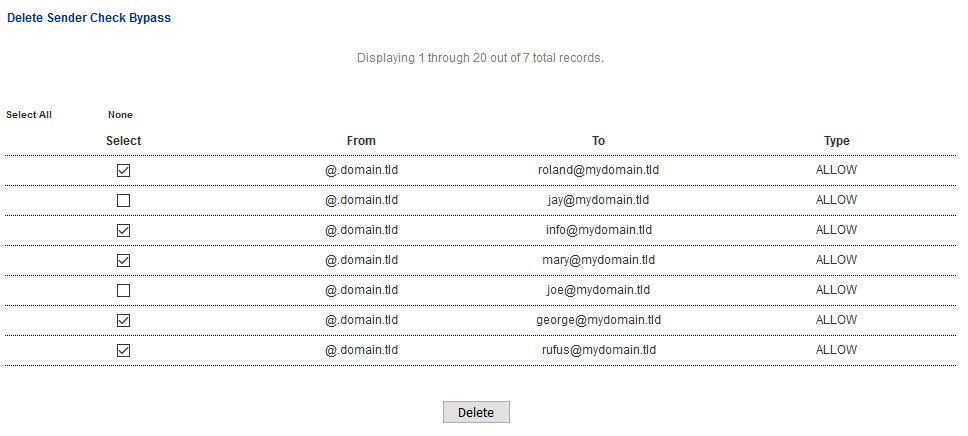
- Place a checkmark on the checkbox under the Select column of any entries you wish to delete. You can select as many entries as needed.
- Click the Delete button on the bottom (Figure 14).
Figure 14
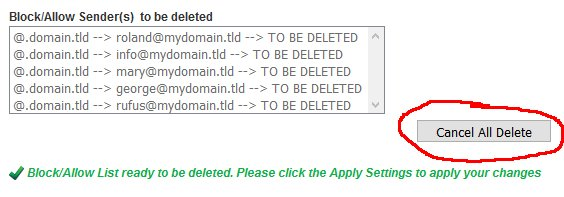
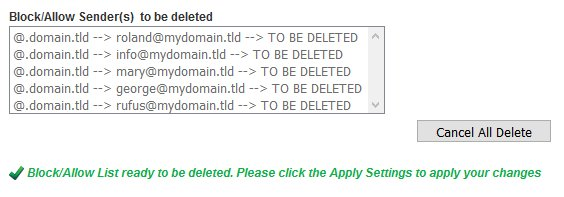
- The entries to be deleted will show up under the Block/Allow Sender(s) to be deleted section (Figure 15).
Figure 15
- Click on the Apply Settings button to delete the entries from the system (Figure 16).
Figure 16
- If you make a mistake, click on the Cancel All Delete button to cancel (Figure 17).
Figure 17