File Rules
File Rules allow you to create rules containing either block or allow actions for file extensions, file types or file expressions. File rules are assigned to Spam/Virus/File Policies which in turn are assigned to Internal Recipients.
Hermes SEG file rules are processed from the top down fashion. In other words, as a file rule gets processed, block/allow actions on the to of the rule get processed first. If a match is found then the action is taken and all further processing of the rule stops.
Default System File Rule
Hermes SEG already comes pre-configured with a Default System File Rule which is assigned to all the system Spam/Virus/File Policies. The Default System File Rule cannot be edited, it can only be viewed or copied in order to be used as a starting point in creating custom file rules (Figure 1).
Figure 1

View Default File Rule
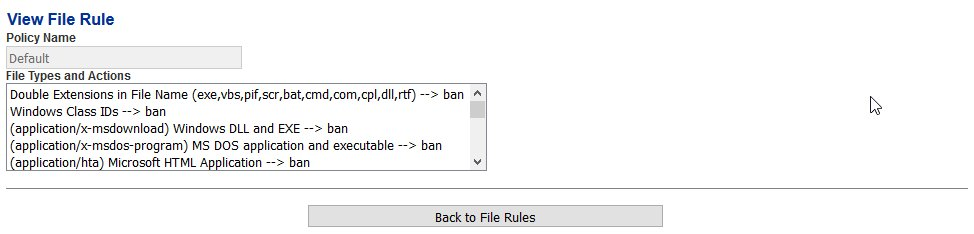
Note: You cannot make any changes to the Default file rule.
- Under the System File Rules section click on the
 icon under the Actions column of the Default file rule.
 - On the View File Rule page, you will see a listing of file types and corresponding actions for those file types (Figure 2).

Figure 2
- Click on the Back to File Rules button on the bottom of the page to return to the File Rules page (Figure 3).
Figure 3

Create Custom File Rule by copying Default File Rule or any Custom File Rule
This method will allow you to copy the Default File Rule or any Custom File Rule (assuming there are existing custom file rules) and using it as a starting point for a new custom file rule.
- Under the System File Rules section or the Custom File Rules (if there are already existing custom file rules) section, click on the
 icon under the Actions column of the file rule you wish to copy. You will be redirected to the Copy File Rule page in order to create and customize a new file rule based on the file rule you choose (Figure 4).

Figure 4

Add File Types
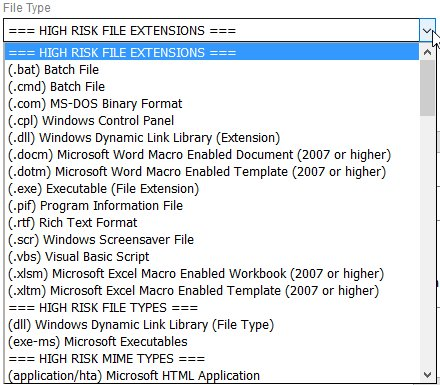
- On the Copy File Rule page, under the File Type drop-down field, select a file type. Note that the File Type drop-down is organized in sections of HIGH-RISK FILE EXTENSIONS, HIGH RISK FILE TYPES, HIGH RISK MIME TYPES, FILE EXTENSIONS, FILE TYPES, MIME TYPES, OTHER TYPES and CUSTOM-EXPRESSIONS (Figure 5).
Figure 5
- Under the Action field, select either a Ban or Allow action and then click on the Add button (Figure 6).
Figure 6

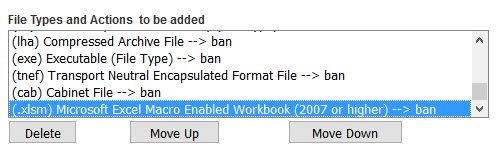
- As you add File Types and their associated actions, they show up on the bottom of the File Types and Actions to be added section (Figure 7).
Figure 7
- Continue adding File Types as needed.
Re-order File Types
- Under the File Types and Actions to be added section, adjust the order the File Types that appear in the file rule by selecting each file type at a time the clicking on the Move Up or Move Down buttons as necessary to adjust the order (Figure 8).
Figure 8

Delete File Types
- Under the File Types and Actions to be added section, delete file types by selecting each file type at a time the clicking on delete button (Figure 8).
Create File Rule Name
- Under the Enter a name for this File Rule field, enter a unique name for this rule and click the Add Rule button below (Figure 9). You will be redirected back to the File Rules page.
Figure 9

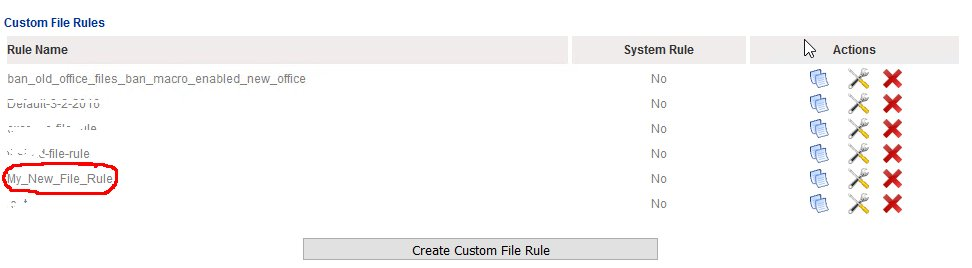
- Back at the File Rules page, the new rule will appear under the Custom File Rules section (Figure 10).
Figure 10

Create Custom File Rule
This method will allow you to create a new blank Custom File Rule.
- Under the Custom File Rules section, click on Create Custom File Rule button (Figure 11).
Figure 11

- You will be redirected to the Create File Rule page in order to create and customize a new file rule (Figure 12).
Figure 12
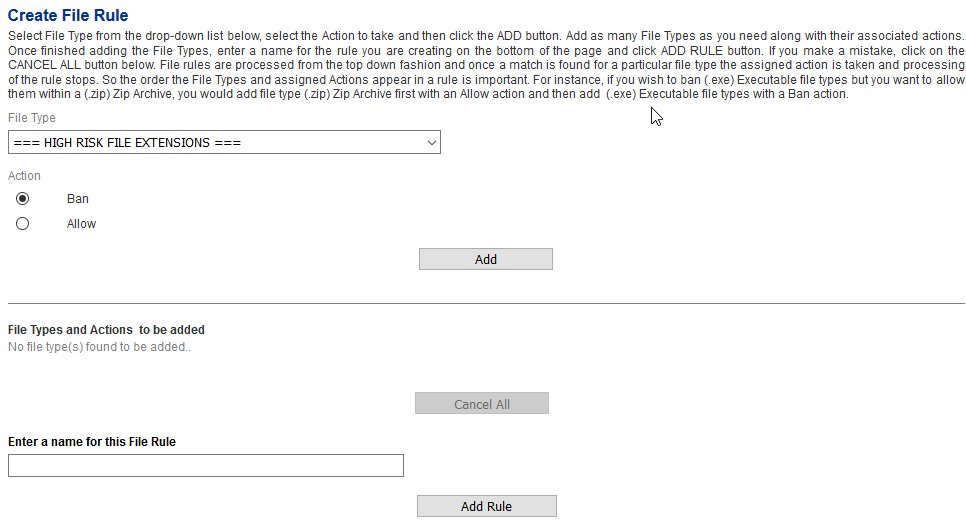
Add File Types
- On the Create File Rule page, under the File Type drop-down field, select a file type. Note that the File Type drop-down is organized in sections of HIGH-RISK FILE EXTENSIONS, HIGH RISK FILE TYPES, HIGH RISK MIME TYPES, FILE EXTENSIONS, FILE TYPES, MIME TYPES, OTHER TYPES and CUSTOM-EXPRESSIONS (Figure 13).
Figure 13

- Under the Action field, select either a Ban or Allow action and then click on the Add button (Figure 14).
Figure 14

- As you add File Types and their associated actions, they show up on the bottom of the File Types and Actions to be added section (Figure 15).
Figure 15

- Continue adding File Types as needed.
Re-order File Types
- Under the File Types and Actions to be added section, adjust the order the File Types that appear in the file rule by selecting each file type at a time the clicking on the Move Up or Move Down buttons as necessary to adjust the order (Figure 16).
Figure 16

Delete File Types
- Under the File Types and Actions to be added section, delete file types by selecting each file type at a time the clicking on delete button (Figure 16).
Create File Rule Name
- Under the Enter a name for this File Rule field, enter a unique name for this rule and click the Add Rule button below (Figure 17). You will be redirected back to the File Rules page.
Figure 17

- Back at the File Rules page, the new rule will appear under the Custom File Rules section (Figure 18).
Figure 18
Edit Custom File Rule
Note: ONLY Custom File Rules can be edited.
- Under the Custom File Rules section, click on the
 icon of the Custom File Rule you wish to edit.
 - You will be redirected to the Edit File Rule page in order to customize the file rule (Figure 19).

Figure 19
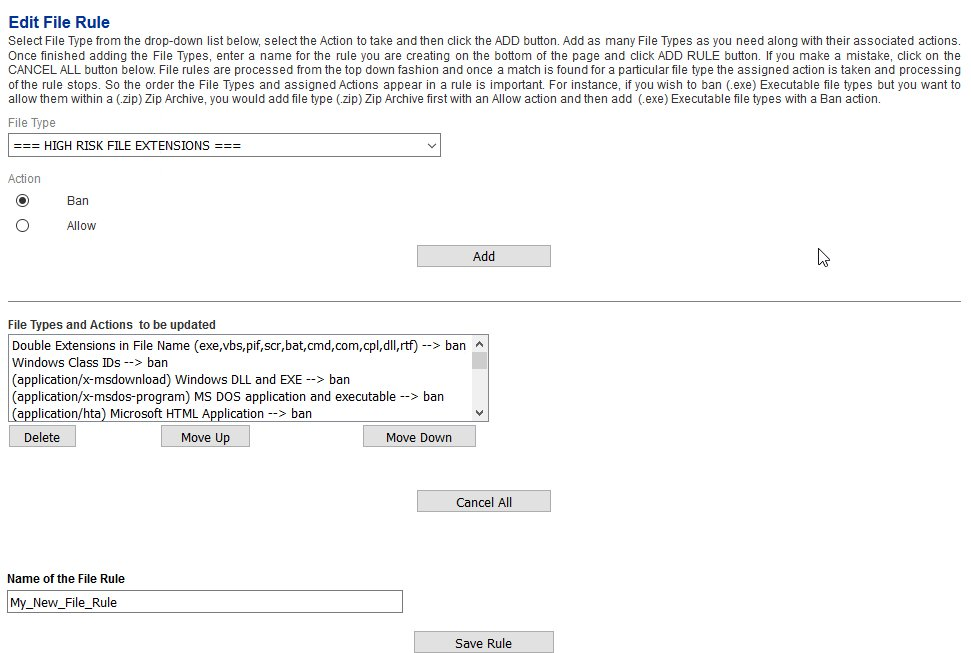
Add File Types
- On the Edit File Rule page, under the File Type drop-down field, select a file type. Note that the File Type drop-down is organized in sections of HIGH-RISK FILE EXTENSIONS, HIGH RISK FILE TYPES, HIGH RISK MIME TYPES, FILE EXTENSIONS, FILE TYPES, MIME TYPES, OTHER TYPES and CUSTOM-EXPRESSIONS (Figure 20).
Figure 20

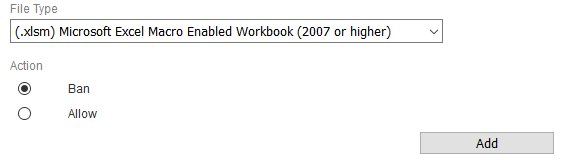
- Under the Action field, select either a Ban or Allow action and then click on the Add button (Figure 21).
Figure 21
- As you add File Types and their associated actions, they show up on the bottom of the File Types and Actions to be added section (Figure 22).
Figure 22

- Continue adding File Types as needed.
Re-order File Types
- Under the File Types and Actions to be added section, adjust the order the File Types that appear in the file rule by selecting each file type at a time the clicking on the Move Up or Move Down buttons as necessary to adjust the order (Figure 23).
Figure 23

Delete File Types
- Under the File Types and Actions to be added section, delete file types by selecting each file type at a time the clicking on delete button (Figure 23).
Edit File Rule Name
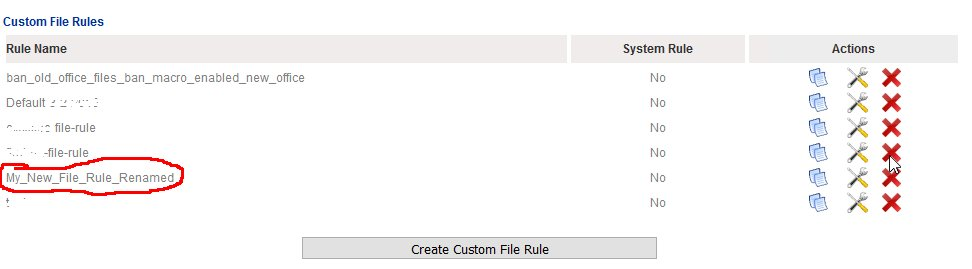
- Under the Name of the File Rule field, enter a unique name for this rule and click the Save Rule button below (Figure 24). You will be redirected back to the File Rules page.
Figure 24

- Back at the File Rules page, the new rule will appear under the Custom File Rules section (Figure 25).
Figure 25
Delete Custom File Rule
Note: ONLY Custom File Rules that are NOT associated with with a File/Virus/Spam Policy can be deleted. When deleting a Custom File Rule, the system will NOT prompt you to confirm, it will be deleted immediately.
- Under the Custom File Rules section, click on the
 icon of the Custom File Rule you wish to delete.
 - The system will delete the Custom File Rule and re-direct you back to the File Rules page (Figure 26)

Figure 26
